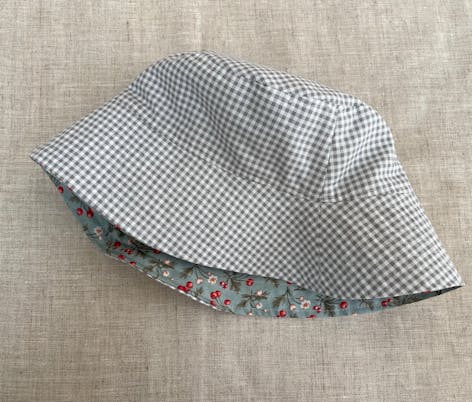
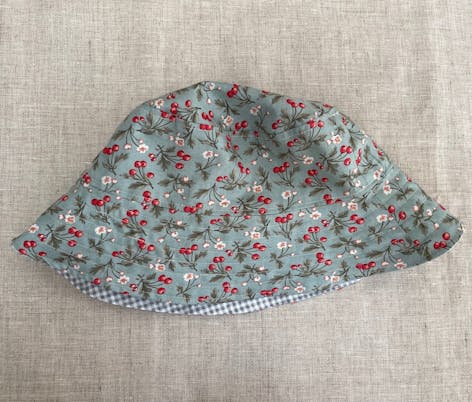
Make this bang on-trend bucket hat sewing pattern!
Published on 13 August 2021 1 min read90's fashion has made a comeback! This DIY reversible bucket hat pattern for adults is so easy to whip up at home. Print the FREE PDF paper pattern, pick your fave fabrics and follow this super easy bucket hat sewing pattern by Kate Owen for the ultimate retro cool accessory this summer.
Materials
- About 1⁄4 meter of two different fabrics – cotton, denim, linen etc
- Scissors:
- Fiskars Classic Universal Scissors
- Pins:
- Prym Glass-Headed Pins No. 9 Assorted Colours 0.60 x 30 mm
- Air-erasable marker or pencil or chalk:
- Hemline Vanishing/Wipe Off Fabric Marker Pen
- Fusing – only about the size of two A4 sheets of paper
- Sewing machine & thread
- Iron


Bucket hat fabrics we love!
Make your bucket hat step-by-step
1
Print out the PDF pattern making sure your printer is set to 100% scale and cut the three pattern pieces out.
2
Cut out your fabric pieces - 1 x top of hat, 2 x side of hat, 2 x brim of hat. Do this in both of your fabrics so you end up with 10 pieces in total. Make sure to cut on the fold where the pattern pieces tell you for the side and brim of the hat.
3
Start with the two side pieces of one your fabrics and sew them together along the two short sides with a 1cm seam allowance, making sure the fabric is face sides together. Press the seams open.
4
Take the top of hat piece in the same fabric and pin it face sides together to the two side pieces that have now been sewn together. This might look a little tricky because you are pinning a circle to a circle, but take your time and work your way slowly around making sure there aren’t any gathers or puckers.
5
Once it’s pinned, sew the top piece to the side pieces with a 1cm seam allowance.
6
Take out all the pins, and then press the top seam down so that it lies flat against the side pieces. Sew the seam down to the side piece, which keeps it nicely tucked away and tidy.
7
Sew your two brim pieces together with a 1cm seam on the two short sides, making sure the fabric is face sides together. Press the seams open.
8
Pin the brim to the side pieces, just like you did when you pinned the side to the top, and sew them together with a 1cm seam allowance.
9
Take out all the pins, and then press the seam up so that it lies flat against the side pieces. Sew the seam down to the side piece, which keeps it nicely tucked away and tidy. That’s the first side of your hat done!
10
Now it’s time to make the second side of your hat. Cut out two brim pieces in your fusing and iron it onto the brim pieces in your second fabric. This will add some stiffness to the fabric and help your brim pop out. Repeat steps 3 – 9 with the your other fabric pieces. Once you’ve finished you’ll end up with what looks like two hats.
11
Now it’s time to sew your two hats together to make one reversible hat. Take one of your hats and turn it inside out, then lay your other hat inside it so that their face sides are together. Line up the side seams and then pin the hats together all around the edges of the brims. Make a little mark with a pencil or air-erasable marker 10cm away from the edges of one the side seams along the brim, This is the gap that we’re going to leave open so that we can turn our hat right-side out.
12
Sew all around your pinned brims with a 1cm seam allowance, making sure not to sew in the 10cm gap you’ve marked.
13
Turn your hat right-side out, and voila! You almost have a reversible bucket hat! It just needs some tidying up. Use your fingers to wiggle to brim seams open and flat, and press them down with your iron. When you come to the gap you’ve left, turn the edges of the fabric under by 1cm and press them flat too, so that they are lined up with the edges of the rest of your brim.
14
Sew your brim 0.5cm from the edge all around your hat. This will keep the seams tucked and tidy, and will also seal the gap that was left open.
15
For the final detail of your bucket hat, sew several rows of stitches all around your brim, up to the seam of the side of your hat, which will help to give it even more stability and body. Use the row of stitching you made to seal your brim edge as your guide and keep sewing circles about 1cm apart working up all around your brim until you get to the seam with the side pieces of your hat.
Ta-da! Your reversible bucket hat is finished!


