Make this beautiful abstract beginners punch needle trio
Published on 22 October 2021 2 min readLearn how to make these pretty beginner punch needle wall hangings. Perfect for brightening up your bedroom, living room or study, these abstract designs are a fresh and fun way to explore texture and colour in your needlework. Download these free templates from designer Lucy Davidson, gather some supplies and follow her simple steps!
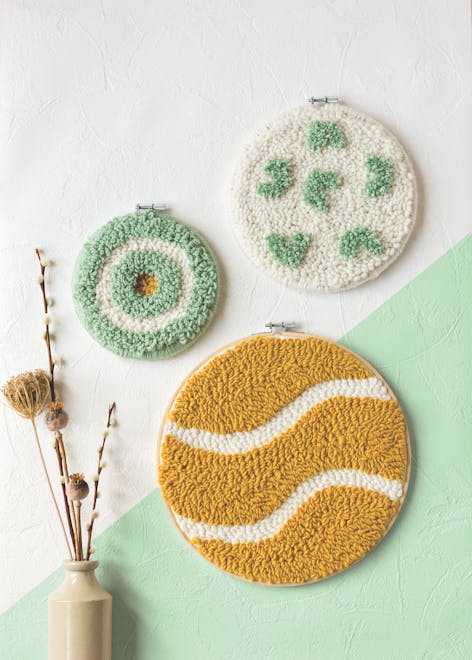
To celebrate the launch of the new book Punch Needle Embroidery for Beginners by Lucy Davidson from Search Press, we have this beautiful hoop art trio of wall hangings that can be displayed in a pretty cluster or individually too!
Punch needle embroidery can look fiddly but once you learn the basics you'll love filling your home with these stunning textiles.
There are three sizes to choose from, each with its own elegant minimalist design.
Sizes and templates
Large hoop, 28cm (11in)
Medium hoop, 20cm (9in)
Small hoop, 15cm (6in)
Abbreviations
L = loop stitches, numbers indicate loop height
E = embroidery stitches
Materials
- Large hoop, 28cm (11in)
- Medium hoop, 20cm (9in):
- Elbesee 9 inch (22.86 cm) Wooden Embroidery Hoop
- Small hoop, 15cm (6in):
- Elbesee 6in Embroidery and Quilting Hoop
- Monk’s cloth, 50 x 140cm (17¾ x 55in):
- Zweigart 7ct Needlecraft Fabric Monk's Cloth - 100cm x 140cm
- Scissors
- Marker pen
- Adjustable punch needle:
- Rico Punch Needle Tool
- Wool needle:
- DMC 2 Tapestry Needles (Size 13)
- Glue gun and hot-glue, or strong craft glue:
- Sizzix Glue Gun UK Version w/EU Adapter
- West Yorkshire Spinners Re:Treat in Mellow:
- West Yorkshire Spinners Re:Treat
- Paintbox Yarns Simply Chunky in Champagne White:
- Paintbox Yarns Simply Chunky
- Paintbox Simply DK in Pistachio Green:
- Paintbox Yarns Simply DK
What to do
1
Insert your monk’s cloth fabric into the largest embroidery hoop. Making sure that the fabric is nice and tight, trace your design onto the fabric.
Pro Tip
Remember that every motif you punch needle on the ‘front’ will be reversed on the ‘back’ (the side to be on display), so it may be useful to write the letters of the stitches on your fabric, too, to make sure you punch on the correct side.
2
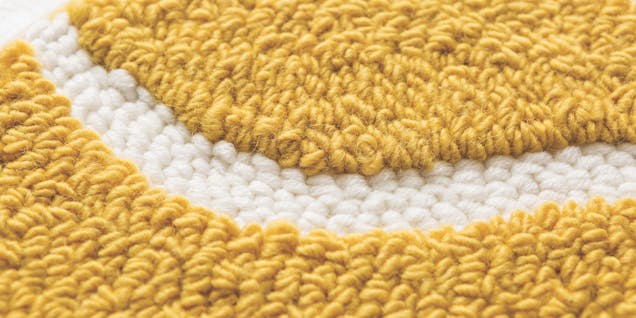
Using the adjustable punch needle, thread the gold/yellow yarn onto your needle. If the yarn is not thick enough, you will need to twist together two yarns and thread them at the same time. With the needle set on loop height 3, start to punch the ‘L’ sections on your fabric.
Pro Tip
Remember to work the outlines first, then work towards the middle of the shapes.
3
Once you have finished these sections, turn your hoop over so that the yellow loops are facing you. Thread your needle with the cream yarn. This time you may need to use just the one strand of yarn. Fill in the ‘E’ sections. This will create neat embroidery stitches on the ‘right’ side of the fabric, and make a nice contrast to the loops.
4
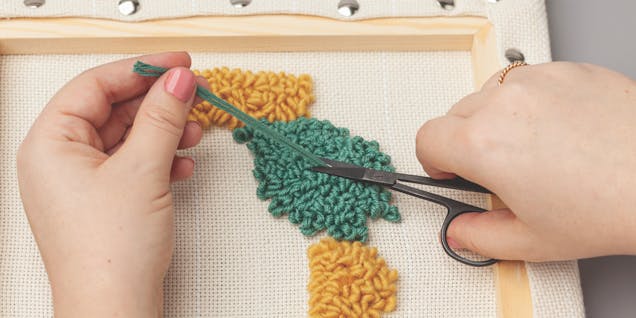
Once the large embroidery hoop design is fully punched, fasten off all the yarn tails and cut them flush against the loops. (See instructions below.)
Make sure the right side of your design is on the display side of the hoop – you might need to take your fabric out of the hoop and flip it over and secure it back in the hoop.
Trim so that you have a 1.5cm (⅝in) border of excess fabric all the way around. Heat up the glue gun and hot-glue, or take the strong craft glue, and adhere the border of excess fabric to the inner hoop on the wrong side of the design.
5
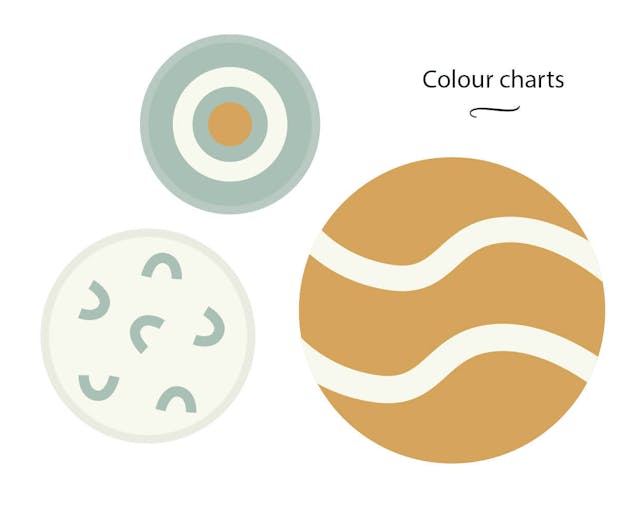
Using the colour charts to help you, follow the same process to create the medium and small hoops.
6
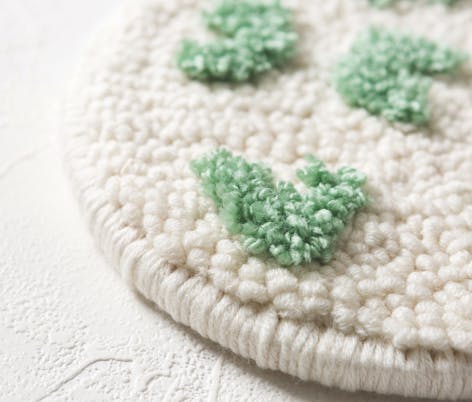
If you wish, change the height setting on your adjustable needle to create different-sized loops. If you like, deliberately make longer loops for some of the motifs, and snip through them, to create a tufted effect – I have done this with the smaller hoop’s motifs.
7
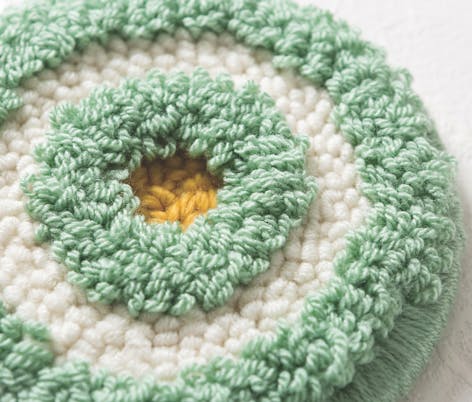
If you wish, to finish, you can bind the wooden hoops all the way around with matching or co-ordinating yarn, following the instructions below. As you can see, I have done this with the small and medium hoops. I have left the large hoop unbound for a nice contrast.
Fastening off
Below is the method I use for fastening off all yarn tails. You should do this once the yarn tail is surrounded by stitches, as this helps to secure the cut yarn. If the yarn tail – especially the beginning tail at the edge of a motif – is not yet surrounded by stitches, hold off cutting this until it is. Alternatively, if you're nervous, fasten off all tails once the whole design is in place.
1
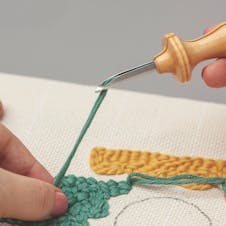
Once you have come to the end of your design, gently pull the punch needle away from the fabric at the ‘front’, making sure to catch the yarn with the other hand.
Pro Tip
For this particular shape, to achieve the thickness I wanted, I doubled the yarn so there are two strands of yarn.
2
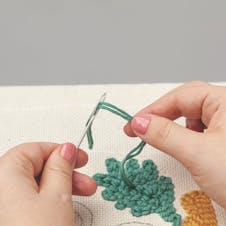
Leaving a 10cm (4in) length on the ‘front’ of you work, cut the yarn. Thread the yarn tail or tails onto your wool needle.
3
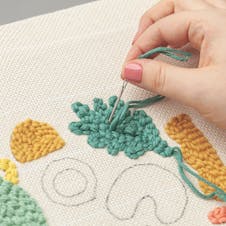
Poke your needle through the centre of one of the stitches...
4
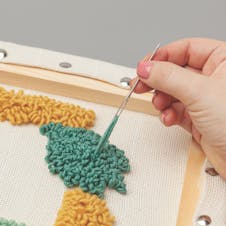
... and pull your needle out the other side (the ‘back’ of your work).
5
The yarn tail should now be anchored, as it is ‘squished’ inside the stitch. Cut off the excess yarn flush against the stitching on the ‘back’ of your design. That's it!
Binding
This kind of finish makes a feature of your edging. I often pick the yarn colour that I used for my background, but you could use a contrasting colour for a striking effect.
1
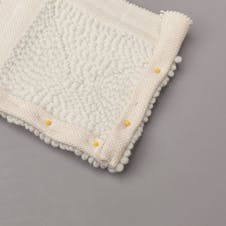
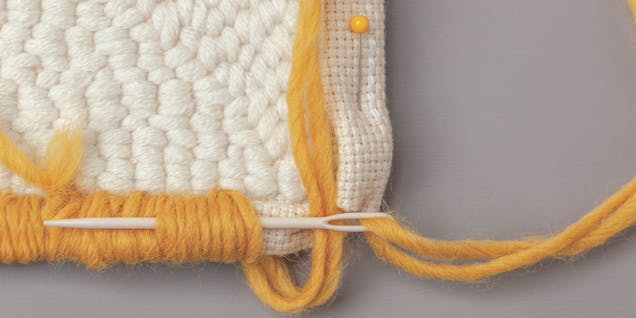
Cut around the project so you have a 3cm (1⅛in) border of fabric all around. Flip the project so the side NOT on display is facing. Fold the edges of the fabric over once by 1.5cm (about ⅝in), then again to double hem. Pin in place.
2
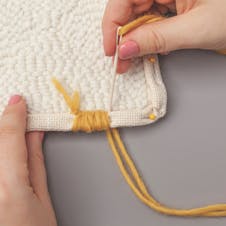
Thread your wool needle with your chosen yarn colour. Push your needle into the fold of the fabric and pull through; this will pull the knot into the fold of the fabric (for demonstration, mine is on show). Bring the needle up and over and into the fold, close to where you first inserted the needle. Repeat all the way around.
3
To finish the end of your yarn, whether you’ve come to the end of your length of threaded yarn or completed your border, take your wool needle through several stitches then cut the yarn flush.
