How to crochet waffle stitch
Published on 16 April 2020 By Yaz 1 min readIn this fun and easy tutorial Hopeful Honey will teach you how to crochet the fabulous waffle stitch! This tutorial uses US terms.
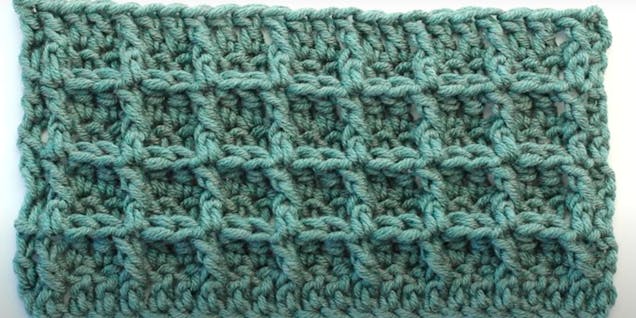
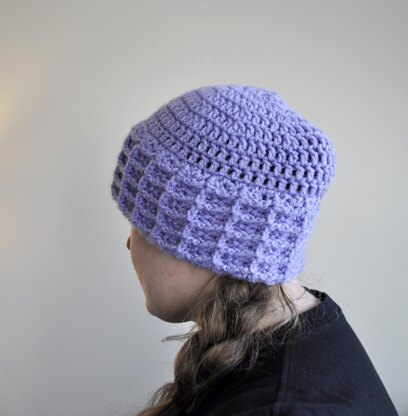
The waffle stitch is a beautifully textured stitch that’s just fab for giving depth and bringing heaps of design interest to crocheted accessories and garments.

The waffle stitch creates a wonderfully dense and snuggly fabric, heavenly when crocheting cosy cushion covers, snuggly scarves or sturdy washcloths. This combination of US double crochet (dc)/ UK treble crochet (tr) and US front post double crochet (fpdc) / UK front post treble crochet (fptr), creates an adorable ‘waffle texture’. Yes! Like the kind you drizzle with syrup and eat for breakfast.
Materials
Abbreviations
st - stitch
ch – chain stitch
dc - double crochet US (tr - treble crochet in UK)
fpdc - front post double crochet (fptr - front post treble crochet in UK)
Foundation
Chain in multiples of 3 + 2.
How to waffle stitch
1
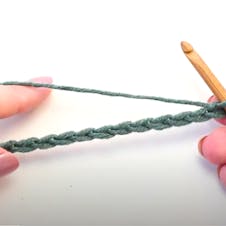
Make your foundation chain, counting multiples of 3, plus 2.
2
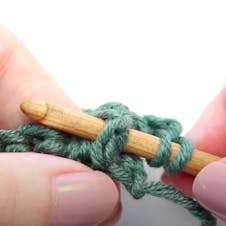
Row 1. Skip 3 ch (counts as 1st dc), 1 dc in 4th ch from hook.
3
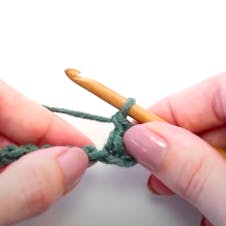
1 dc in every ch. When you get to the end of your row, turn your work.
4
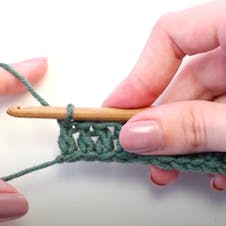
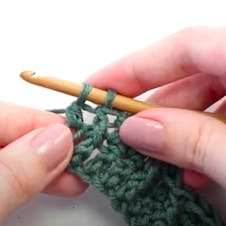
Row 2. Ch2 (as this counts as first dc in row 2).
5
*1 fpdc in next st, 1 dc in next 2 sts. Repeat from the * all across until you get to the last 2 sts.
6
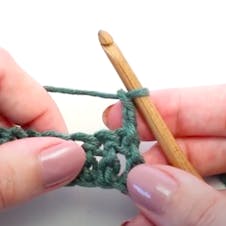
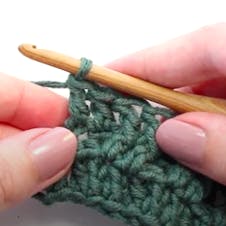
When you get to the last two stitches of row 2, 1 fpdc and 1 dc. Turn your work.
7
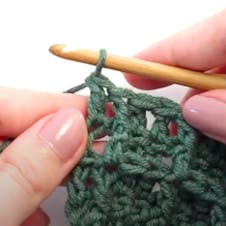
Row 3. Ch2 (counts as 1st dc), 1 dc in next st. *1 fpdc in next 2 sts, 1 dc in next st. Repeat from the * all across till last st. 1 dc in next st. Turn your work.
8
Row 4. Ch2 (counts as 1st dc), *1 fpdc in next st, 1 dc in next 2 sts. Repeat from the * all across till last 2 sts. 1 fpdc in next st, 1 dc in next st. Turn your work.
9
Repeat row 3 - 4 until you reach your desired length.