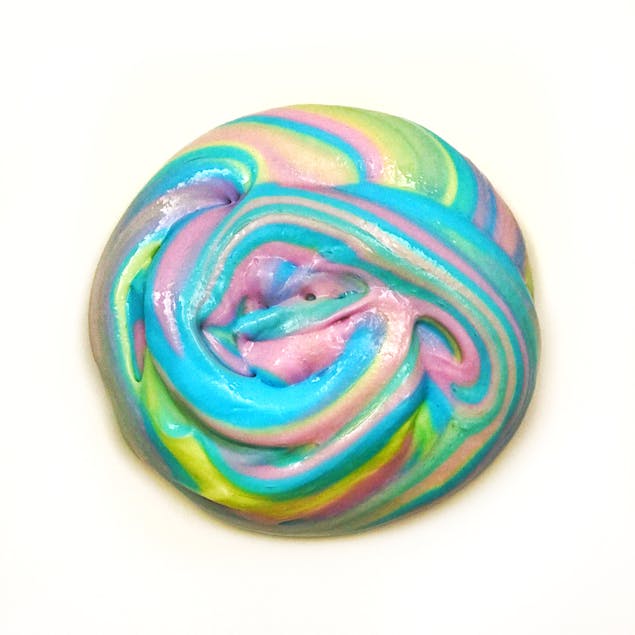
Make magical DIY unicorn slime!
Published on 6 April 2021 By Holly Butteriss 1 min readSonia and Caverleigh - the amazing makers behind The Craft Aisle, are multi-craft goddesses! This time they've put together this super simple step-by-step tutorial to make unicorn slime - magical to look at and so much fun to play with!
Materials
- 3 x 5oz bottles of PVA Glue (1 bottle per colour)
- 2 tsp of baking soda
- 4 tbsp of contact lens solution. *It needs to contain boric acid and sodium borate in the ingredients.
- 2 tbsp water
- Neon food colouring (3 colours)

Make your slime!
1
Pour all 3 bottles of glue into a bowl.
2
Add 2 tsp of baking soda and mix well.
3
Slowly, mix in 3 tbsp of contact lens solution.
4
Add 1 tbsp of water.
5
Mix until your slime comes together. If it’s still a bit too sticky, add a bit more contact lens solution and water. We added in an additional tbsp of each!
6
Remove from bowl and knead until your slime forms.
Pro Tip
You can put lotion on your hands to help prevent it from sticking as you knead!
7
Separate the slime into 3 separate sections.
8
Add a different colour drop of food colouring to each section and knead to incorporate the food colouring, creating 3 separate solid colours of slime.
9
Twist all the slime colours together to make one multi-coloured ball of unicorn slime!


