Make these planet friendly Paintbox Yarns tote bags with Kate Eastwood
Published on 5 May 2023 By Yaz 2 min readLearn how to make these fabulous eco-friendly tote bags designed by Kate Eastwood in Paintbox Yarns Recycled Cotton worsted. Choose from two gorgeous designs and follow the steps to make your very own! This tutorial uses UK terms.
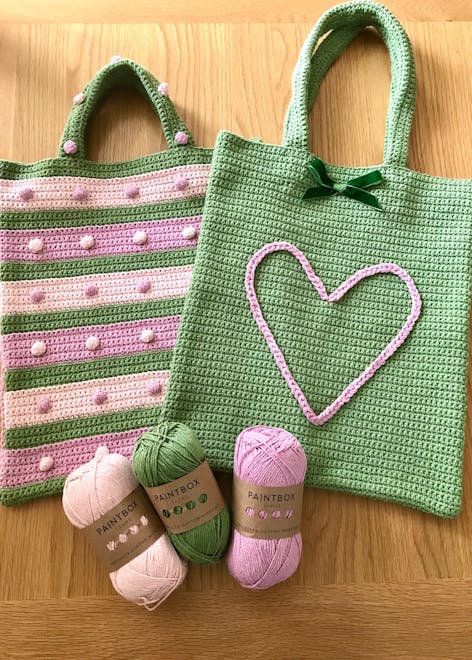
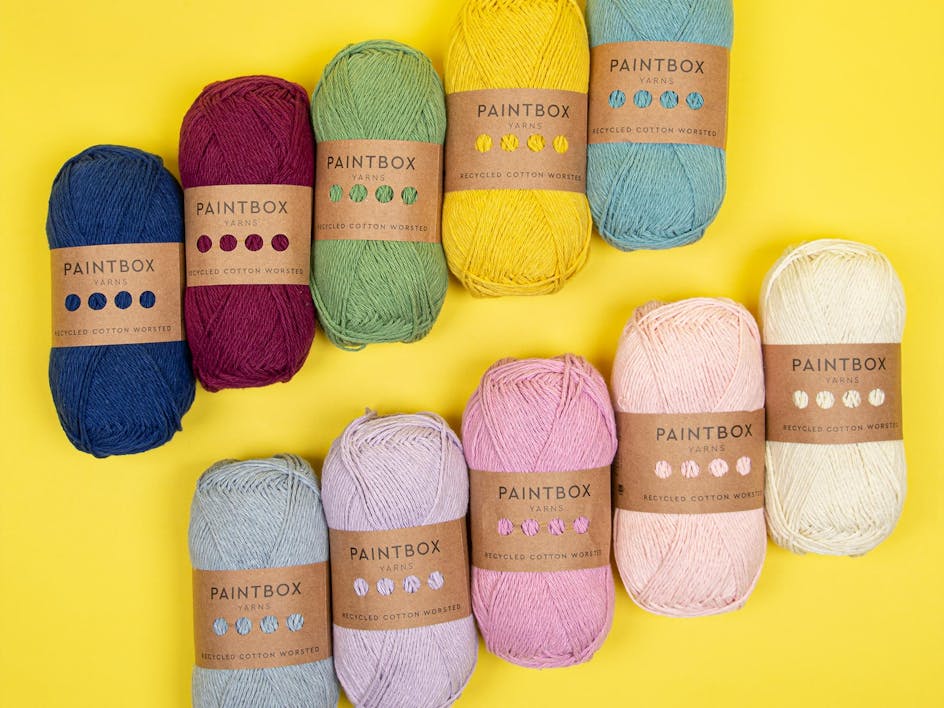
These simple crochet tote bags are perfect for everyday use whether you are going to the shop to pick up some essentials, or getting organised at home. Made in Paintbox Yarns Recycled Cotton Worsted they work up to give a strong, hardwearing texture that will hold its shape perfectly. You can add long or short handles and with 10 gorgeous colours to choose from you could almost have a different bag for each day of the week!
The finished bag measures: W 37cm x H 42 cm. Once stitched in to the bag the long handles measure 53cm and the short handles measure 33cm.
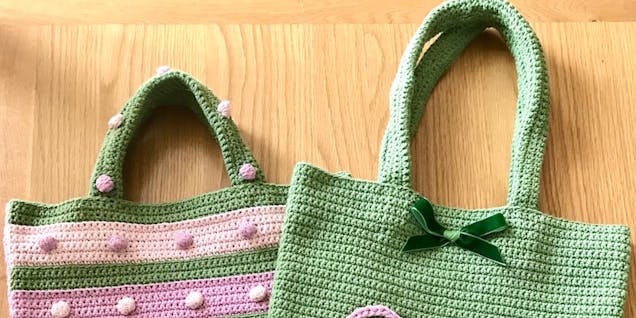
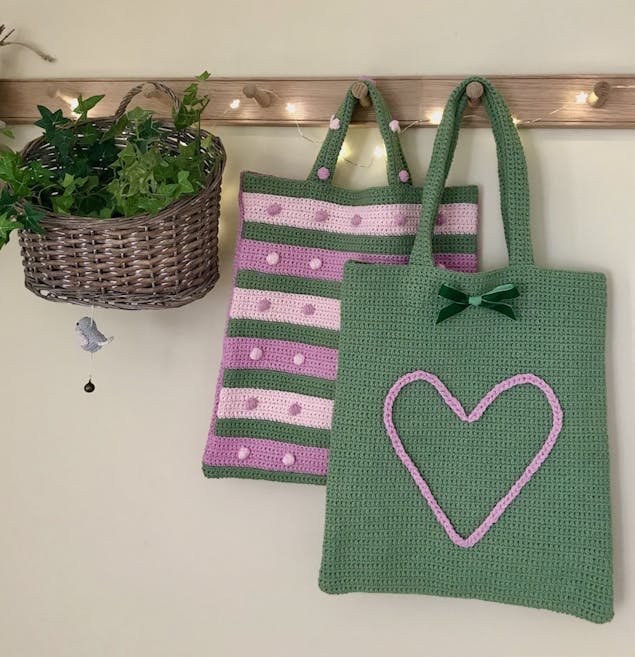
I have worked the bag in two different styles, the Heart Tote and the Stripy Tote! So pick your fave and follow the steps.
The heart tote
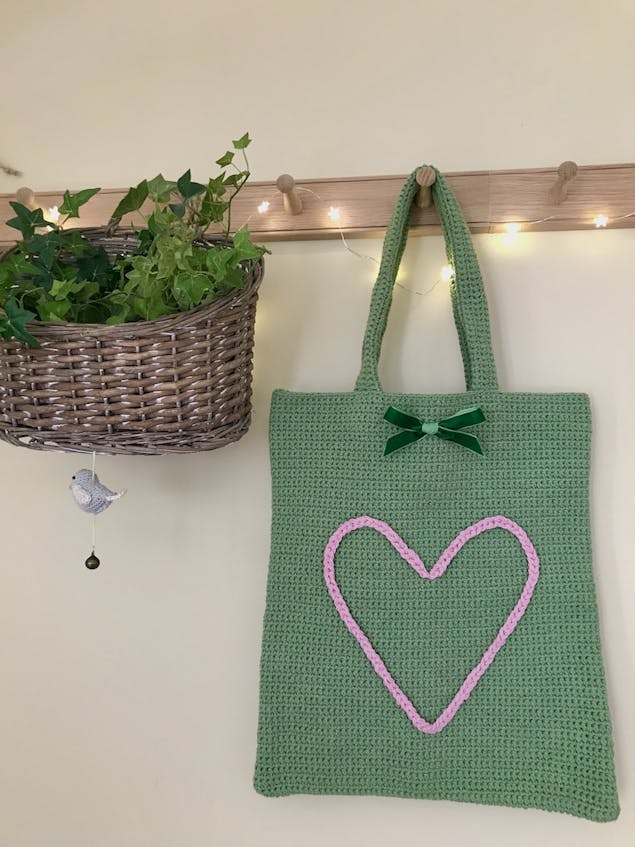
The Heart Tote could not be simpler and is a perfect beginners project. The bag is made up of two rectangles of crochet, worked in DC, that are stitched together. The handles are each worked as one long strip and then folded in half and stitched down the long edge to create a strong seam that will not stretch. The heart decoration is a chain worked in three strands of the same yarn that, once shaped into a heart, is stitched to the front of the bag.
Materials
- Paintbox Yarns Recycled Cotton Worsted
- 5 x balls of yarn in Meadow Green
- 1 x balls of yarn in Tea Dance
- 4mm crochet hook
- 6mm crochet hook (for the heart)
- Yarn needle
- Small amount of co-ordinating ribbon (optional)
How to make the heart tote
1
FOR THE FRONT AND BACK PANELS, make 2:
Using MEADOW GREEN and a 4mm crochet hook, chain 66.
2
Row 1: Starting in the second chain from the hook, work 1 dc into each chain to the end of the row. 65 sts. Chain 1 and turn.
3
Row 2: Work 1 dc into each stitch to the end of the row. 65 sts. Chain 1 and turn.
4
Now repeat Row 2 until your rectangle measures 43cm from top to bottom. Finish off.
5
Make a second rectangle in the same way.
6
FOR THE HANDLES, make 2:
Using MEADOW GREEN and a 4mm crochet hook, chain 101.
7
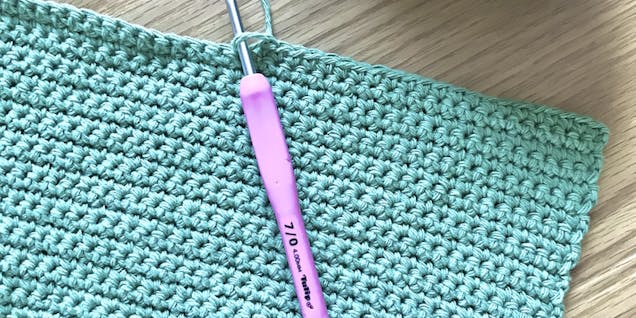
Row 1: Starting in the second chain from the hook, work 1 dc into each chain to the end of the row. 100 sts. Chain 1 and turn.
8
Rows 2 to 12: Work 1 dc into each stitch to the end of the row. 100 sts. Chain 1 and turn. Finish off.
9
Make a second handle in the same way.
10
FOR THE HEART:
Using 3 strands of TEA DANCE and a 6mm hook, chain 100. Finish off.
11
MAKING UP:
Take the front and back panels and lay them on a flat surface, right sides together. Using a yarn needle and a length of MEADOW GREEN stitch the two sides together with back stitch, approx. 1 cm in from the edge, all the way around the bag. Finish off securely.
Turn the bag the right way out.
12
Take one of the handles and lay it on a flat surface, right side down. Now fold in each side, so that the two long edges meet at the middle. Join the two long edges together either by over sewing all the way down or work mattress stitch. This seam will remain on the outside of the handle but will be on the underside.
Finish the other handle in the same way.
13
Lay the bag on to a flat surface and place the handle so that both ends are approx. 9cm in from the outside edges of the bag and approx. 4cm below the top edge of the bag. Pin to hold in place.
14
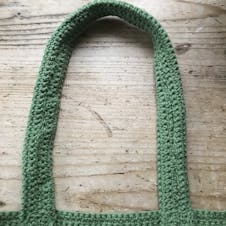
Attach the handles on to the inside of the bag by stitching them in place securely.
15

Lay the finished bag on to a flat surface and use the pink chain to make a heart shape in the centre of the front of the bag. Once you are happy with the positioning, pin in to place and then stitch securely. I found it helpful to slide a piece of cardboard inside the bag at this point to avoid sewing the front of the bag to the back.
16
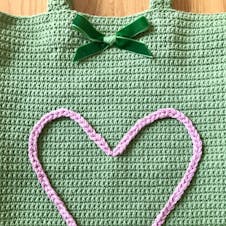
Finally, stitch a small bow in between the handles, just under the top edge of the bag.
The stripy tote
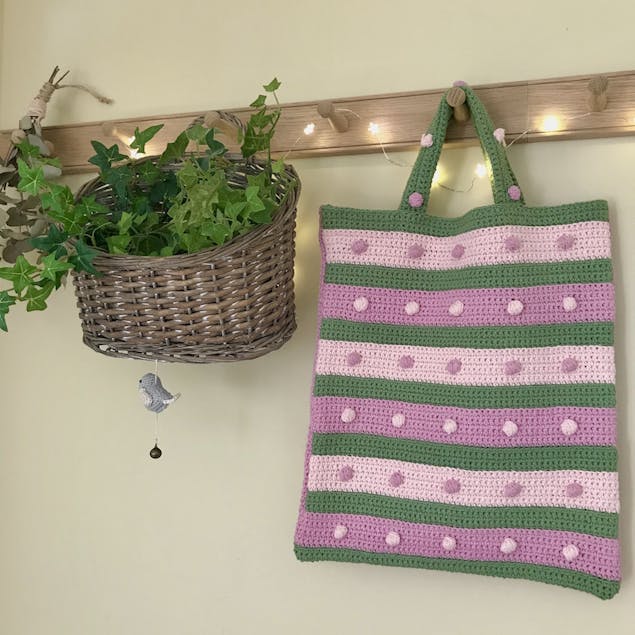
The Stripy Tote is worked in alternating stripes of three different colours, with added bobbles for extra fun! As with the Heart Tote the main stitch used is Dc, with the bobbles being worked in Tr’s. The back panel of this bag is plain and worked in one colour. This bag has short handles with a few bobbles running through them.
Materials
- Paintbox Yarns Recycled Cotton Worsted
- 3 x balls in Tea Dance
- 1 x ball in Meadow Green
- 1 x ball in Peachy
- 4mm crochet hook
- Yarn needle
How to make the stripy tote
1
FOR THE FRONT PANEL, make 1:
Using MEADOW GREEN and a 4mm crochet hook, chain 66.
2
Row 1: Starting in the second chain from the hook, work 1 dc into each chain to the end of the row. 65 sts. Chain 1 and turn.
3
Row 2 to 5: Work 1 dc into each stitch to the end of the row. 65 sts. Finish off MEADOW GREEN.
4
Row 6: With right side facing, join in TEA DANCE at the right-hand side at the start of the row, with a sl st and chain 1. Working into the back loops only for this row, 1 dc in to the first st. DC to the end of the row. 65 sts. Chain 1 and turn.
5
Rows 7 to 9: Now working into both loops again, dc to the end of the row. 65 sts. Chain 1 and turn.
6
Row 10: Bobble row. As the bobbles will be worked in PEACHY lay this yarn along the top of this row as you work, as you will be pulling this yarn up to make the bobbles as you work along the row.
7
Working in TEA DANCE work 10 dc. Pull PEACHY up and work a bobble in to the next st as follows: Work 6 tr’s all in to the next st, working both loops of the tr as usual but leaving the last loop of each st on the hook.
8
You will have 7 loops on your hook, 1 in TEA DANCE and 6 in PEACHY. Now yarn over in TEA DANCE and pull through all the loops on your hook. Gently pull the yarn to tighten the bobble.
9
Lay the PEACHY back on the top of the row and continuing to work in TEA DANCE, 10 dc and then work your second bobble.
10
Continue along the row, working 10 dc, followed by a bobble.
11
At the end of the row you will have 5 bobbles. Finish off the TEA DANCE. Chain 1 and turn.
12
Rows 11 to 13: Working in TEA DANCE, dc to the end of the row. Chain 1 and turn. At the end of Row 13 finish off TEA DANCE.
13
Row 14: With right side facing, join in MEADOW GREEN at the right-hand side at the start of the row, with a sl st and chain 1. Working into the back loops only for this row, 1 dc in to the first st. DC to the end of the row. 65 sts. Chain 1 and turn.
14
Rows 15 to 18: Now working into both loops again, dc to the end of the row. 65 sts. Chain 1 and turn. Finish off MEADOW GREEN.
15
Row 19: With right side facing, join in PEACH at the right-hand side at the start of the row, with a sl st and chain 1. Working into the back loops only for this row, 1 dc in to the first st. DC to the end of the row. 65 sts. Chain 1 and turn.
16
Rows 20 to 22: Now working into both loops again, dc to the end of the row. 65 sts. Chain 1 and turn.
17
Row 23: Bobble row. As the bobbles will be worked in TEA DANCE lay this yarn along the top of this row as you work, as you will be pulling this yarn up to make the bobbles as you work along the row.
18
Working in PEACHY work 10 dc. Pull TEA DANCE up and work a bobble in to the next st as follows: Work 6 tr’s all in to the next st, working both loops of the tr as usual but leaving the last loop of each st on the hook.
19
You will have 7 loops on your hook, 1 in PEACHY and 6 in TEA DANCE. Now yarn over in PEACHY and pull through all the loops on your hook. Gently pull the yarn to tighten the bobble.
20
Lay the TEA DANCE back on the top of the row and continuing to work in PEACHY, 10 dc and then work your second bobble. Continue along the row, working 10 dc, followed by a bobble. At the end of the row you will have 5 bobbles. Finish off the PEACHY. Chain 1 and turn.
21
Rows 24 to 26: Working in PEACHY, dc to the end of the row. Chain 1 and turn. At the end of Row 13 finish off PEACHY.
22
Row 27: With right side facing, join in MEADOW GREEN at the right-hand side at the start of the row, with a sl st and chain 1. Working into the back loops only for this row, 1 dc in to the first st. DC to the end of the row. 65 sts. Chain 1 and turn.
23
Rows 28 to 31: Now working into both loops again, dc to the end of the row. 65 sts. Chain 1 and turn. Finish off MEADOW GREEN.
24
Now repeat from Row 6 to Row 31 twice more.
25
Finish off and sew in all the yarn ends.
26
FOR THE BACK PANEL, make 1:
Using TEA DANCE and a 4mm crochet hook, chain 66.
27
Row 1: Starting in the second chain from the hook, work 1 dc into each chain to the end of the row. 65 sts. Chain 1 and turn.
28
Row 2: Work 1 dc into each stitch to the end of the row. 65 sts. Chain 1 and turn.
29
Now repeat Row 2 until your rectangle matches the same length as the front panel. Finish off.
30
FOR THE HANDLES, make 2:
Using MEADOW GREEN and a 4mm crochet hook, chain 66.
31
Row 1: Starting in the second chain from the hook, work 1 dc into each chain to the end of the row. 65 sts. Chain 1 and turn.
32
Rows 2 to 5: Work 1 dc into each stitch to the end of the row. 65 sts. Chain 1 and turn. Finish off.
33
Row 6: Lay PEACHY and TEA DANCE along the top of the row as you work, so that you can work alternating coloured bobbles along this row. Work 10 dc in MEADOW GREEN. Work first bobble in TEA DANCE, 10 dc in MEADOW GREEN, work second bobble in PEACHY. Continue to the end of the row in this same pattern. At the end of the row you will have 5 bobbles, 3 in TEA DANCE and 2 in PEACHY. Finish off TEA DANCE and PEACHY.
34
Rows 7 to 11: Working in MEADOW GREEN work 1 dc into each stitch to the end of the row. 65 sts. Chain 1 and turn. Finish off.
35
MAKING UP:
Take the front and back panels and lay them on a flat surface, right sides together. Using a yarn needle and a length of MEADOW GREEN stitch the two sides together with back stitch, approx. 1 cm in from the edge, all the way around the bag. Finish off securely.
Turn the bag the right way out.
36
Take one of the handles and lay it on a flat surface, right side down. Now fold in each side, so that the two long edges meet at the middle. Join the two long edges together either by over sewing all the way down or work mattress stitch. This seam will remain on the outside of the handle but will be on the underside.
Finish the other handle in the same way.
37
Lay the bag on to a flat surface and place the handle so that both ends are approx. 9cm in from the outside edges of the bag and approx. 4cm below the top edge of the bag. Pin to hold in place.
38
Attach the handles on to the inside of the bag by stitching them in place securely.
