Learn how to make a fruity punch needle coaster trio
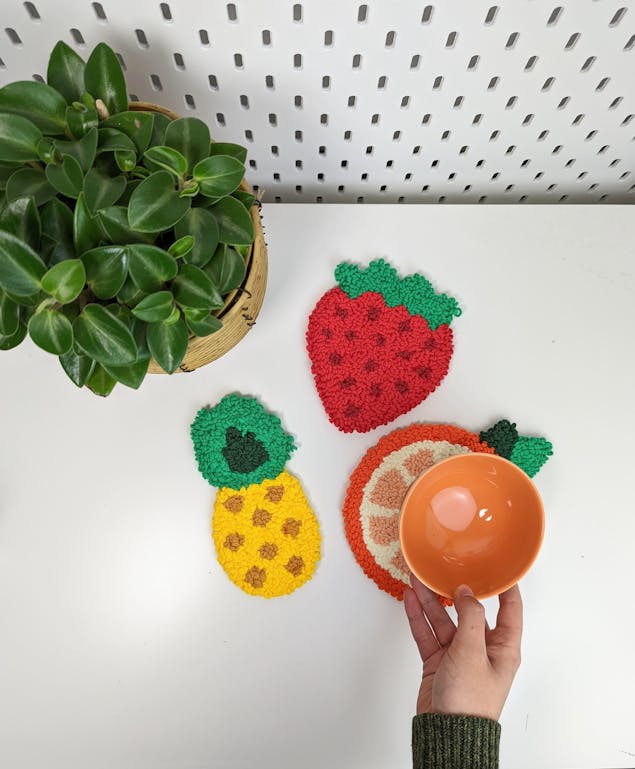
Published on 14 April 2022 1 min readWe are so berry excited to introduce you to our Fruit Punch collection of coasters; a sweet trio of punch needle patterns! Follow along with our simple step-by-step to learn how to make punch needle coasters yourself. From stitching to finishing, you’ll learn how to create delightful decorations that will brighten any table!
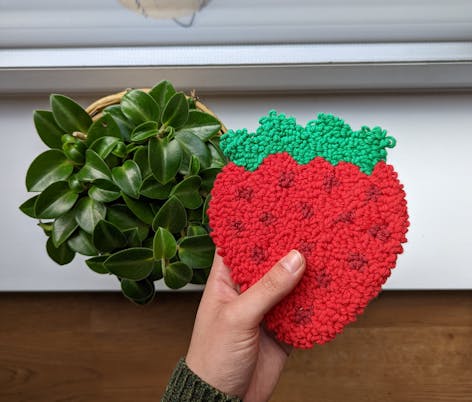
Materials
- Monks cloth:
- Zweigart 13ct Monks Cloth 39in x 55in
- Regular punch needle:
- Milward Punch Needle Set: Size 10: Regular and Fine
- Paintbox Yarns Cotton Aran in Blood Orange, Peach Orange, Banana Cream, Pillar Red, Red Wine, Glorious Gold, Buttercup Yellow, Grass Green and Racing Green:
- Paintbox Yarns Cotton Aran
- Tapestry needle:
- Pony Gold Eye Sewing Needles
- Felt fabric:
- Trimits Acrylic Felt Roll 1m x 45cm - Emerald
- Embroidery scissors:
- Hemline Stork scissors
- Fabric scissors:
- Korbond Precision Dressmaking Scissors
- 9” Embroidery hoop:
- Elbesee 9 inch (22.86 cm) Wooden Embroidery Hoop
- 10” embroidery hoop:
- Elbesee 10 Inch Wooden Embroidery Hoop
- Fabric glue:
- Rico Punch Needle Fabric Glue 250ml
- Paintbrush
- Marker Pen
- Tape
Let’s get punching! How to make your punch needle coasters
1
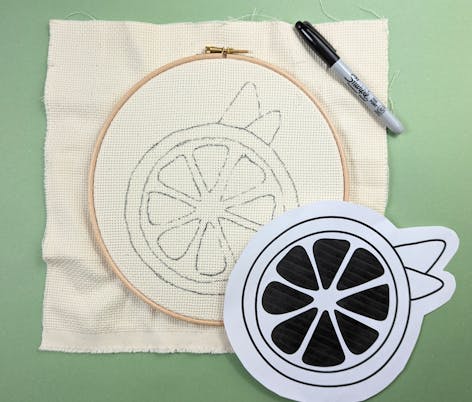
Lay the 9” embroidery hoop on top of the monk's cloth and cut an approx. 1 inch square around it. Repeat with the 10” embroidery hoop.
2
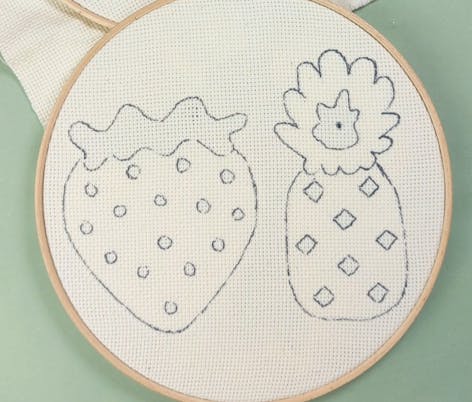
Stretch both monk's cloth squares onto their embroidery hoop frames until they are both drum tight. Cut out your fruity templates. Tape the orange template to the back of the 9” hooped fabric and the strawberry and pineapple to the back of the 10” hooped fabric. Ensure there is a gap between the strawberry and pineapple. Trace all templates with a marker pen against a light source.
Pro Tip
Before you begin punching, remember to release yarn from your yarn ball along the way to avoid tension in your needle. This will prevent your stitches from coming out of the fabric and also ensures the loops on the front of your work are nice and even throughout!
3
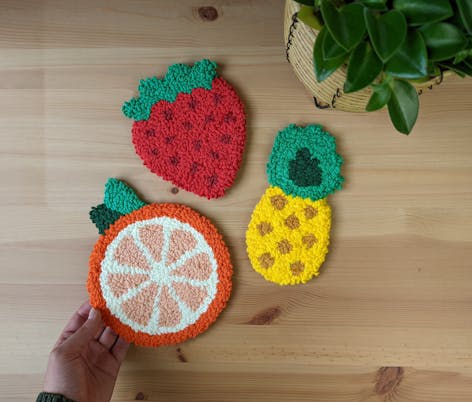
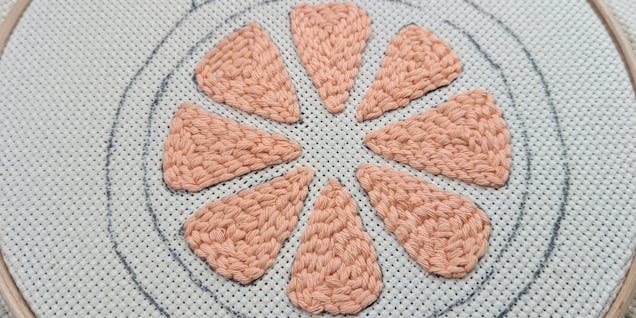
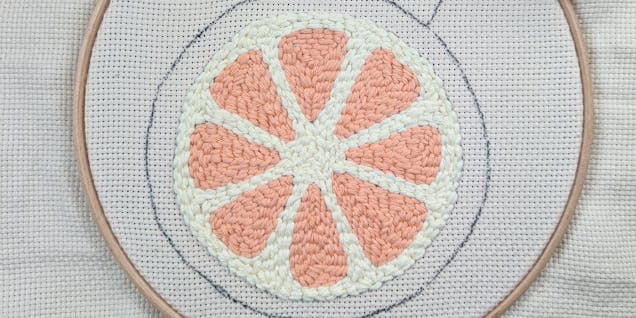
Start embroidering your orange. Thread the thicker needle of the Milward punch needle set with Paintbox Yarns Cotton Aran in Peach Orange, and embroider the orange slices in the centre of the design.
Pro Tip
Push your needle through the little holes in the monk's cloth. These spaces are designed particularly for punch needles to glide through the fabric with ease without creating any rips on it.
4
With Banana Cream Cotton Aran, embroider the background around the orange slices.
5
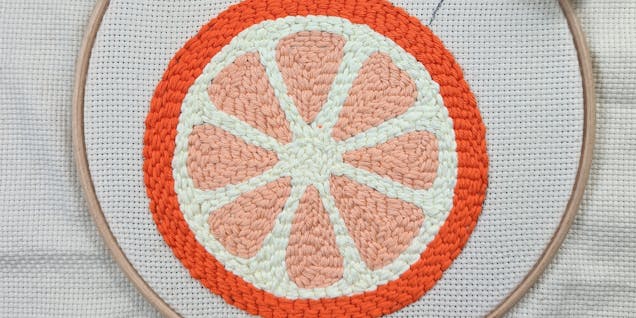
Change to Blood Orange yarn, and embroider the outer orange skin layer.
6
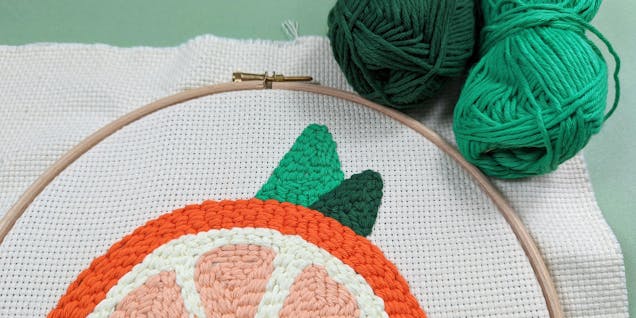
Embroider the large leaf in Grass Green, and the small leaf in Racing Green.
7
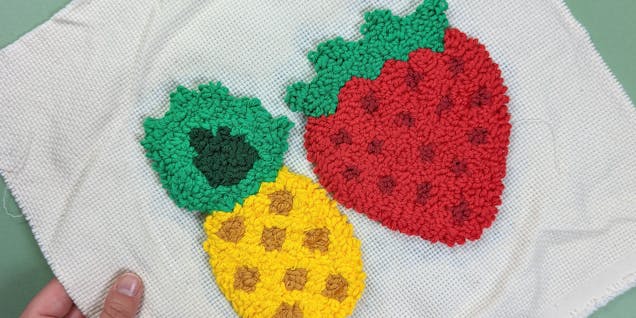
Now that you’ve finished your orange, it’s time to punch your pineapple and strawberry! Similar to the orange, start by embroidering from the centre of the design. For the pineapple, punch the diamond shapes in Glorious Gold Cotton Aran, the body around the diamonds in Buttercup Yellow, the smaller leaf section in Racing Green, and the bigger leaf section in Grass Green. For the strawberry, punch the dots in Red Wine, the body around the dots in Pillar Red, and the leaf in Grass Green.
8
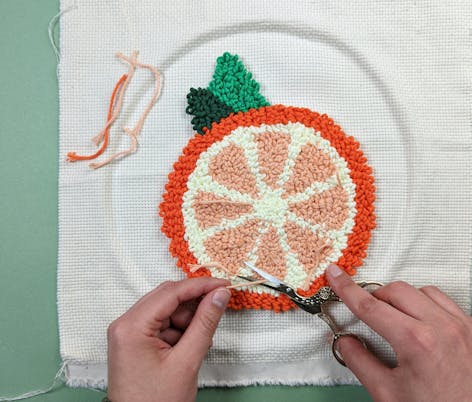
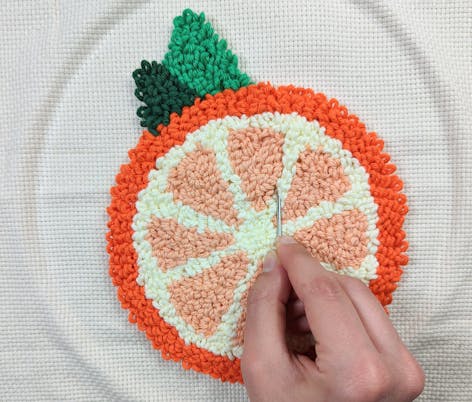
Tidy up your fruity work of art! Trim all the yarn ends on the front of the three fruits with embroidery scissors. Using the tapestry needle, separate any intertwined loops where the different colours meet. This will neaten the lines in your work.
9
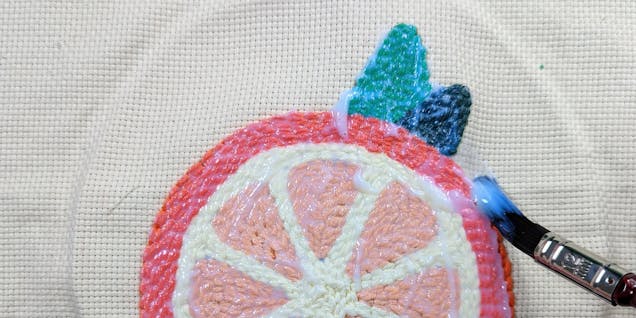
Time for the finishing touches! Paint fabric glue on the back of the embroidery and repeat for all 3 designs. Make sure to paint approx. 2 cm of the monk’s cloth around the fruits too, to allow you to cut out the fruits close to the flat stitches without the fabric fraying.
10
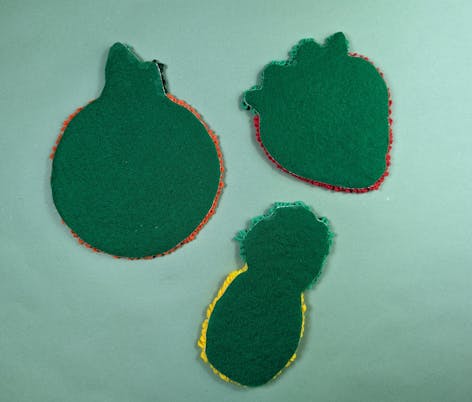
Press some felt fabric onto the painted glue. Place a heavy object on top of the felt, e.g a book, and let it dry overnight. Once dry, cut close and around the punch needle stitches to finish the back of your coasters.

And now your fab punch needle coaster trio is done! Time to throw a summer party and enjoy some delicious fruit punch.
