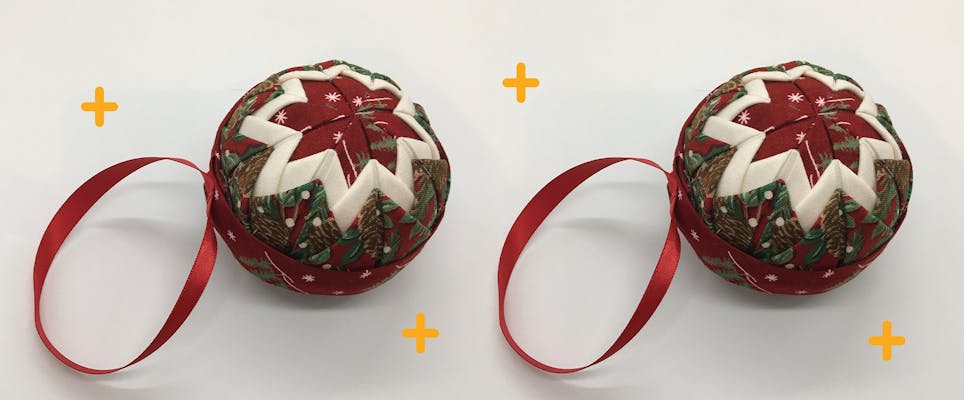
Quilted Christmas bauble - free tutorial!
Published on 12 December 2019 By Holly Butteriss 1 min read
These quilted baubles are the perfect project to make any home feel a little more festive! Raid your stash for fun, festive fabric and get making!
While Natalie is a baker at heart, she is also a fantastic quilter! While they may not taste as good as Natalie’s cake creations, her gorgeous quilting projects are not to be overlooked. This festive make is one yule not want to miss!
You can find more of Natalie’s amazing makes at @nattiesbakesandbites on Instagram.
Materials
- 3” diameter polystyrene ball
- 40 x 3” squares
- Dressmaker pins (these are flat headed pins)
- Bias cut strip of material 1 ¼” wide or ¾” binding or ribbon ¾” wide
- 6” length of ¼” width ribbon
This tutorial uses imperial inches.
How to make your quilted bauble!
1
Mark the top and bottom of the polystyrene ball with a marker pen.
2
Cut 8 x 3” squares of the central colour material (4 for each side), then 16 x 3” squares each of the second and third material (8 for each side).
3
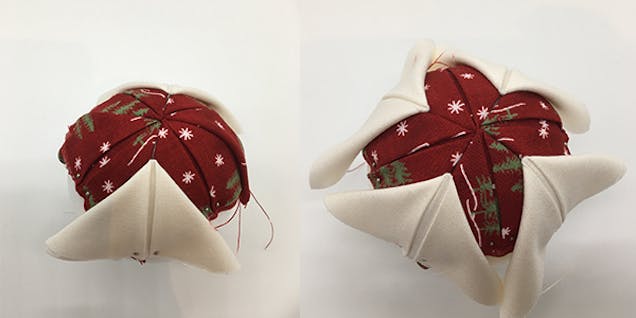
Selecting the first material, find the centre of it (fold in half and half again) and pin to the top of the ball.
4
Fold the material over to form a rectangle, then pull the top corners down to the bottom centre line and pin into place. Repeat this process directly opposite and then in between until the top is covered.
5
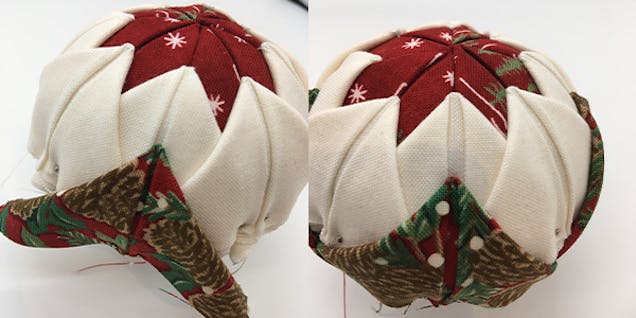
Selecting the second material, repeat the process, moving down 3/8” (less than half an inch) from the centre-top and on the joint line (as shown in step four).
Continue this process, doing the opposite side first, then the quarter sides (as shown in step four) before doing the filling in quarters – this ensures an even layering.

6
Selecting the third material, repeat as above

7
Turn the ball over and repeat steps until the whole ball is covered.
8
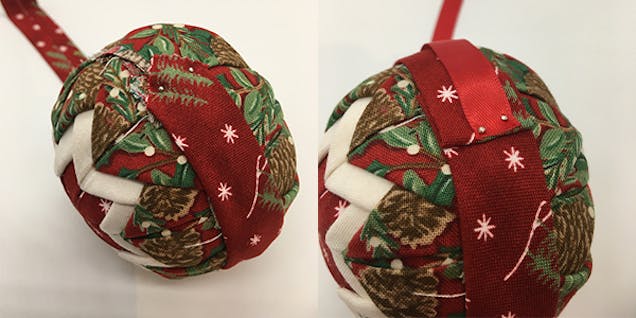
Using the bias strip of material, fold in the edges and iron flat to make bias binding, or use a length of ¾” wide ribbon (be it of the first material or contrasting material, or selected length of ribbon or binding).
Pin one end to the middle of the ball and pull the strip around the ball covering all the edges of material. Fold the end of the bias strip under and tuck the end of the ribbon (used to hang the ball) under the join, loop the ribbon round and pin this into place as shown in step seven.
And you're done! Now you have a beautiful Christmas bauble to decorate your tree!


