How to make a rag quilt
Published on 5 August 2021 By Sarah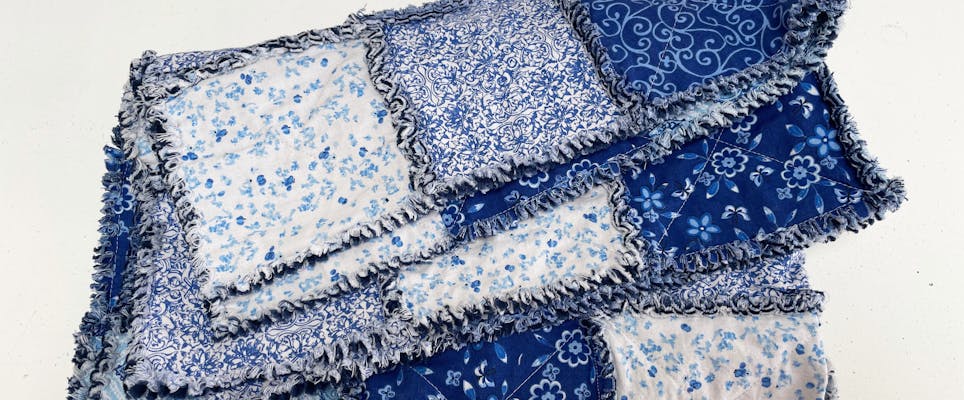
For a homey design to keep you snuggly on the sofa, create your own rustic rag quilt - a cosy creation that brings you fun textures to your quilting. Kate Owen will talk you through how to make a rag quilt and all you need to get started!
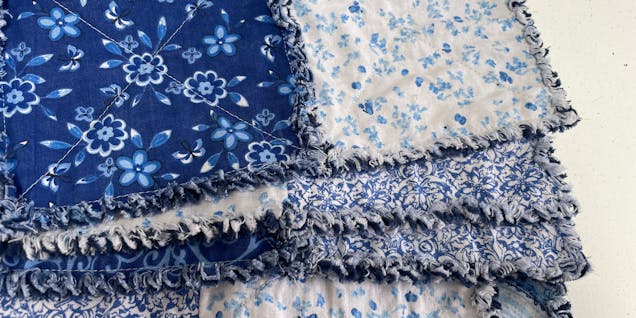
Unlike a simple quilt, rag quilts have exposed edges which, when washed, creates a fabulous frayed edging to your fabric. This is done through layering three squares of fabric for a ruffled texture that brings a shabby chic touch to your quilt.
Quilting cotton is the ideal choice for making your rag quilts. The super breathable fabric is machine washable, which makes it perfect for this project. Choose fat quarter bundles to match your aesthetic in whatever colour and pattern you desire!
Materials
- 2 x fat quarter packs, each with 5 fabrics
- Craft Cotton Craft Cotton FQ Fat Quarter Bundle - Delft Blues - Multi
- ½ m fabric for the middle layer
- Rotary cutter
- Quilters ruler
- Cutting mat
- Air erasable marker or pencil or tailors chalk
- Sewing machine & thread
- Scissors
Measure and prepare your fabrics
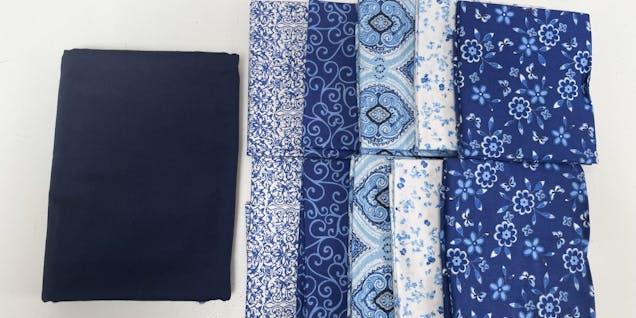
My finished quilt size is going to be 35.5” x 31.5” (90 x 80cm) and I’m using two fat quarter packs, which each have 5 fabrics. I’ll be using the same patterned fabric on the front and back of each square, with a navy fabric in the middle.
Three layers gives the quilt a nice weight, and the navy fabric will still be seen on the open seams that are left raw and frayed.
Each fat quarter piece measures approximately 18“ x 21“ and we’re going to cut 6” squares. This means that we should be getting 9 squares out of each fat quarter piece with very little wastage, and I’ll end up with a total of 90 squares.
This might sound like a lot! But remember, half of these squares are going to be on the back of the quilt.
Pro Tip
You can of course use any fabrics you want, and make your quilt as big or small as you want!
Cut your fabric
Iron your fabric pieces before cutting so that you keep everything flat and straight - this will make it easier to sew later. A rotary cutter, quilters ruler and cutting mat are the easiest way to cut the squares.
Cut all your fat quarters into squares, then cut 45 squares from your navy fabric, which will be the middle layer of your quilt. You’ll still see the edges of this fabric, which is why I’ve chosen something that matches my fat quarter colours nicely.
Pro Tip
A great way to speed up the cutting is to first cut a few 6” wide strips the length of your fabric, then stack a few strips on top of each other and cut them into 6” squares.
Assemble your fabric sandwiches
Once all your squares are cut, make little sandwiches using two of the same fat quarter fabric with a plain navy square in the middle. Make sure to place both of the fat quarter squares with their face sides outside.
Mark and sew each sandwich
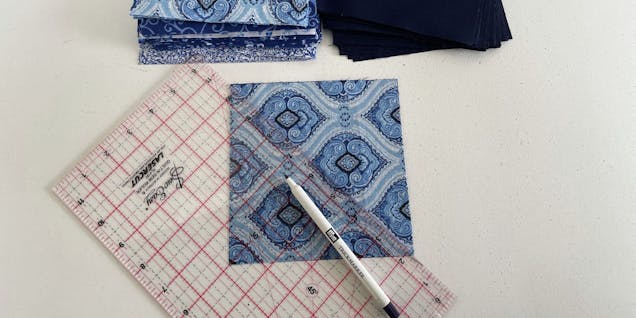
Use a disappearing marker (or a pencil, or tailors chalk) to mark an X going from corner to corner of each top square, then stitch over these lines to keep each little sandwich sealed together. You’ll end up with a very satisfying stack of sewn squares!
Pro Tip
If you’d like to save time (and thread!) why not try ‘chain piecing’? This is when you sew several pieces in a row without stopping, then simply snip them apart once you’re done. Here I’ve done all my diagonal stitches in one direction across the squares, then I’ve snipped them apart and have sewn all the diagonal stitches in the other direction.
Plan the layout of your squares
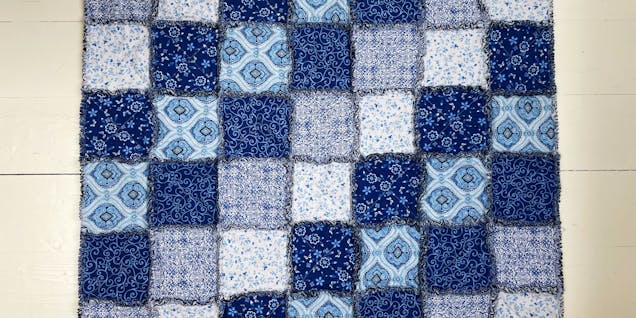
Once you’ve got your stack of sewn sandwiches, lay your squares out in your desired design. Depending on what design layout you choose, you may have a few squares leftover. Here my quilt is 6 x 7 squares and I have three leftover. You can save any leftovers for future quilting projects!
Sew your squares together
Start sewing your squares together, first sewing them into rows using a 1 cm seam allowance.
Sew your rows together
Once your squares are all sewn into rows, sew each row together. Keep your seams on the same side as you did for your rows, face side up. We’re going to make a feature out of all those seams!
Sew around your quilt
Once all your rows have been sewn together, sew 1 cm away from the edge all around the four sides of your quilt.
Snip your seams
We want the fabric on our seams to really fray and fluff, so add little snips every ¼ - ½ inch. Make sure not to snip through your stitching though!
Wash and dry your quilt
Washing your quilt will fluff and fray your seams, making them go soft and fluffy and becoming a real feature of your quilt. It’s quite a magical transformation!
Pro Tip
There will be some loose threads that come off when you wash your quilt, so it’s best to put it into the machine on it’s own, so nothing else gets covered in thread. If you have a tumble dryer it’s super helpful because all those little threads get collected in your lint trap. If not don’t worry! Just take your quilt somewhere to give it a good shake.
And you're done! Wasn’t that easy? No fiddly lining up big layers of fabrics and quilting all over a whole quilt. Plus you get the super fun and fluffy seams that add a great layer of texture to your project. You’ll be making many more I’m sure!
