Guide to top down knitting
Published on 29 April 2019 By Yaz 4 min read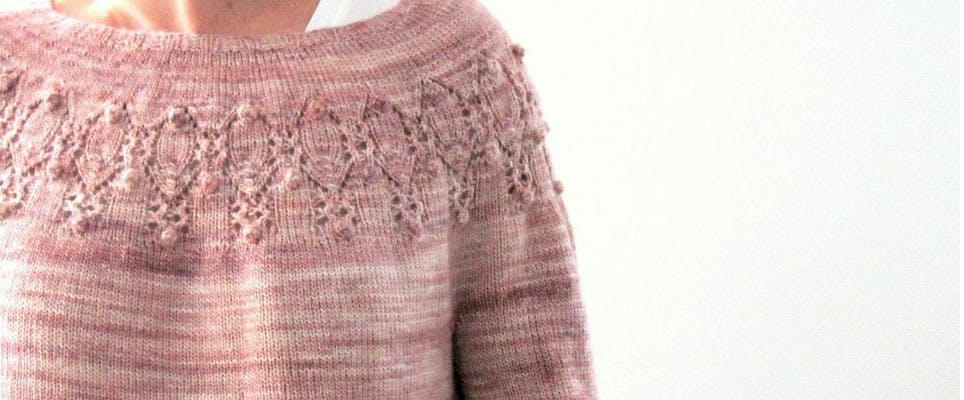
Top down knitting is the modern method of knitting apparel in one piece from the top down, rather than creating separate panels and sewing together. The marvellous invention of circular needles meant that modern knitters could knit in the round, from the top down, bottom up and even from side-to-side giving knitters the creative freedom to adjust their projects as they go!
Top down knitting is a dream for many knitters as it means more freedom to adjust and adapt the drape, fit and positive ease of your project, perfect for jumpers, cardigans and baby projects that are custom fit. The result is beautifully fitted garments with fewer seams than if you were using traditional methods.
Top down jumper knitting patterns
How to knit a top down jumper
1
Start with a row gauge. Before you start your top down jumper or cardigan, we would recommend creating a gauge swatch to test out your tension. Top-down jumperss and cardigans need that swatch more than probably any other construction, because both the stitch and the row gauge need to be pretty accurate. If you cannot get row gauge, your armholes may be too shallow, and your jumpers will might not pull up to the neck properly.
2
Casting on. Top-down jumpers are generally cast on at the collar and neck, with markers placed at both the front and back of each shoulder. Sometimes, the neck band is part of the cast-on, and other times, the neck band is picked up and knitted later. The neck band is generally not part of the shaping which makes top-down jumpers and cardigans so special.
Pro Tip
Jumpers are generally knit in the round when made from the top down, and cardigans are knitted from one front button band to the other one, from side to side. In other words, cardigans are knitted flat, with the middle front joining each edge.
3
Increases. Top-down jumpers and cardigans generally involve increasing at regular intervals on both the fronts and backs of the shoulders. You end up with a diagonal line of increases that go from the collarbone to under the arms. The section from the collar to the caps of the shoulders is called the yoke, and this is often where the magic happens in terms of a design.
4
Tie off for the sleeves. When the jumpers or cardigan has a large enough circumference to cover both the body and shoulders, it’s time to tie off the sleeves. Scrap yarn holds the stitches on the outsides of those diagonal lines of increases, and the body is connected by knitting the stitches between diagonal increases, both across the front and across the back, so the body gets knitted in a tube. You will pick up the sleeves later.
5
Knitting the body. If you are knitting a cardigan, you continue knitting from button band to button band, but leave the sleeve stitches alone. You are knitting the front and back as one piece, but with no more increases so that the body just knits in a straight line down from the underarms to the waistband.
If you are knitting a jumper, you will be knitting the front and back of the body in a tube, all the way to the waistband. Cast off when it is long enough, or whenever the pattern tells you to do so.
6
Picking up the sleeves. Take the scrap yarn off of your live sleeve stitches, knitting one sleeve at a time, and knit from the shoulder cap down to the cuff in a tube. The sleeves often will have some shaping near the forearm and wrist even if the body does not. Bind off for the cuff whenever the sleeve is long enough, or whenever the pattern tells you to stop, and then repeat for the second sleeve.
7
Pick up the collar. If your yoke began at the increase rows, pick your cast-on row back up and knit in the other direction to form a collar. Cast off when the collar is the correct length. Sometimes, the collar will be just a neck band, and other times, it will be a knitted-flat actual collar with wings instead of a crew or turtle construction.
8
Finishing. Since you have knitted the piece in the round, and then gone back to pick up the sleeves in a tube as well, there are no seams in a top-down garment. You may have a zipper to add, or buttons to sew on, or snaps, or picot edging to be added later, or embroidered little flowers.
Explore our top down knitting patterns picks
From easy top down baby jumper knitting patterns to top down hat designs, whether you're a beginner or intermediate knitter we've rounded up our favourite top down patterns to get those creative juices flowing!
Top down children's cardigans
Top down baby jumper knitting patterns
Top down hat knitting patterns
What are the main benefits of top down knitting?
1. No seaming
This is very high on the list for a lot of people! When you knit a jumper or cardigan from the top down there is very little sewing up to do. There might be a little bit of seaming, or at the least, ends to sew in - but if you don't like sewing up, this is the method for you!
2. Alteration as you go
You can begin with a neckline and know straight away whether it is going to be too small, too wide, too deep - and, if you are presented with options at this point, you can alter your jumper to fit.
3. Raglan placing
None of us is the same shape, and sometimes raglan placings are in the wrong place for our particular body formation. With top-down knitting, you can alter this right at the beginning, and decide where you want your raglan seams to be.
4. Armholes
You can customize the measurement from the top of your shoulder to the bottom of your armpit to make sure the sleeves are going to fit perfectly. There's nothing more soul destroying than finishing a garment to find that the arm holes are too tight!
5. Sleeve width
Again, tied into modification of arm holes, you can make sure that your sleeves actually fit your upper arm because you are starting to knit them from the top and widest part down. In altering the width of the top of the sleeve, you are able to then modify the arm hole to be precisely right too.
6. The yoke
The exciting part of top down knitting is that you can try your jumper or cardi on as you work - so by the time you have knitted the yoke of the garment, you can put it on to see if it really fits.
7. Length of body
Nobody measures the same from bust to hip - some of us have shorter measurements there, and others are tall and willowy. Sometimes body sections are shaped or waisted, and in a top down scenario, you will have scope to precisely alter the length and shape of the body section.
8. Hems
Although I am not advocating changing the design of a pattern you have spent good money on (simply altering shaping if you particularly need it), you have a wonderful opportunity with this method of knitting to modify the hem of a garment. Imagine you loved the top of a pattern but you wanted more of a fluted hem and sleeves - top-down knitting will allow you to modify the hems and ends of sleeves to reflect that. You may want to space increases along the lower body to bring the hemline into more of an A-line or fluted shape, or conversely bring it closer in. You might prefer a deeper hem, or even a different finish, and at this point of course, if you don't like it, you can frog it back and do it again!


