Make a woven love heart wall hanging
Published on 24 April 2019 By Christine Leech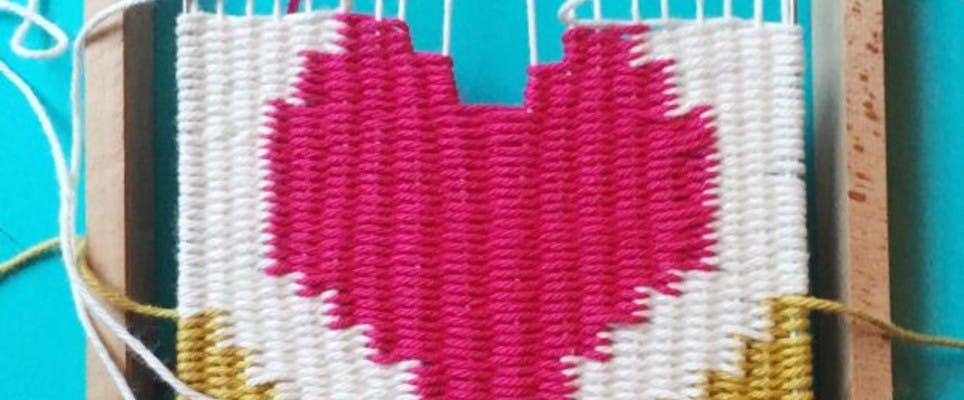
Looking for an alternative declaration of love? In this step-by-step free tutorial, Christine Leech from Sew Yeah! shows you how to weave a love heart wall-hanging that will surely make your partner’s heart flutter.
Materials
- Paintbox Yarns Cotton DK
- 1 ball of Vanilla Cream, Marine Blue, Mustard Yellow, Slate Green & Lipstick Pink
- Rico Weaving Loom Large
- Copper pipe 4 cm wider than your weave
- Scissor
- Eraseable pen
- Pack of 3 Wool Sewing Needles
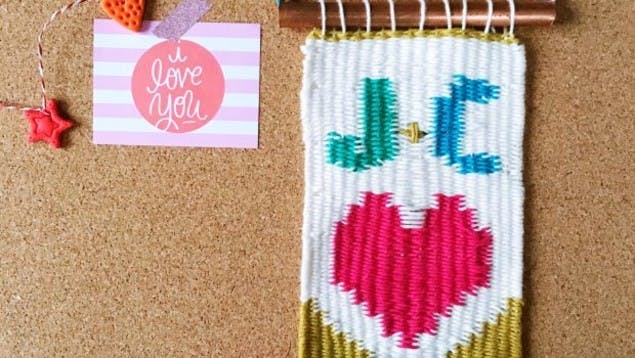
Declarations of love don't have to be saved for Valentine's Day! Why not try your hand at creating a love heart keepsake weave. It’s something that can stay up all year round on your love nest wall and can either declare your love for your other half or use your own initials to show yourself some big love.
Set the knitting loom up according to the products instructions. The warp threads are the ones on the loom running vertically and the weft is the yarn you use to weave with. I’ve set it up so it is one notch in from each side to make the weave slightly narrower. I’ve also marked the middle of the loom with a small piece of tape.
When you have decided the width of your weave, take a piece of paper and draw a rectangle the same size as the weave. Sketch out your heart and initials. Also cut out a heart the size of your sketched one.
Weaving the heart
1
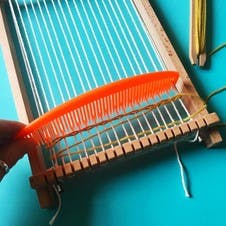
Begin with the Mustard Yellow yarn and weave 3 full rows.
Use the enclosed comb to push the weft (horizontal threads) down to the bottom.
2
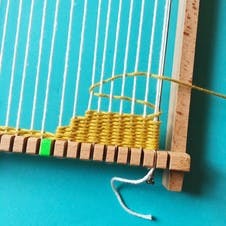
Then starting from the right hand side, weave three rows - stopping when you reach one of the middle warp threads.
3
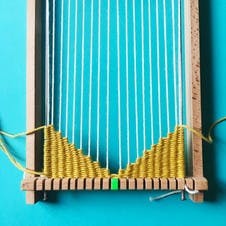
Keep weaving, decreasing the width of your weave by one warp thread every three rows till you are only weaving across two warp threads.
4
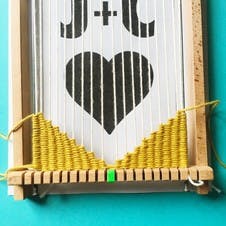
Repeat on the other side then place the sketch of your initials and the heart under the loom so you can check the progress of the pattern.
5
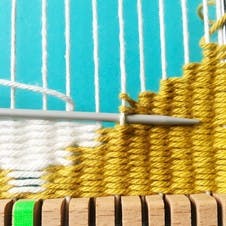
Next begin filling in the white area of the pattern.
It’s easier to use a wool needle instead of the shuttle when weaving small areas. Begin weaving at the bottom between the two Mustard Yellow triangles. When you reach the edge of the Mustard, weave pass the needle (loaded with the white yarn) between two rows of Mustard on the same warp thread and then return the other way.
This connects the rows of weaving.
6

Place the printout under the loom and also place the cut out heart on top of the weave so you can follow the progress of the design.
7
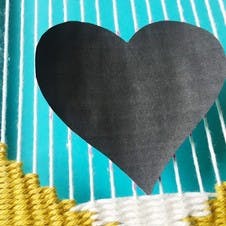
Use a pen to mark around the heart on the warp threads.
As this loom doesn’t have that many warp threads your heart shape can’t be as smooth as a loom that has many. Marking it out on the warp threads helps you keep the heart shape even.
8
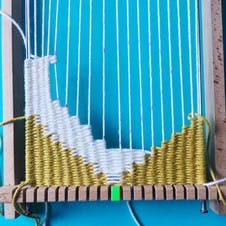
Work your way around the heart shape weaving the Vanilla yarn back and forth.
I found that reducing the width of the weave by one warp thread every two or three rows made a good shape.
Try to keep the tension consistent across the weave. Keep weaving till you reach the point the heart shape begins to turn inwards.
9
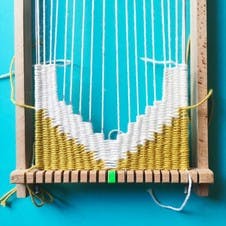
Repeat on the other side.
10
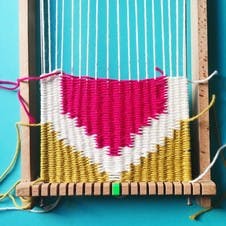
Next use the Lipstick Pink yarn to weave the heart shape, again pass the pink yarn between two rows of Vanilla yarn where they meet.
11
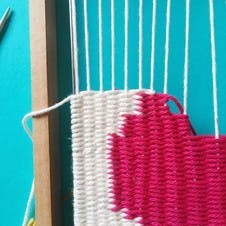
Gradually build up the top of the heart.
When working on more intricate sections of the weave it can be easier to weave a few Vanilla rows and a few Lipstick rows. This helps keep the tension even across the weave.
12
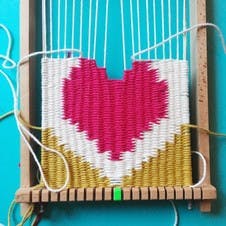
Repeat on the other side.
Pro Tip
You can see on my weave that I pulled the Lipstick Pink yarn too tight when working on the middle of the heart, and the warp threads have been pulled apart in the middle.
You can fix this by gradually easing the yarn looser across the weave using a needle or your fingers to release some yarn in each row.
Weaving the initials
1
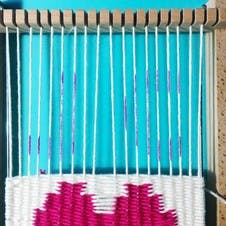
Finish the heart and then begin working on the letters.
Again place your template under the loom and then use a pen to draw the shape of the letters on the warp threads.
2
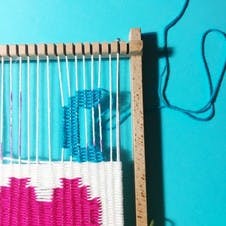
Beginning with one of the letters follow your pen marks to weave the shape using the Marine Blue yarn.
3
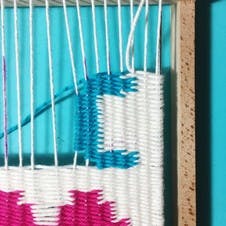
Fill the negative space around the letter with the Vanilla yarn.
4

Repeat with your other letter and the Slate Green yarn.
Then continue with the Vanilla yarn to within a couple of centimetres of the top of the loom.
5

Finish the weave with three rows of Mustard.
On the final row finish the weave off by passing the needle from the back to the front over one warp thread and then under the previous row of Mustard and then finally behind the next warp thread.
This stops the weave moving.
Finishing touches
1
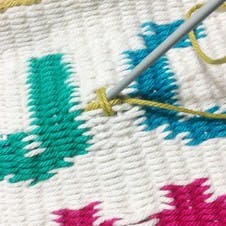
Use a small length of Mustard yarn to stitch a ‘plus’ sign between the two initials.
2
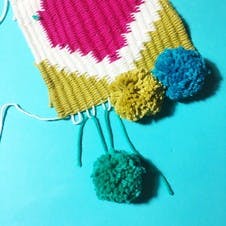
Make five pompoms, one in each colour used in the weave.
Remove the weave from the loom and then attach the pompoms to the bottom of the weave.
Take one pompom and then thread its two tails through two of the adjacent warp loops on the weave.
Then tie in a double knot to secure.
3

Repeat with the other four pompoms.
4
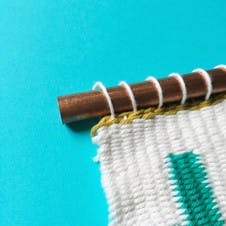
Thread your copper pipe through the warp loops at the top.
5
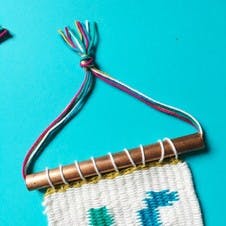
Cut five 30 cm lengths of yarn.
One of each colour then thread them through the copper pipe and tie in a knot to hang.
Voila! Your love heart wall hanging is ready to adorn the walls and declare your love all year round!
