Crochet Winston, the cutest amigurumi dog!
Published on April 28, 2022 By Sarah 2 min read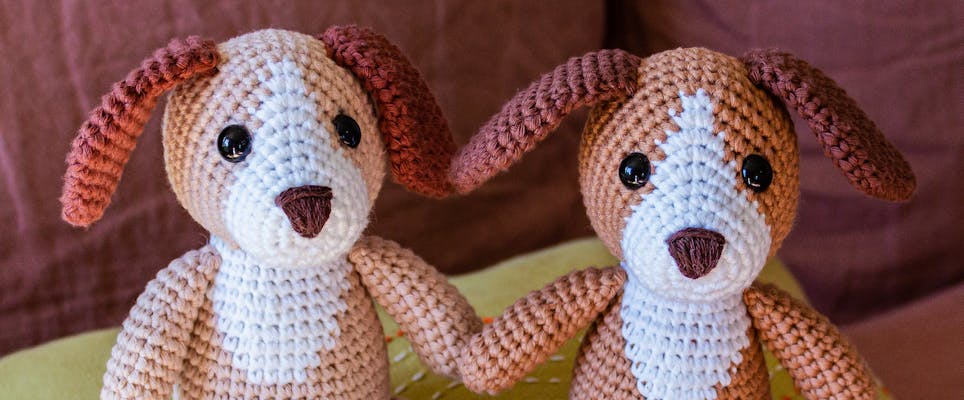
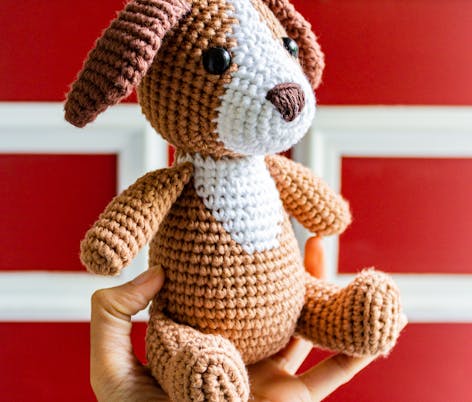
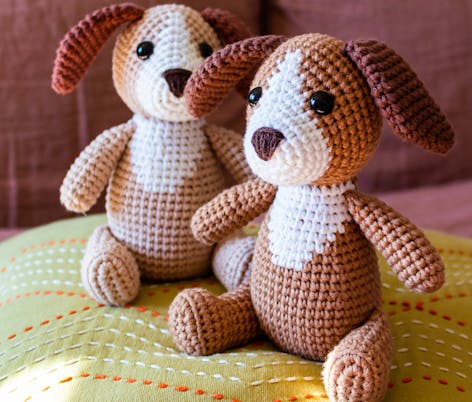
Meet Winston the amigurumi puppy, designed by the fabulous Rupinder Kaur from the Love & Stitch Co! This dapper little fellow is the most loyal friend around. Winston’s droopy ears and perky nose make this hound a trusty companion for adventures big and small! We’ve made him in a lovely chocolate brown, but Winston would look just as sweet in any color.
A few things to note
- The puppy is approximately 6.5in tall.
- The pattern can be made with any 4-ply or worsted weight yarn.
- The size of the toy may vary depending on the size of the hook and yarn used.
- The body is worked from bottom to top. The head, ears, arms, legs and tail are made separately and then attached to the body.
- Work in continuous rounds, without joining the round with a slip stitch. Do not turn at the end of each round unless directed to.
- Use a stitch marker to keep track of the beginning of each round.
- We recommend using invisible decrease to avoid the gap in the stitches.
- Firmly stuff as you work and overstuff slightly before finishing the section you are working on. This will allow for the stuffing to fill out the shape after the crocheting is done.
This pattern uses US terminology
MR - magic ring
sc - single crochet
ch(s) - chains
inc - increase
st(s) - stitches
dec - decrease
sl st - slip stitch
F/O - fasten off
( ) - repeat the steps in brackets
[ ] - total # of sts per round
Materials
- Paintbox Yarns Cotton Aran
- In shades: Soft Fudge (610)
- Paper White (601)
- Coffee Bean (611)
- 3.25mm crochet hook
- Trimits Toy Filling / Stuffing: 400gm
- Trimits Toy Eyes Solid Black
- Stitch marker
- Tapestry needle
- Black yarn
How to crochet Winston's head
1
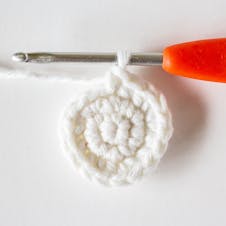
Using the Paper White yarn, begin with an MR
Round 1: 6 sc in MR [6]
Round 2: (inc) x 6 [12]
Round 3: (inc, inc, 2 sc) x 3 [18]
Round 4: 1 sc, (inc) x 2, (4 sc, inc, inc) x 2, 3 sc [24]
Round 5: sc in each st around [24] Round 6: 10 sc, (inc) x 2, 12 sc, [26] Round 7: 11 sc, (inc) x 2, 13 sc [28]
Round 6: 10 sc, (inc) x 2, 12 sc, [26] Round 7: 11 sc, (inc) x 2, 13 sc [28]
Round 7: 11 sc, (inc) x 2, 13 sc [28]
2
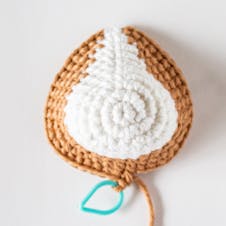
We will be joining Soft Fudge yarn in the next round.
Round 8: color A 10 sc; color B 2 sc, (inc) x 2, 2 sc; color A 12 sc [30]
Round 9: color A 2 sc, (inc) x 2, 8 sc; color B 1 sc, (inc) x 2, 1 sc; color A 8 sc, (inc) x 2, 4 sc [36]
Round 10: color A 3 sc, (inc) x 2, 11 sc; color B (inc) x 2; color A 11 sc, (inc) x 2, 5 sc [42]
Round 11: color A 19 sc; color B 2 sc; color A 21 sc [42]
F/O Paper White yarn, continue in Soft Fudge yarn only.
3
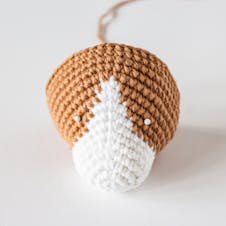
Round 12: (6 sc, inc) x 6 [48]
Round 13-16: sc in each st around [48]
Using the white portion as the top centre of the face, insert the eyes between rounds 9 and 10, about 10 sts apart.
4
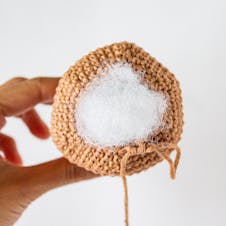
Round 17: (6 sc, dec) x 6 [42]
Round 18: (5 sc, dec) x 6 [36]
Round 19: (4 sc, dec) x 6 [30]
Round 20: (3 sc, dec) x 6 [24]
Start stuffing the head with as you work along.
5
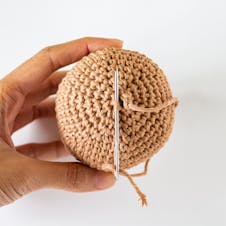
Round 21: (2 sc, dec) x 6 [18]
Round 22: (sc, dec) x 6 [12]
Round 23: (dec) x 6 [6] Winston the Puppy Love and Stitch Co.
Fill the head with stuffing firmly. F/O and thread tail end of yarn onto a tapestry needle, insert the needle in and out of the front loops of the remaining sts, pull tight to close and weave in the end.
How to crochet Winston's body
1
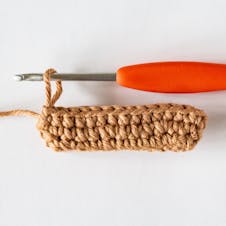
Using Soft Fudge yarn, ch 12
Round 1: sc in the 2nd ch from the hook, sc in next 9 chs, 3 sc in the last ch, Working on the other side of the ch, sc in next 9 chs, 2 sc in the last ch where you started from. [24]
Round 2: (3 sc, inc) x 6 [30]
Round 3: sc in each st around [30]
Round 4: (4 sc, inc) x 6 [36]
Round 5: sc in each st around [36]
2
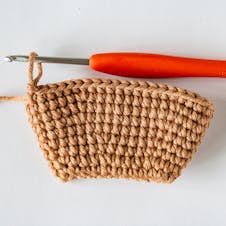
Round 6: 4 sc, inc; (8 sc, inc) x 3; 4 sc [40]
Round 7: sc in each st around [40]
Round 8: 5 sc, inc; (9 sc, inc) x 3; 4 sc [44]
Round 9-11: sc in each st around [44]
Round 12: 4 sc, dec; (9 sc, dec) x 3; 5 sc [40]
Round 13-14: sc in each st around [40]
3
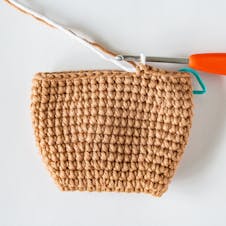
Join Paper White yarn in the next round.
Round 15: color A 4 sc, dec, 3 sc; color B 4 sc; color A 1 sc, dec, (8 sc, dec) x 2, 4 sc [36]
Round 16: color A 7 sc, color B 6 sc; color A 23 sc [36]
Round 17: color A 6 sc, color B 8 sc; color A 22 sc [36]
Round 18: color A 4 sc; color B dec, 4 sc, dec, 3 sc; color A 1 sc, dec, (4 sc, dec) x 3 [30]
4
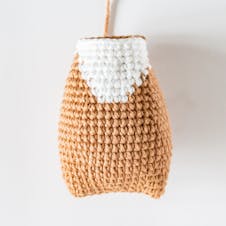
Round 19: color A 3 sc; color B 11 sc; color A 16 sc [30]
Round 20: color A 2 sc; color B 13 sc; color A 15 sc [30]
Round 21: color B (dec, 3 sc) x 3, dec; color A (3 sc, dec) x 2, 3 sc [24] Round 22-23: color B 14 sc, color A 10 sc [24]
Round 22-23: color B 14 sc, color A 10 sc [24]
Sl st into next st and F/O leaving a very long tail for sewing. Firmly stuff the body with stuffing.
How to make Winston's arms
1
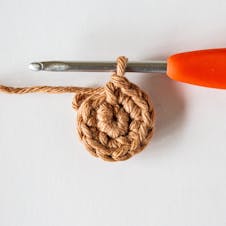
Using Soft Fudge yarn, begin with an MR
2
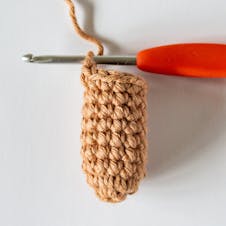
Round 1: 6 sc in MR [6]
Round 2: (inc) x 6 [12]
Round 3-8: sc in each st around [12]
Round 9: dec, 10 sc around [11]
Round 10: dec, 9 sc around [10]
Round 11-13: sc in each st around [10]
3
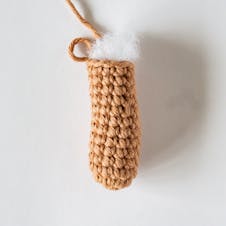
Stuff the arm lightly. Flatten the top of the arm together, sc through both sides in the next 4 sts. F/O leaving a tail for sewing.
Repeat for the second arm.
How to make Winston's legs
1
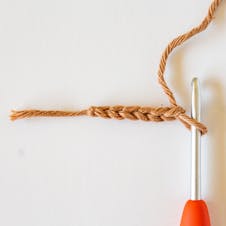
Using Soft Fudge yarn, ch 6
2
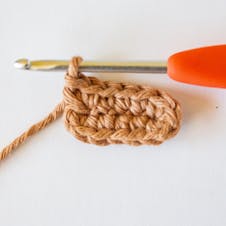
Round 1: 2 sc in the 2nd ch from the hook, sc in next 3 chs, 4 sc in last ch, Working on the other side of the ch, sc in next 3 chs, 2 sc in last ch Where you started. [14]
3
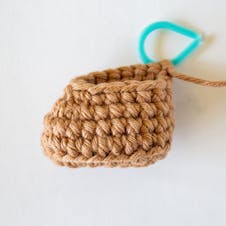
Round 2: inc, 3 sc; (inc) x 6; 3 sc, inc [22]
Round 3: sc in each st around BLO [22]
Round 4: sc in each st around [22]
Round 5: 7 sc; (dec) x 4; 7 sc [18]
Round 6: 6 sc; (dec) x 3; 6 sc [15]
Round 7-13: sc in each st around [15]
4
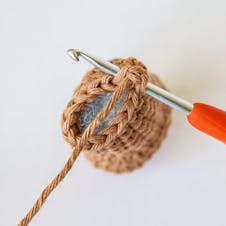
Stuff the foot as you work along the leg
5
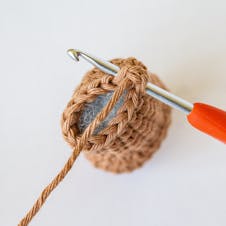
Sc in next 2 sts only. This is done to make sure the top of the foot points outwards when we sew the legs. Stuff and shape the foot firmly and stuff the leg but not quite to the top. Flatten the top of the leg together, and sc in the next 6 sts through both sides. F/O leaving a long tail for sewing.
6
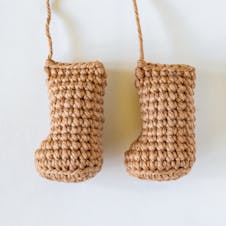
Repeat for the second leg.
How to make Winston's ears
1
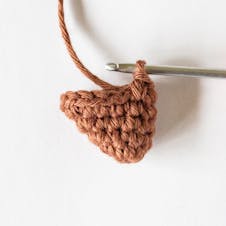
Using Coffee Bean yarn, begin with a MR
Round 1: 6 sc in MR [6]
Round 2: 3 sc in next st, 5 sc [8]
Round 3: 1 sc, 3 sc in next st, 6 sc [10]
Round 4: 2 sc, 3 sc in next st, 7 sc [12]
Round 5: 3 sc, 3 sc in next st, 8 sc [14]
Round 6-10: sc in each st around [14]
Round 11: 3 sc, (dec) x 2, 7 sc [12]
Round 12-13: sc in each st around [12]
Round 14: 2 sc, (dec) x 2, 6 sc [10]
Round 15: 2 sc, dec, 6 sc [9]
2
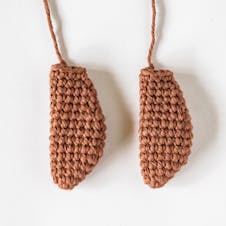
Sl st into next st and F/O leaving a tail for sewing. Do not stuff the ears, only flatten them in half.
How to Winston's tail
1
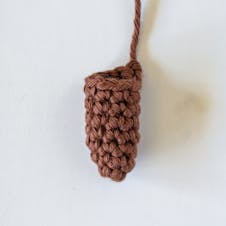
Using Coffee Bean yarn, begin with a MR
Round 1: 6 sc in MR [6]
Round 2: inc, 5 sc [7]
Round 3: inc, 6 sc [8]
Round 4: inc, 7 sc [9]
Round 5-8: sc in each st around [9]
2
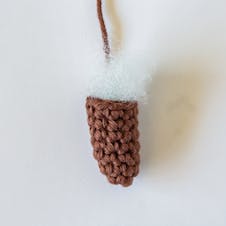
Sl st into next st and F/O leaving a long tail for sewing. Fill the tail with fiberfill lightly.
How to assemble Winston
1
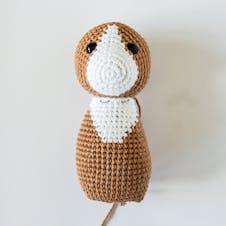
Fill the body generously with stuffing. Position the head on the body, so that the front of the head is aligned to the front of the body.
Secure the head with bobbin pins. Sew the head to the body using the neat sts. Before finishing the sewing, add some additional stuffing to the body and fill out any empty space between the head and body.
2
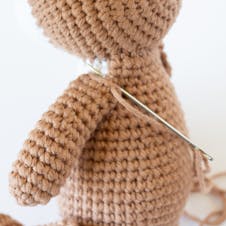
Position the arms on each side of the body directly under the head. Sew them neatly into place.
3
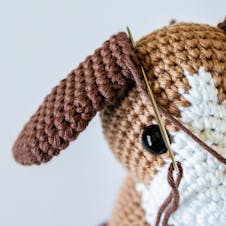
Sew the ears neatly into place on each side of the head.
4
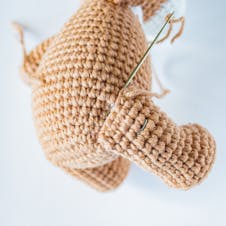
Position the legs on the lower side of the body. Make sure that the feet are in the right position. You can sew 1-2 sts from where legs meet the body so they don’t flare out too much.
5
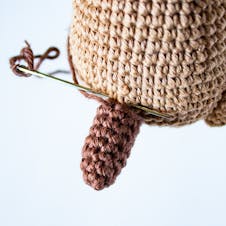
Centre the tail to the bottom of the body and sew it neatly.
6
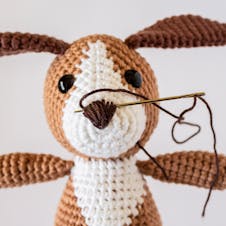
Using the Coffee Bean yarn, embroider the nose on rounds 1 to 4 of the head.

