Oh Deer! Crochet a baby deer hat
Published on October 16, 2019 2 min read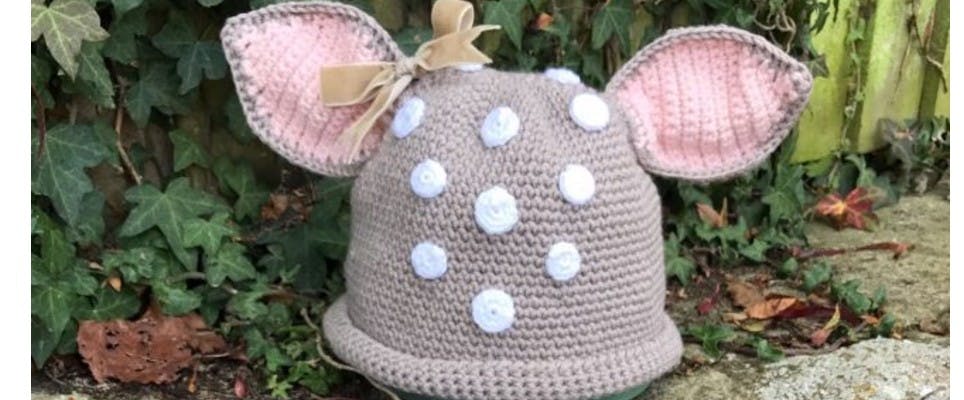
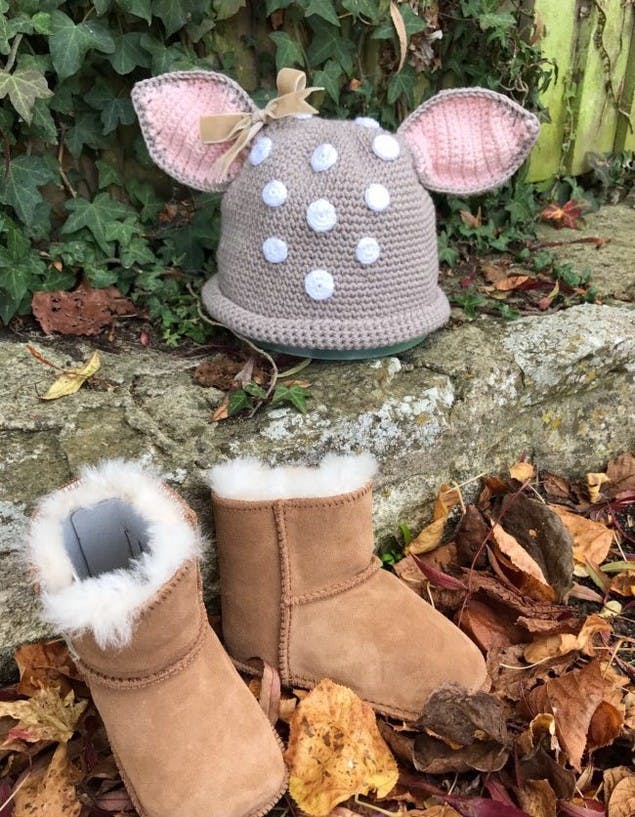
As the chilly weather begins to creep in what could be more adorable than crocheting up this doe-tally delightful baby deer hat by Kate Eastwood. In this step-by-step guide, she'll teach you how to craft the cutest fauna themed winter accessory complete with adorable ears and spots! Perfect for keeping your own little fawn snug on those frosty forest walks.
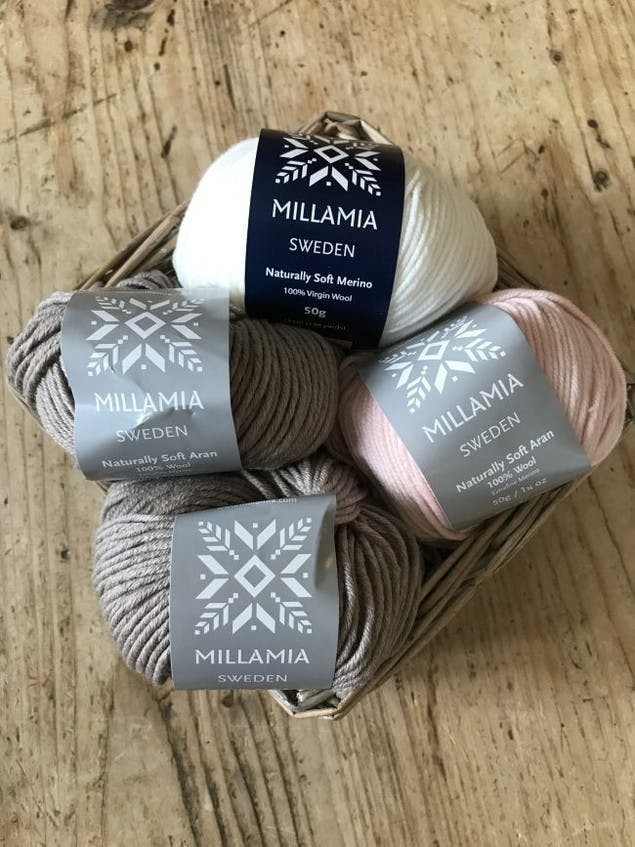
For my baby deer hat I used MillaMia Naturally Soft Aran as this works up to give a beautifully soft and warm texture. I used 2 x balls of LATTE 203 and 1 x ball of BLUSH 229. The main body of the hat is worked with a 5mm hook.
The ears are worked with a 4mm hook.
For the spots I used MillaMia Naturally Soft Merino in ICE 125 and worked with a 3mm hook.
The hat is worked in a continuous round and I used a stitch marker to mark the beginning of each round whilst working.
Note: this tutorial is written in UK crochet terms.
Materials
- MillaMia Naturally Soft Aran
- MillaMia Naturally Soft Merino
- KnitPro Waves Crochet Hook
- KnitPro Locking Stitch Markers
The finished measurements of the hat are:
Diameter around bottom approx 48cm.
Width under deer ears: approx. 16cm.
Height from bottom of folded up brim to top of hat: approx. 15cm.
So let's begin with the main part of the hat, made in deliciously soft Latte.
To make the hat
1
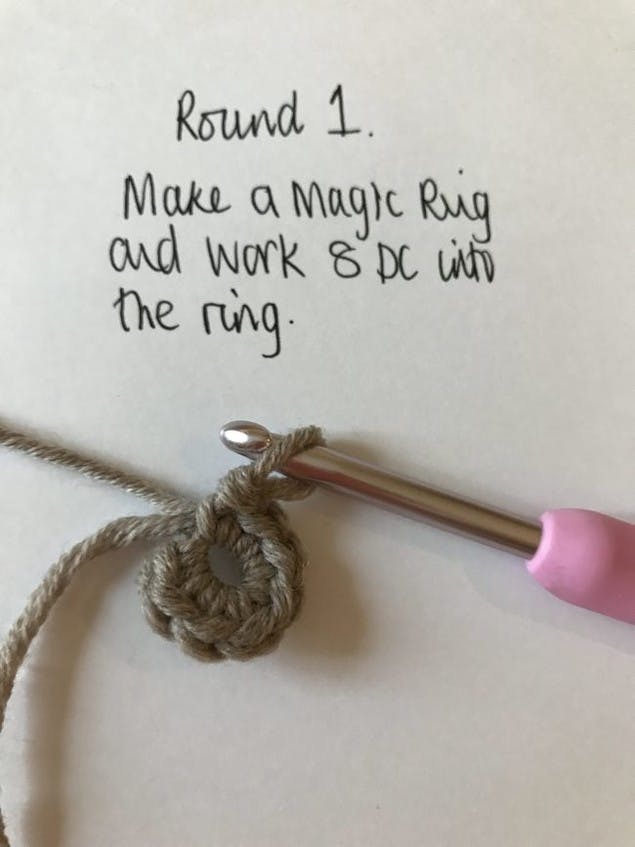
Round 1: Using a 5mm hook and the LATTE make a magic Ring and work 8 DC in to the ring.
2
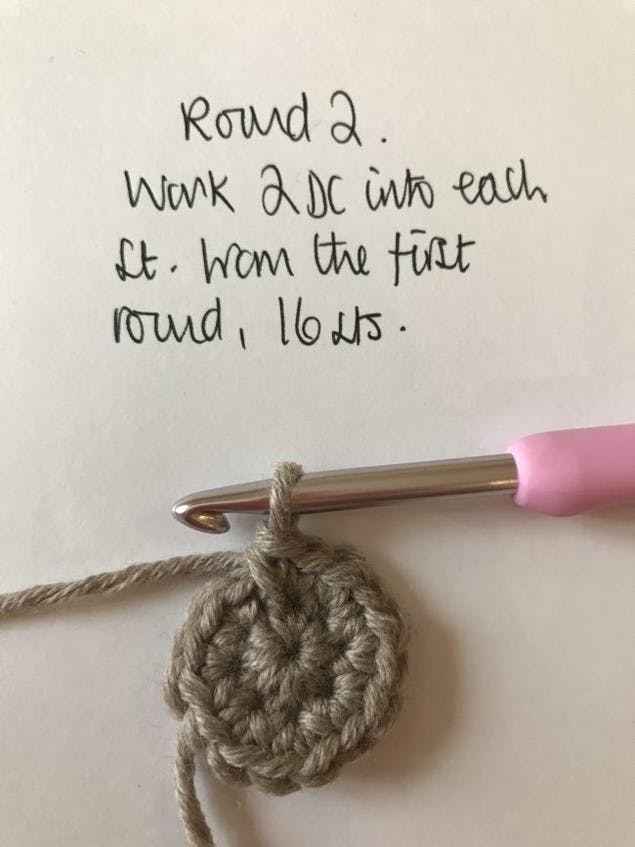
Round 2: Work 2 DC in to each stitch from Round 1, 16sts.
3
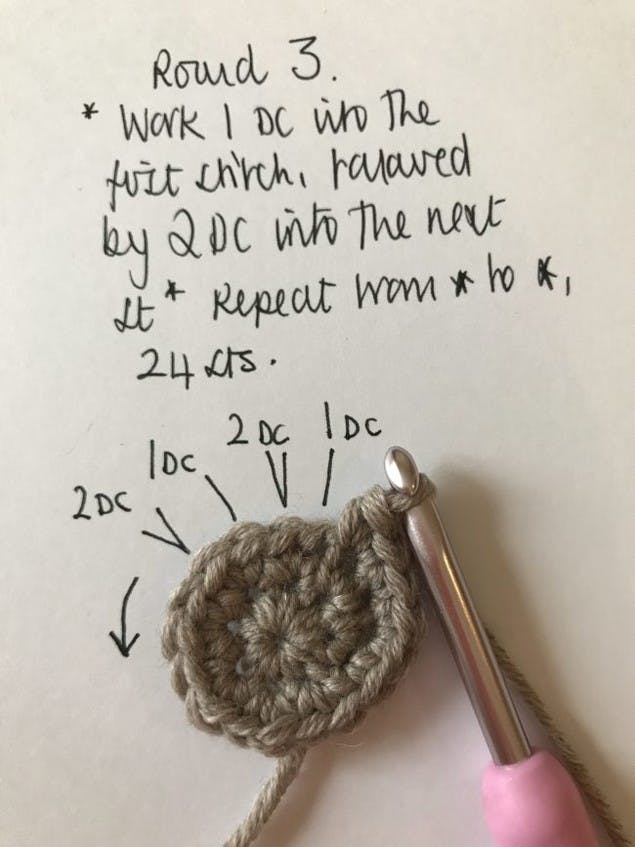
Round 3: *Work 1 DC in to the first stitch and then two DC in to the next stitch*. Repeat from * to *all the way around. 24 sts.
4
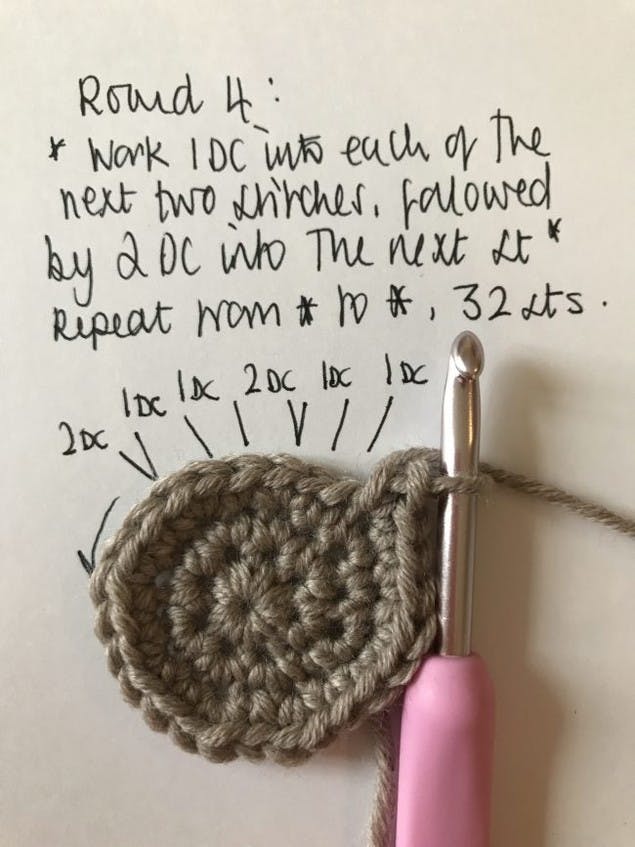
Round 4: *Work 1 DC in to the each of the next 2 stitches and then two DC in to the next stitch*. Repeat from * to * all the way around. 32 sts.
5
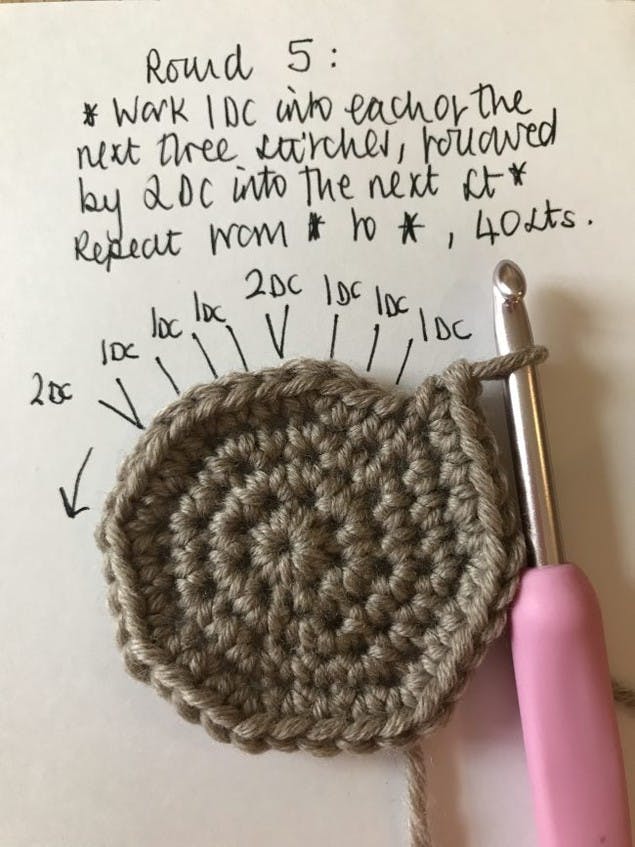
Round 5: *Work 1 DC in to the each of the next 3 stitches and then two DC in to the next stitch*. Repeat from * to * all the way around. 40 sts.
6
Round 6: *Work 1 DC in to the each of the next 4 stitches and then two DC in to the next stitch*. Repeat from * to * all the way around. 48 sts.
7
Round 7: *Work 1 DC in to the each of the next 5 stitches and then two DC in to the next stitch*. Repeat from * to * all the way around. 56 sts.
8
Round 8: *Work 1 DC in to the each of the next 6 stitches and then two DC in to the next stitch*. Repeat from * to * all the way around. 64 sts.
9
Rounds 9 to 11: Work a round of DC, 64 sts.
10
Round 12: *Work 1 DC in to the each of the next 7 stitches and then two DC in to the next stitch*. Repeat from * to * all the way around. 72 sts.
11
Rounds 13 to 15: Work a round of DC, 72 sts.
12
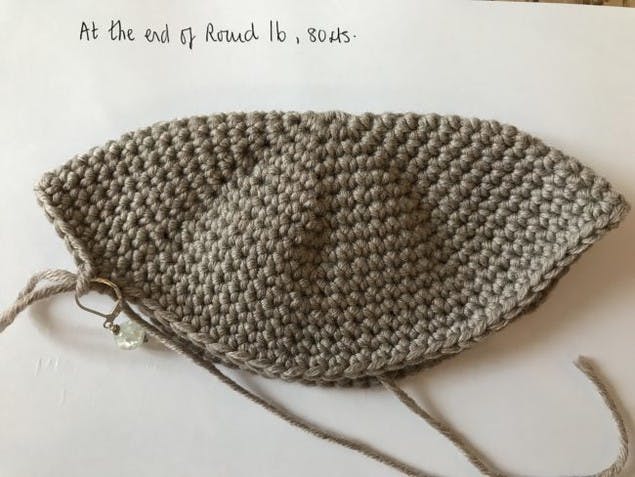
Round 16: *Work 1 DC in to the each of the next 8 stitches and then two DC in to the next stitch*. Repeat from * to * all the way around. 80 sts.
12
Rounds 17 to 24: Work a round of DC, 80 sts.
13
Round 25: *Work 1 DC in to the each of the next 9 stitches and then two DC in to the next stitch*. Repeat from * to * all the way around. 88 sts.
14
Rounds 26 to 37: Work a round of DC, 88 sts.
15
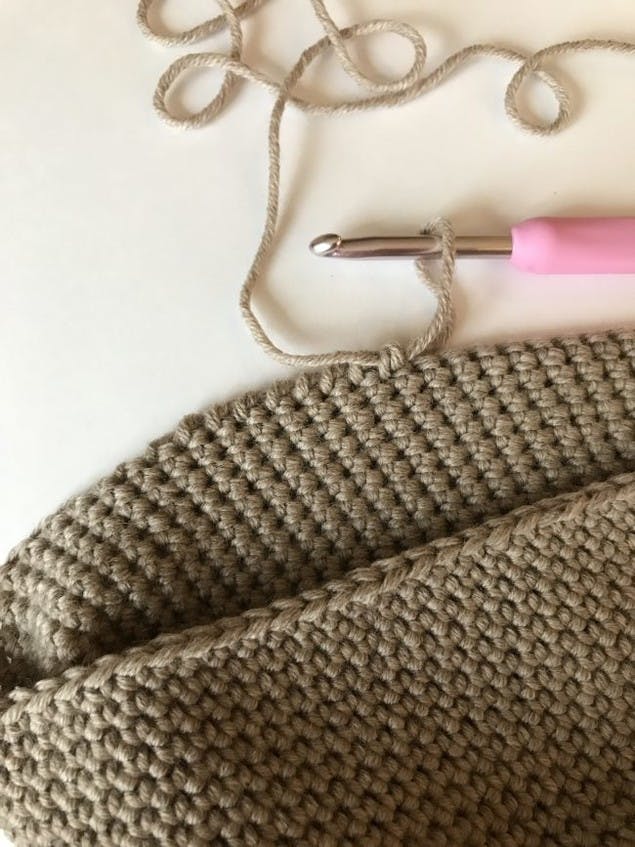
To finish off the edge of the hat I worked a round of Rope Stitch (DC worked clockwise as opposed to the usual anti-clockwise.) I worked this with the wrong side facing so that when the bottom edge of the hat is folded up the rope stitch is on the right side.
16
Finish off and sew in the ends.
17
Fold the bottom of the hat up to create a small brim.
To make the ears
1
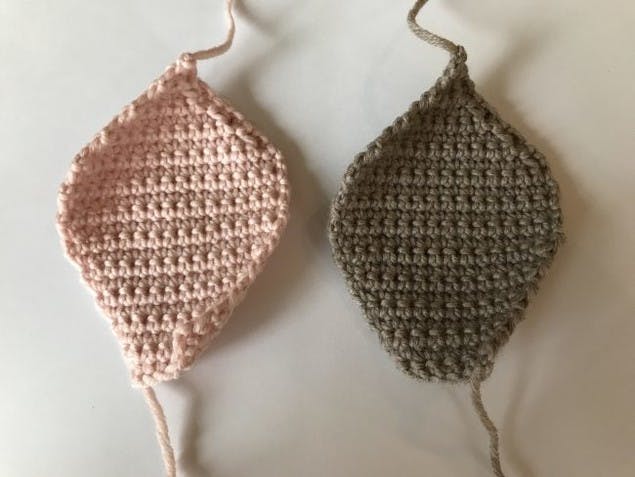
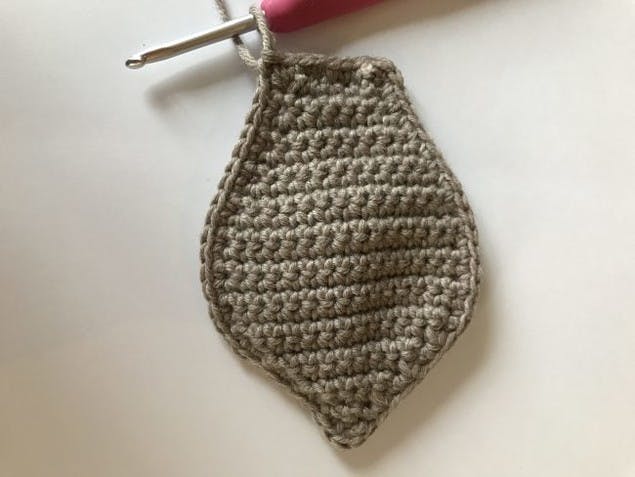
You are going to make Make 2 x LATTE and 2 x BLUSH for the inside and outside of your deer ears. Using a 4mm hook chain 8.
2
Rows 1 and 2: Work a row of 7 DC, chain 1 and turn at the end of this row and all following rows.
3
Row 3: Increase in the first and last stitch, 9 sts.
4
Row 4: Work a row of DC, 9 sts.
5
Row 5: Increase in the first and last stitch, 11 sts.
6
Row 6: Work a row of DC, 11 sts.
7
Row 7: Increase in the first and last stitch, 13 sts.
8
Row 8: Work a row of DC, 13 sts.
9
Row 9: Increase in the first and last stitch, 15 sts.
10
Rows 10 to 15: Work a row of DC, remembering to chain 1 and turn at the end of each row, 15 sts.
11
Row 16: Decrease (by working 2 DC together) at the beginning and end of the row, 13 sts.
12
Row 17: Decrease (by working 2 DC together) at the beginning and end of the row, 11 sts.
13
Row 18: Decrease (by working 2 DC together) at the beginning and end of the row, 9 sts.
14
Row 19: Decrease (by working 2 DC together) at the beginning and end of the row, 7 sts.
15
Row 20: Decrease (by working 2 DC together) at the beginning and end of the row, 5 sts.
16
Row 21: Decrease (by working 2 DC together) at the beginning and end of the row, 3 sts.
17
Row 22: Decrease at the beginning of the row (by working 2 DC together) , DC 1, 2sts.
18
Row 23: Work the last 2 stitches together and finish off.
19
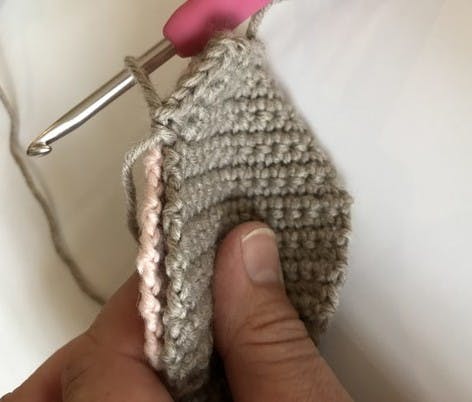
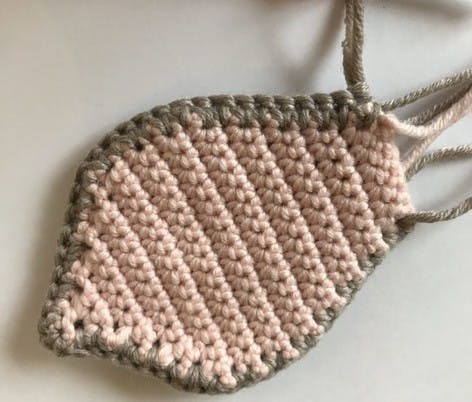
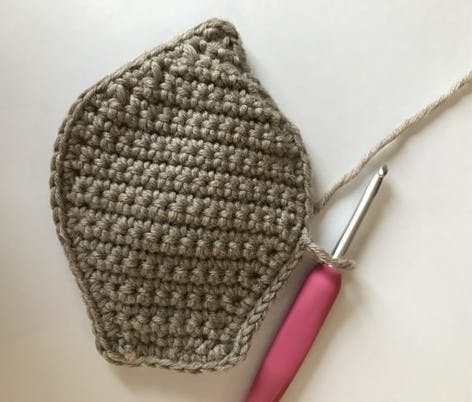
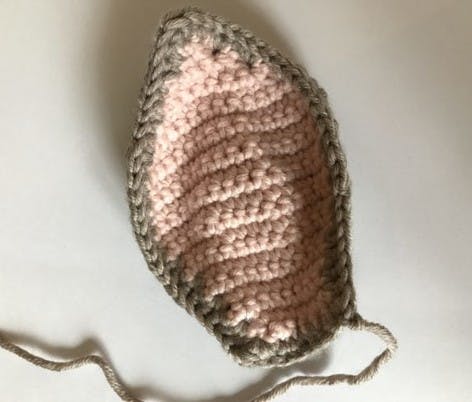
Place one of the pink ears and one of the brown ears on top of each other, wrong sides together and with the LATTE DC all the way around the edge to join the two together. When you get to the bottom of the ear push all your ends inside and DC along the bottom edge.
20
Work one further round of SL ST, all the way around the ear. This creates a good, firm edge and will give the ear some rigidity. Finish off leaving a long tail for when you attach the ears to the hat.
To make the spots
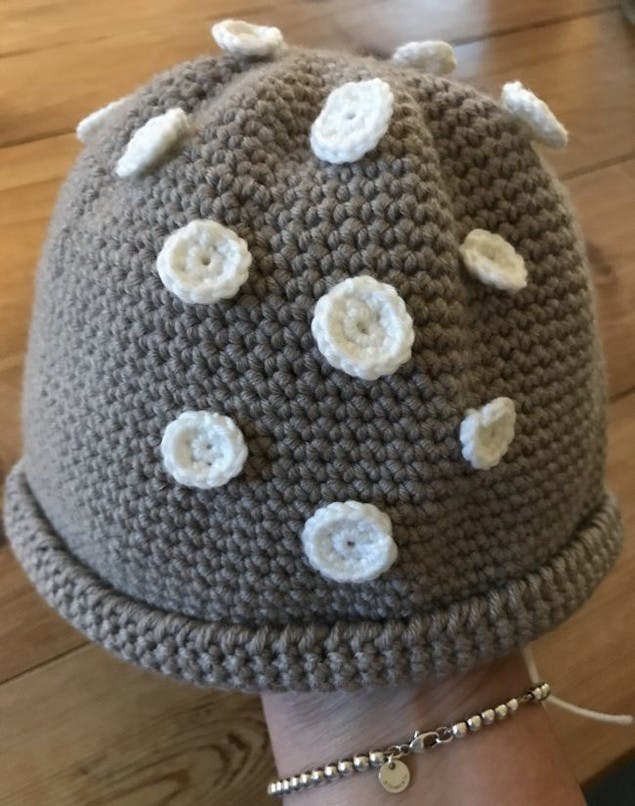
These are worked in the Millamia Soft Merino ICE and worked with a 3 mm hook. I made three different sized spots so that when they are sewn on to the hat they can graduate back in size with small at the front, working to larger at the back.
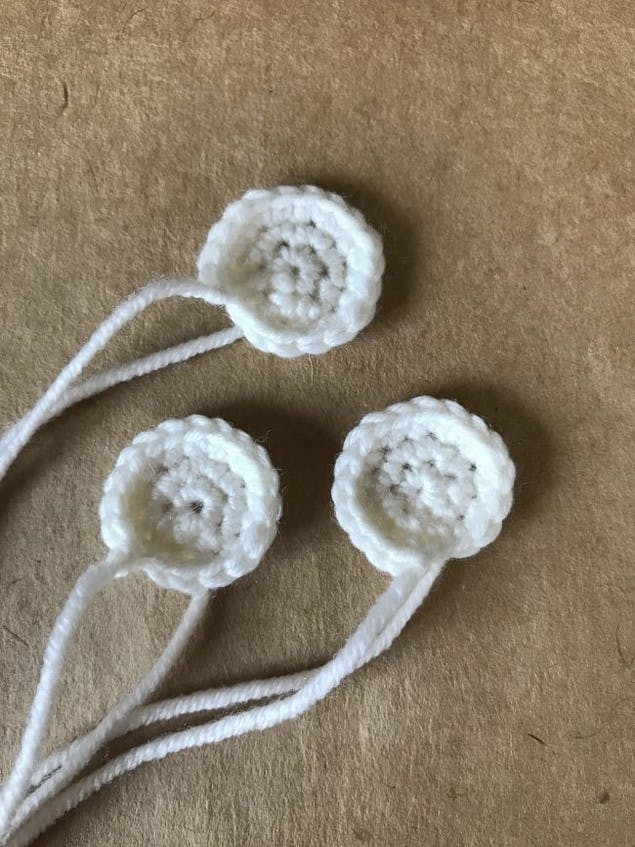
Small Spots
1
Round 1: Make a Magic Ring and work 6 DC in to the ring.
2
Round 2: Work 2 DC in to each stitch from round 1, 12 sts. Finish off.
Medium spots
1
Round 1: Make a Magic Ring and work 8 DC in to the ring.
2
Round 2: Work 2 DC in to each stitch from round 1, 16 sts. Finish off.
Large spots
1
Round 1: Make a Magic Ring and work 10 DC in to the ring.
2
Round 2: Work 2 DC in to each stitch from round 1, 20 sts. Finish off.
I made a total of 14 spots altogether, in a combination of the different sizes.
To finish the hat
1
Position your spots in the central section of the hat and stitch in to place.
2
Stitch the ears firmly to the sides of the hat by working stitches at both the front edge and the back so that the ears are held securely in place.
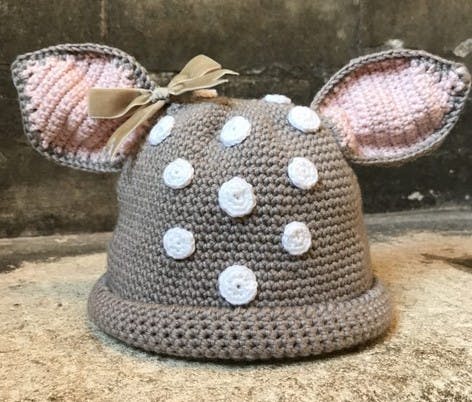
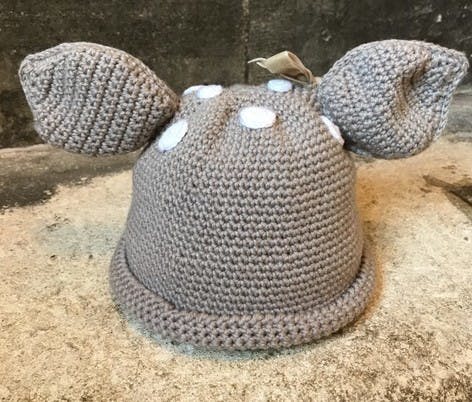
And there you have it, your cozy baby deer hat is ready!
