How to crochet a chick motif
Published on April 3, 2019 By Sian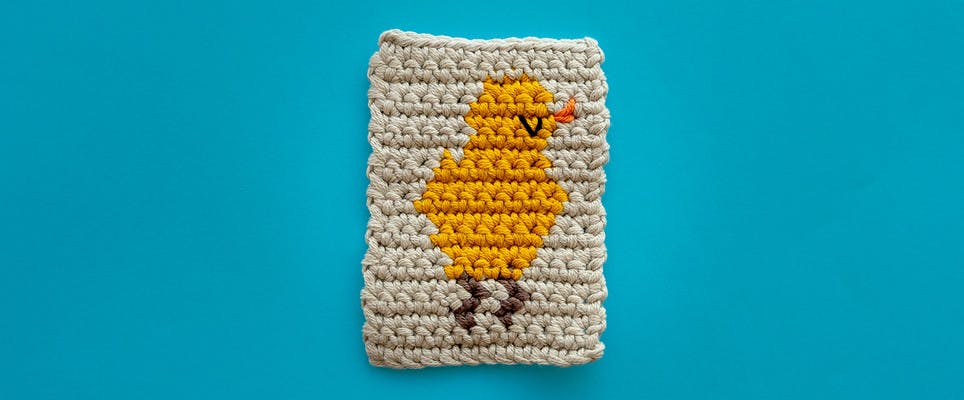
The Almond Snug has created a wonderful, FREE tutorial for you to make your very own crochet patch with a chick motif. Add it to your bag or jacket to put a little spring in your step!
Materials
- DMC Natura Just Cotton
- 2 balls of Sable (03)
- 1 ball of Ombre (39)
- 1 ball of Giroflee (85)
- Hemline Plastic Yarn Sewing Needles (Set of 4)
- KnitPro Waves Crochet Hook
- Size 2.75mm
- A small amount of orange and black embroidery thread
Pattern notes:
Yarn A: Sable (03)
Yarn B: Ombre (39)
Yarn C: Giroflee (85)
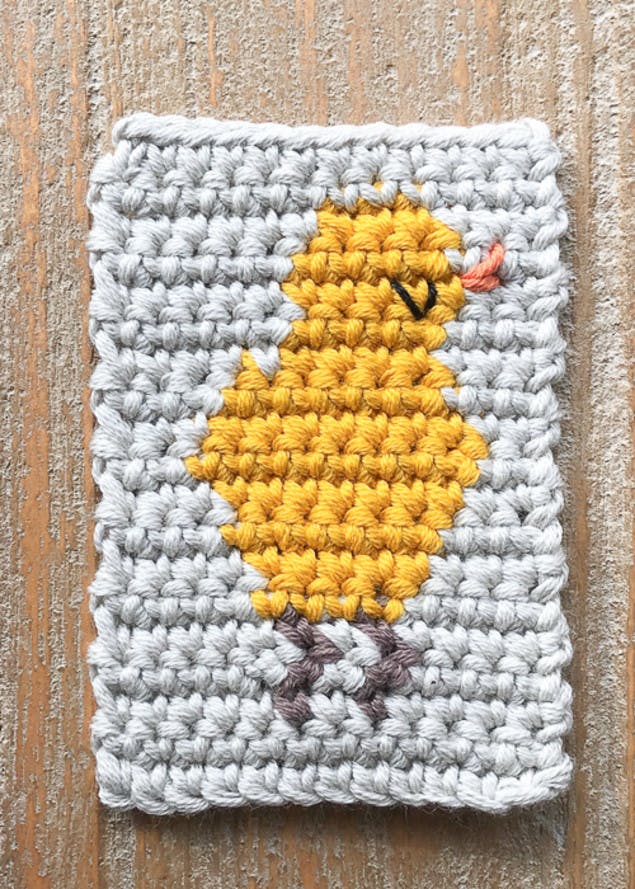
Finished size: 2.75 inches (7cm) x 2 inches (5cm)
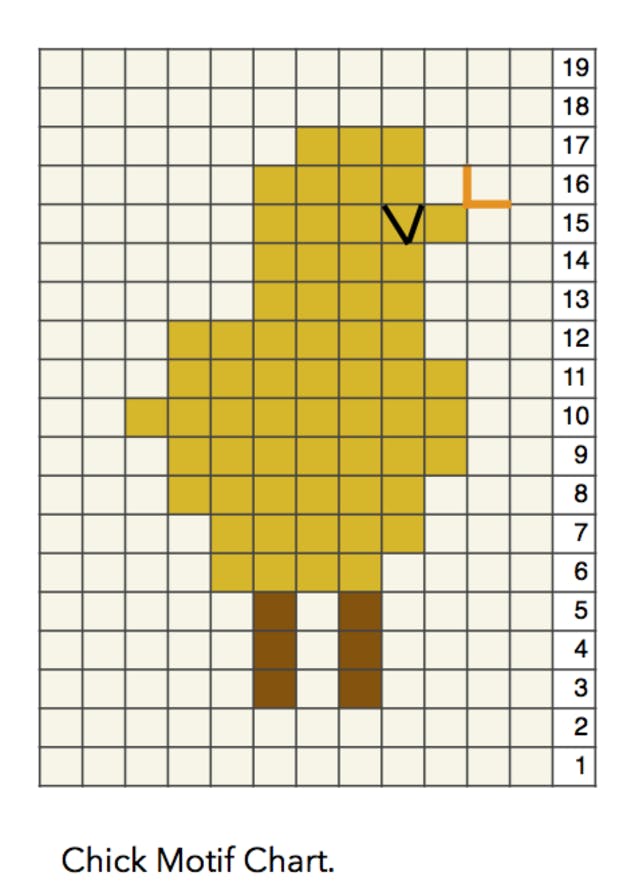
When referring to the chart read all odd (rs) rows from right to left and all even (ws) rows from left to right.
If you are a left-handed maker you will need to add an extra row at the beginning and reverse the rs and ws so read all odd (ws) left to right and all even rows (rs) right to left.
How to crochet the chick motif patch
Getting started
Foundation: Foundation: Using yarn A, 13ch.
Row 1: Row 1: 1sc in second ch from hook, 11sc, turn. (12sc)
Row 2: 1ch (does not count as a st here and throughout), 12sc, turn.
Working row 3
Pro Tip
I prefer to use the intarsia method, starting a new length of yarn for each change of color and keeping all strands on the ws of work. I only carry yarn when it is for a few sts in a small section, like here for the legs.
A
1ch, 4sc using yarn A,
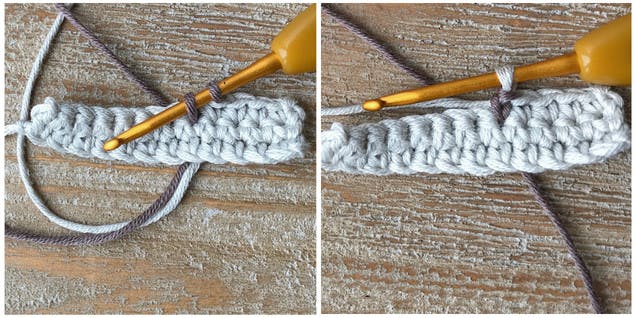
To change color, work only the first yrh of the last st in A before joining yarn B and work the last yrh with B.

B
1sc using yarn B
This time, work only the first yrh of the last st in B before changing back to A for the last yrh
1sc using yarn A
C
Always begin the color change in the previous st, then continue to work each st in the yarn indicated.
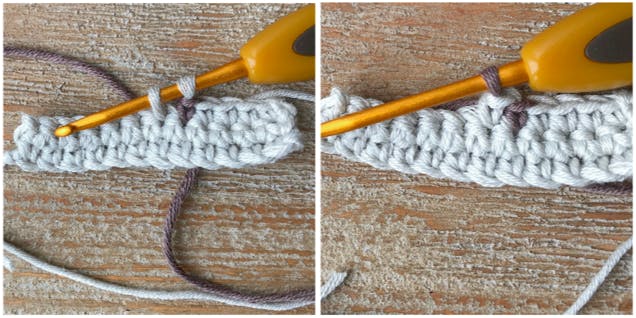
D
1sc in yarn B, 5sc in yarn A
To minimize the crossing of yarn join a new strand of A to work the sts on this side.
Turn.
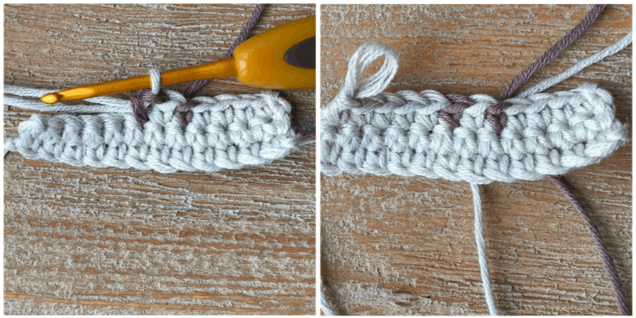
Continuing the colorwork
For the next row you will be working from the ws, remember to keep moving all strands to this side as you change color and pick up and drop the colors as required
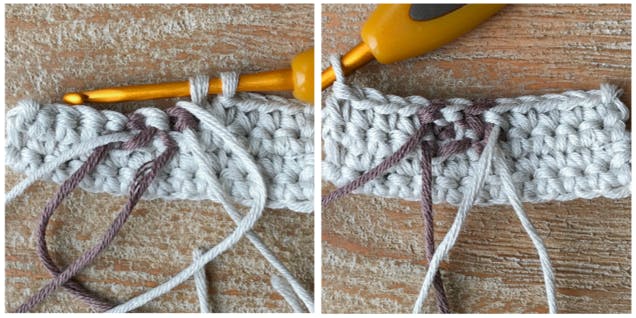
A
Row 4: 1ch, 5sc in yarn A, 1sc in yarn B, 1sc in yarn A, 1sc in yarn B, 4sc in yarn A, turn.
Row 5: 1ch, 4sc in yarn A, 1sc in yarn B, 1sc in yarn A, 1sc in yarn B, 5sc in yarn A, turn.
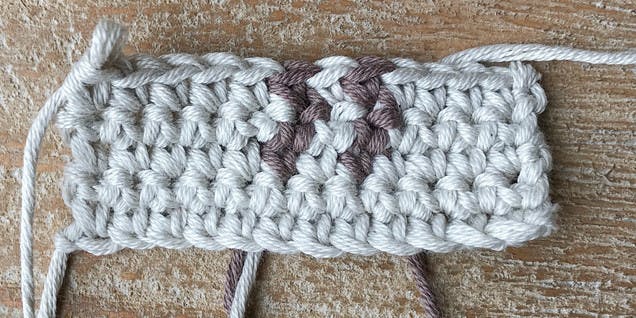
Pro Tip
You have now finished with B so you can cut any excess yarn.
B
Row 6: 1ch, 4sc in yarn A, 4sc in yarn C, 4sc in yarn A, turn.
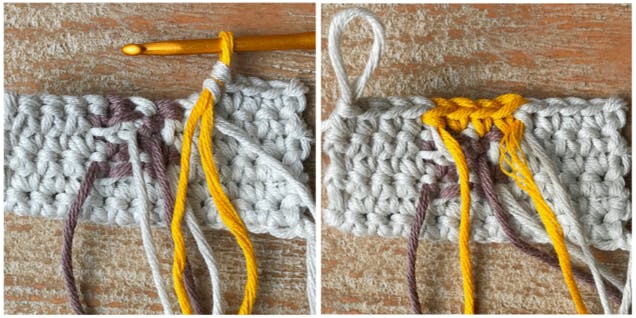
Pro Tip
Continue working the sts in the colors as indicated. If your yarn begins to tangle cut the yarn, leaving a 3yrd (3m) tail and pull the tail through the tangle to release.
Continue working in pattern
Row 7: 1ch, 3sc in yarn A, 5sc in yarn C, 4sc in yarn A, turn.
Row 8: 1ch, 3sc in yarn A, 6sc in yarn C, 3sc in yarn A, turn.
Row 9: 1ch, 2sc in yarn A, 7sc in yarn C, 3sc in yarn A, turn.
Row 10: 1ch, 2sc in yarn A, 8sc in yarn C, 2sc in yarn A, turn.
Row 11: 1ch, 2sc in yarn A, 7sc in yarn C, 3sc in yarn A, turn.
Row 12: 1ch, 3sc in yarn A, 6sc in yarn C, 3sc in yarn A, turn.
Row 13: 1ch, 3sc in yarn A, 4sc in yarn C, 5sc in yarn A, turn.
Row 14: 1ch, 5sc in yarn A, 4sc in yarn C, 3sc in yarn A, turn.
Row 15: 1ch, 2sc in yarn A, 5sc in yarn C, 5sc in yarn A, turn.
Row 16: 1ch, 5sc in yarn A, 4sc in yarn C, 3sc in yarn A, turn.
Row 17: 1ch, 3sc in yarn A, 3sc in yarn C, 6sc in yarn A, turn.
Row 18: 1ch, 12sc in yarn A, turn.
Row 19: 1ch, 12sc in yarn A, turn.
Fasten off.
Finishing off
To manage the ends you can either tie 2 ends which are located close together with a square knot and trim, or weave the ends through a few sts and trim.
Referring to the chart, use backstitch and 3 strands of black embroidery thread to add the eye to the chick and use orange yarn or thread to add the beak.
Wet block or steam on the ws.
