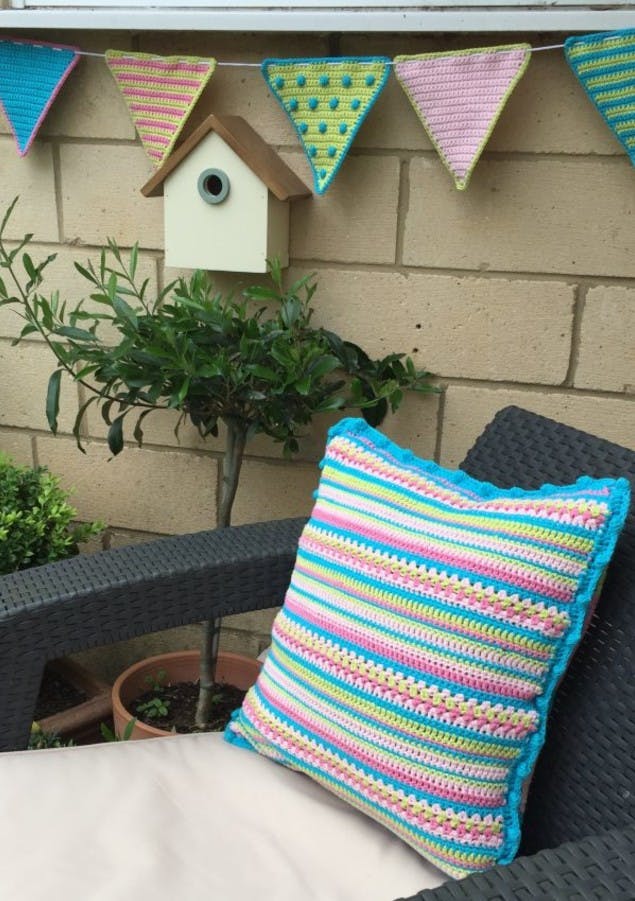
Crochet club: Summer cushion
Published on April 17, 2019 By Kate Eastwood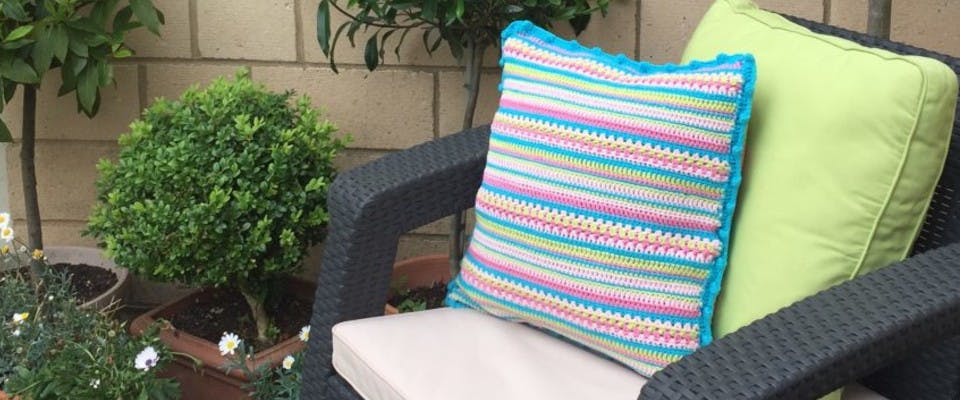
Take your crafting to the garden - Kate Eastwood has created a beautiful cushion to brighten up your summer space!
Materials
- Rico Creative Cotton Aran
- 3 balls in shade Sky Blue (37)
- 2 balls each in shades Light Pistachio (44), Candy Pink (64) and Rose (00)
- KnitPro Waves Crochet Hook
- Size 3.50mm
- Rico Dots Button Mix - Large
- Rico Pillow Insert Large Square
Abbreviations (UK terminology)
Sts - Stitches
Ch - Chain
DC - Double crochet
TR - Treble crochet
HTR - Half treble crochet
WS - Wrong side
RS - Right side
If you loved Kate’s summer bunting, nightlights and tablemats, you can now crochet a stunning summer cushion to match.
The cushion is made up of a front panel and two back panels that, when overlapped and sewn together, form an envelope style opening, allowing easy removal of the cover for washing.
Making the back panels
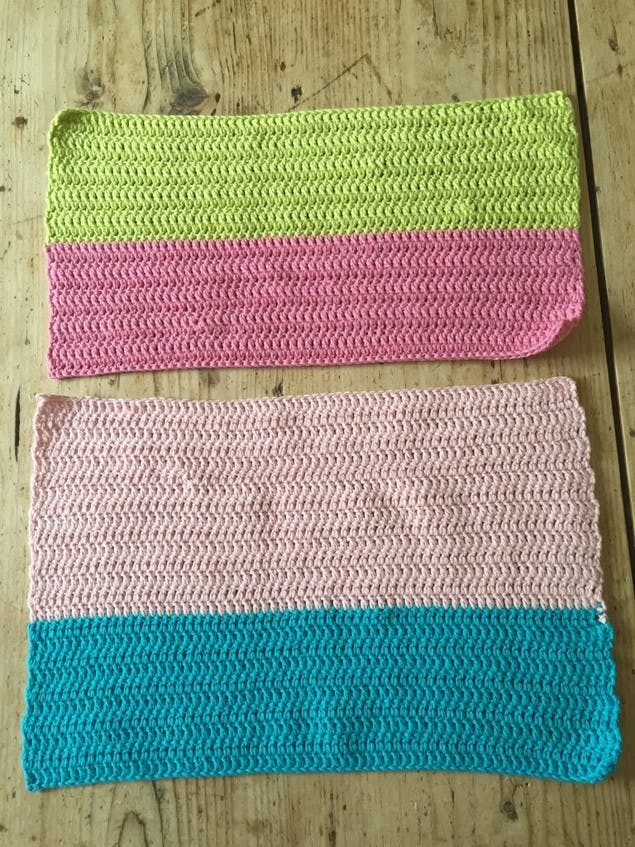
Lower back panel
Foundation: Make a chain of 66 in Sky Blue.
Row 1: Starting in the 2nd chain from the hook, work a row of TR (65 sts)
At the end of the row chain 2 and turn.
Rows 2 to 10: Work a further 9 rows of TR in Sky Blue, remembering to chain 2 and turn at the end of each row.
Rows 11 to 25: Change to the color Rose and work 15 rows of TR, chain 2 and turn at the end of each row.
Finish off and sew in the ends.
Upper back panel
Foundation: Chain 66 in Candy Pink.
Row 1: Starting in the 2nd chain from the hook, work a row of TR (65 sts)
At the end of the row chain 2 and turn.
Rows 2 to 10: Work a further 9 rows of TR in Candy Pink, remembering to chain 2 and turn at the end of each row.
Rows 11 to 20: Change to the color Pistachio and work 10 rows of TR, chain 2 and turn at the end of each row.
Finish off and sew in the ends.
Adding the buttonholes
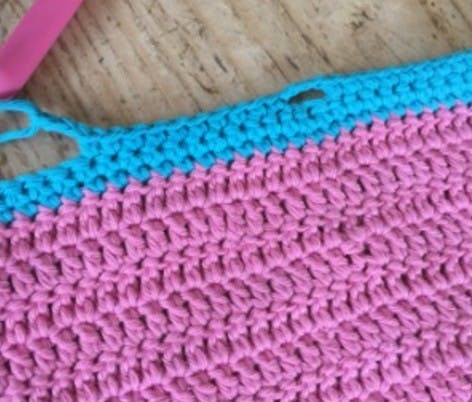
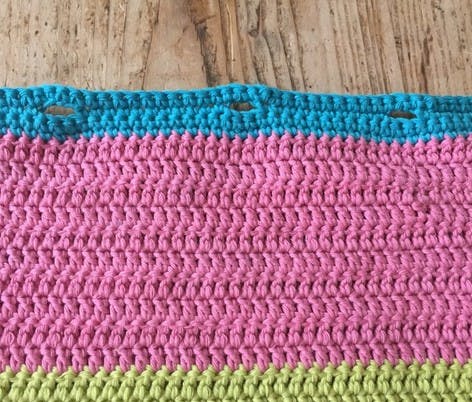
You are now going to add the buttonhole strip to the upper back piece.
Row 1: With the RS of your work facing you, join in the Sky Blue yarn and work a row of DC, chain 1 and turn.
Row 2: Work a 2nd row of DC, chain 1 and turn.
Row 3: DC 18, chain 3 and skip 3 stitches, DC 10, Chain 3 and skip 3 stitches, DC 10, chain 3 and skip 3 stitches, DC 18.
Row 4: DC, chain 1 and turn.
Row 5: DC, finish off and sew in ends.
Joining the back panels
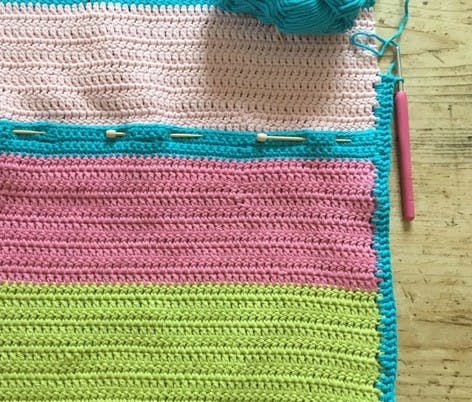
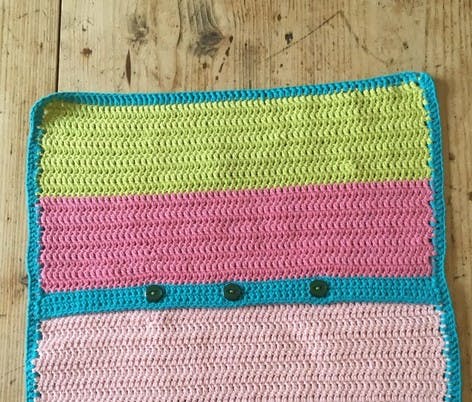
Now pin the top and bottom panels together, with the top flap overlapping the bottom piece, so that 10 of the pale pink rows are showing.
You are now going to add the finishing border to the total back piece, which will, at the same time, join the two pieces together.
Join in the Sky Blue yarn and work a border of TR all the way around the edge, working 2 to 3 TR in each corner stitch to stop the square becoming out of shape.
Making the front panel
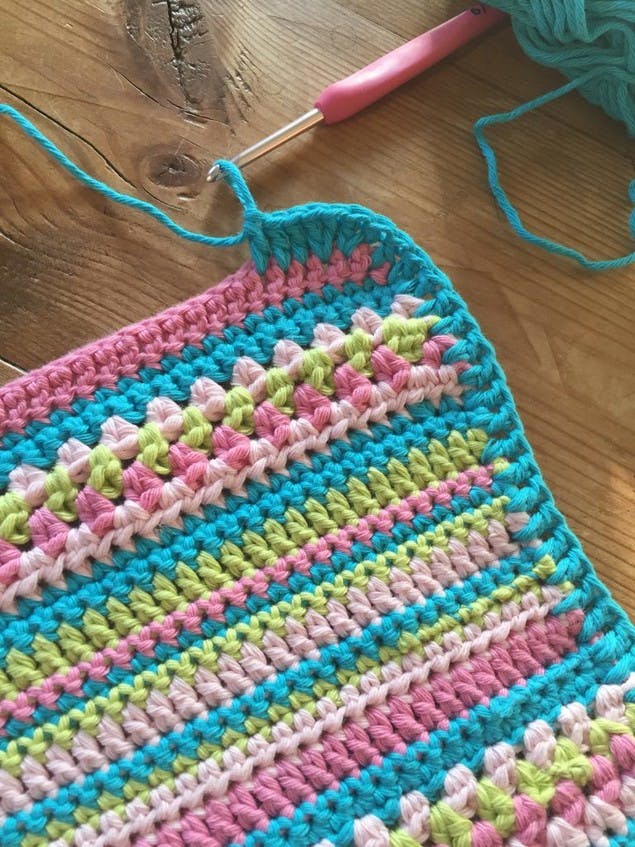
The front panel of your cushion is made up of a pattern of 17 stripes in the four colors. The pattern is worked 4 times.
When working the pattern I found the easiest place to join in each new color was when working the chains at the end of each row, and rather than cutting the yarn at the end of each row I simply looped the yarn up the sides, which also means there are a lot less ends to sew in when finishing the cushion!
When working the chains at the end of each row you will need to work 1 chain if you are going in to a row of DC and 2 chains if you are going into a row of either HTR or TR.
Foundation: Work a chain of 66 sts in Candy Pink.
Row 1: Starting in the 2nd chain from the hook, work a row of TR in Candy Pink. (65sts)
At the end of the row Ch 1 in Sky Blue and turn.
Row 2 and 3: (Sky Blue) Work 2 rows of DC.
Row 4: HTR in Rose – work a HTR into the first stitch, skip a stitch and then work 2 HTR in the next st.
Skip a stitch and work 2 HTR in the next stitch.
Continue this pattern to the end of the row, working a HTR in to the final stitch of the row.
Ch 2 and turn.
Rows 5, 6 and 7: Work 3 further rows of HTR in Pistachio, Candy Pink, and Rose.
Rows 8 and 9: Work 2 rows of DC in Sky Blue.
Check your stitch count during these rows and if you find the HTR slightly altered your stitch count either increase or decrease in these DC rows to get back to 60 sts.
Row 10: Work a row of TR in Pistachio.
Row 11: Work a row of DC in Candy Pink.
Row 12: Work a row of DC in Sky Blue.
Row 13: Work a row of DC in Pistachio.
(Cut the yarn at the end of this row, leaving a tail long enough to sew in.)
Row 14: Work a row of TR in Rose.
(Cut the yarn at the end of this row, leaving a tail long enough to sew in.)
Row 15: Work a row of DC in Sky Blue.
(Cut the yarn at the end of this row, leaving a tail long enough to sew in.)
Row 16: Work a row of DC in Pistachio.
Row 17: Work a row of HTR in Rose.
That completes the end of your first pattern section. I repeated the pattern three more times, and then after the final pattern repeat worked one row of HTR in Candy Pink.
Finish off and sew in the ends.
The border for the front panel is the same as the back, so work a round of TR in Sky Blue all around the edge, working two to three TR in each of the corner stitches.
Joining the front and back panels
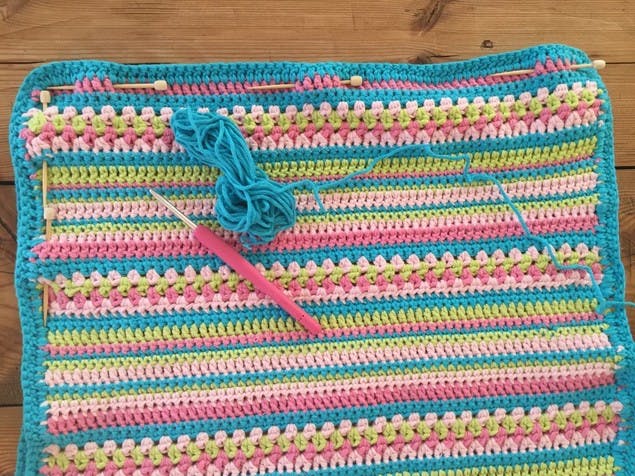
With right sides facing out pin the two pieces together.
Rejoin in the Sky Blue and work a final round with bobbles.
Making a bobble: Yarn over and work a TR in to the stitch, leaving the last loop on the hook.
Work a further 4 TR all into the same stitch, leaving the last loop of each TR on the hook.
Yarn over and pull through all 6 loops on your hook.
Pull the yarn to shape the bobble.
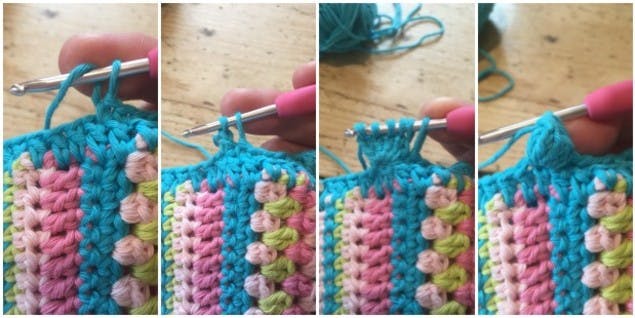
Final round: DC 5 and make a bobble into the next stitch
Repeat this pattern all the way around the edge of the cushion.
Finish off and sew in the ends.
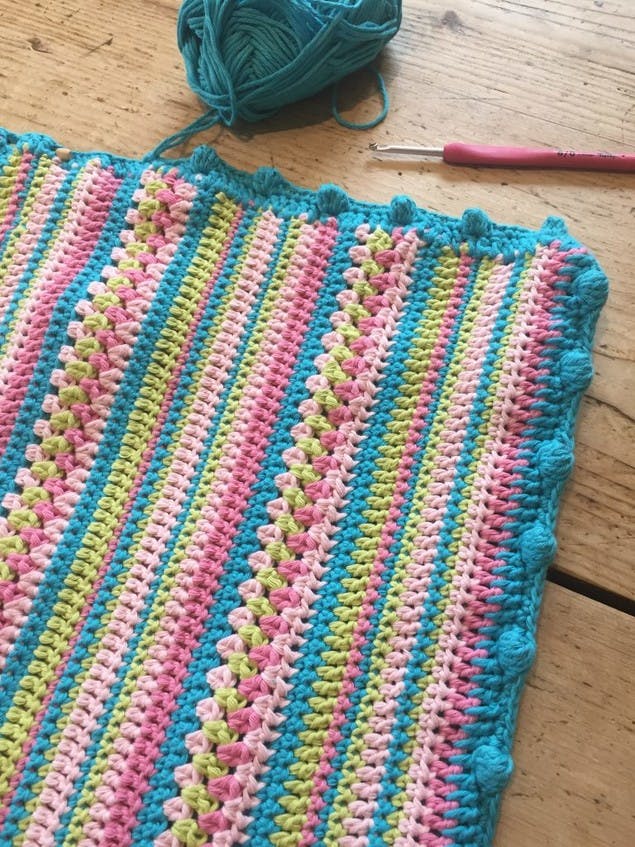
Now you're ready to put in your cushion pad and plump it up!
