Visible mending knitwear: Guide to darning!
Published on September 9, 2021 3 min readHoles in your knitwear? Whether it’s moth-eaten or just general wear and tear, we’ve all had that sinking feeling of finding a pesky hole in our fave sweater, afghan or socks! Darning is a fantastic sewing technique that can mend and even prevent holes in your precious knits. Not only that, snazzy repairs are making a comeback, giving a new lease of life to clothes. Learn how to darn with Arounna of Bookhou and her easy tutorial!
What is darning and mending?
Darning is a type of needlework technique that gives new life to your knitwear! Great for mending holes or strengthening material that’s beginning to thin.
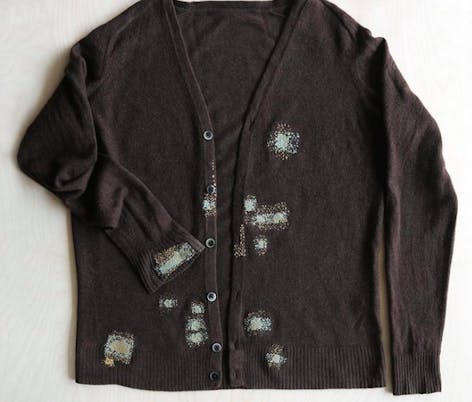
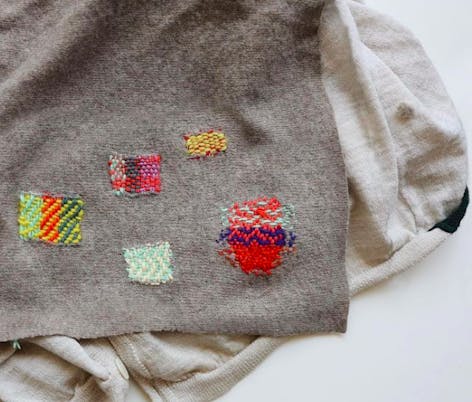
Whether you’re darning socks or want to learn how to fix a hole in a sweater, there are plenty of fun, easy darning and mending methods to suit all kinds of projects and garments. From Swiss darning to Scottish darning, stocking darning and simple pattern darning, each method is slightly different and offers a different effect.
Darning can be both invisible or visible, depending on the style you’re going for. Some darning techniques use a machine, but here Arounna will introduce you to some fab hand darning methods.
What’s a darning stitch?
A simple darning stitch by hand usually means you use a running stitch along the grain of the fabric and stitch a ‘weaving’ style technique to fill in the gaps.
What tools do you need to darn?
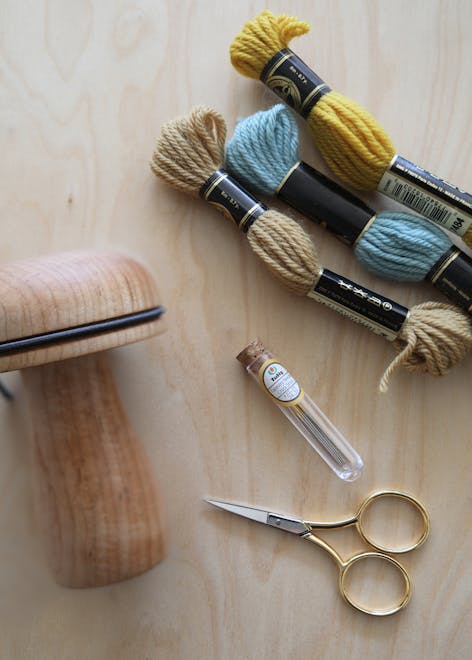
A tapestry needle, scissors and thread in colors of your choice, are the essential tools you’ll need for darning. The size of your needle and thread will depend on the project you are mending.
Darning egg
If you’re darning socks or stockings, you might use a darning egg to keep the curved shape of your garment in place as you darn. Great for preventing wonky, misshapen socks! Darning eggs get their name from their rounded egg shape and are usually made from hard material, such as wood or stone.
Darning mushroom
Named after its mushroom shape, darning mushrooms or mushroom darner have a rounded top that’s great for holding the shape of your garment as you darn. The darning mushroom is particularly good as its flat bottom can rest on a flat surface to keep you steady!
Learn how to darn
Arounna of Bookhou will teach you how to darn with these easy step-by-step tutorials. Whether you want to learn to how to darn a sweater, blanket or socks, these techniques are fantastic to come back to again and again.
How to weave mend
The weave mend is one of my favorite ways to darn a hole in a sweater or a pair of jeans. The basic structure of the mend is quite straight forward, yet within its simplicity there is plenty of room for variation and expression. In most cases I tend to choose a similar material to the article of clothing, so when working on a sweater I’ll use wool yarn, while for a hole in jeans or a shirt I’ll choose cotton threads. Beyond that, color is entirely negotiable - whether it blends in or stands out - it’s entirely up to you!
Materials
- Hemline Mushroom Darner
- Darning needles sized to the yarn you are using
- Scissors
- DMC Tapestry Wool
Learn the weaving method step-by-step
1
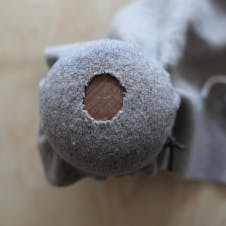
Before you begin, place the hole centered over the darning mushroom - this will give you a good work surface and it will also help to keep your work area flat and taught.
2
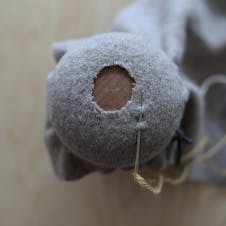
Choose a starting point a short distance - about a centimeter or so - below and to the side of the hole.
Take your tapestry needle with wool yarn and push the needle up from the back to the front leaving a tail of a few inches or so that you will later weave into the back when you are finished the entire mend.
3
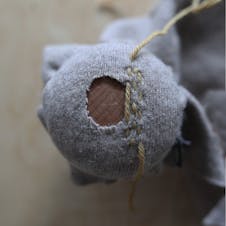
The first step of the mend is to make the warp - the part of the weave that runs up and down. From your starting point, create a running stitch parallel to and within the weave of the existing fabric and continue it up, with little dashes of yarn, to a point beyond the hole - the distance is up to you, but usually symmetrical to the distance that you started below the hole. When you have gone as far as you want, reverse direction and continue your stitch back down, right beside and parallel to the previous stitch.
Continue this, up and down, but try to place the stitches, or ‘seeds’ somewhat randomly so they don’t lay exactly beside each other.
4
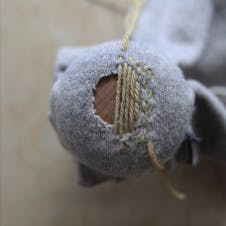
When you reach the hole you want to create one long stitch that will bridge across the hole and continue into the fabric on the other side. Remember to keep your stitches over the hole close together as this is where the actual mend will be and you will want this woven area to be dense. Also keep in mind that the distance you choose to continue into the existing fabric can vary - you may want the seed stitches to form a neat border for the mend or you can do what I did where they remain a little uneven and organic looking.
5
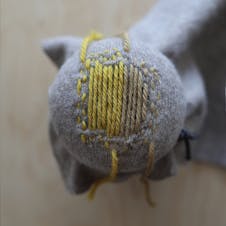
At this point, if you like, it is possible to change yarn in order to add some variation. I chose to change the color, albeit only slightly, so that it’s not all one color for the warp. This can bring more visual interest to the mend , as well as give it a more handmade look. Simply end the stitch somewhere within the existing by leaving a tail beneath the fabric. And, as you did at the beginning of the mend, start the new color with a tail beneath and continue creating the warp. Again, these tails will get woven into the back once finished. Once the hole is covered, continue your running stitch into the fabric to a distance similar to how you started so the mend will be anchored equally on all sides.
6
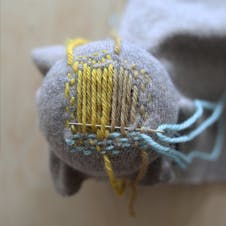
The next step is to create the weft - the stitches that run from side to side and weave into the warp. I chose a third color for this part. Essentially you will start as you did with the warp, below and to one side of the hole and continue a running stitch in the same manner, first anchoring seed stitches back and forth within the existing fabric. I don’t worry so much about my spacing here - I let the stitches be a little random - but when you get to the part where you have to bridge the hole with longer stitches you will need to weave the yarn of the weft into that of the warp. Do this by sliding the point of the needle under and over the threads of the warp and pulling the yarn through.
7
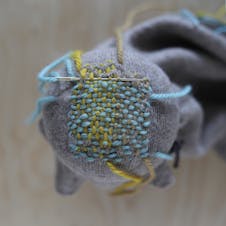
To continue the weave with the next row of stitches, remember to make sure to weave opposite to that of the previous row, so if the previous line of thread was under/over the next line will be over/under. This will make the mend on the hole more secure and stronger.
Now, continue as you did in previous steps, back and forth, until the hole is covered with a weave and each stitch is anchored into the existing fabric at the sides. Once done, clean up by pulling any loose tails to the back, if they are not there already, and re-thread them on your needle. Then anchor them by making a running stitch into the weave on the back and clip the loose tails.


