Make a colourful Faagun Mandala for Holi
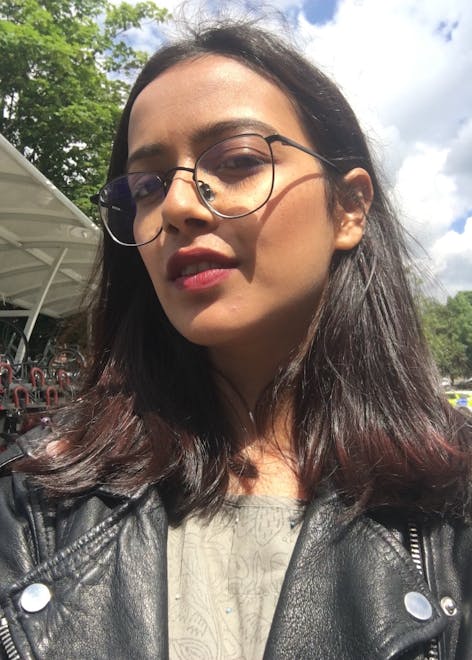
Published on March 26, 2021 2 min readFor Anab, a fibre artist based in New Delhi, her dream is to revive the traditional art of crochet and get more people hooked! Anab learned to knit and crochet as a kid, and now she's turned her passion into selling her makes, yarn, and DIY kits through @oony.by.anab. Take one look at her Instagram (picture oh-so-pretty embroidered knitwear, pretty crochet edge hankies, and daisy earrings) and trust us, you'll be hooked too! A special shout out to these gorgeous crop tops, which, as Anab says are "good for yoga/chilling/dancing/not doing anything at all which is my personal favorite."

Anab, tell us what you're going to make for Holi?
The arrival of spring season in India is celebrated by playing Holi. The night before Holi, we light a bonfire which symbolises burning away all the bad of the past and giving way to a vibrant and new future. The next morning, we play with friends and family applying colours on each other just like the spring brings colour back to nature.
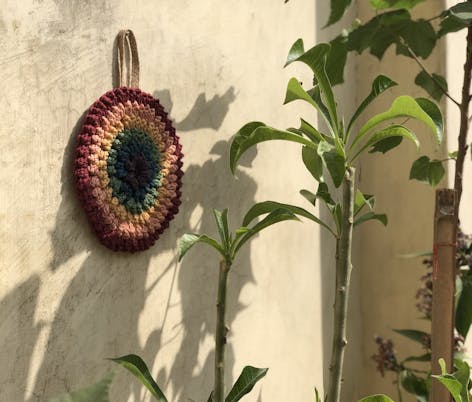
We are calling it the Faagun Mandala as it is the last month of the Hindu Calendar in which Holi is celebrated, and what better way to celebrate the festival of colours than making a colourful Faagun Mandala!"

Materials
- Cotton DK Yarn in six rainbow colours of your choice
- Paintbox Yarns Cotton DK
- Crochet hook
- Darning needle
- Scissors
- A piece of jute/rope
- 6 inch embroidery hoop
- Fabric glue
You will also need to have prior knowledge of some basic crochet stitches like:
- slip stitch (SS)
- double crochet (DC)
- chain (CH)
- magic circle
- popcorn stitch (PC) follow the steps below!
Popcorn stitch
1
5 DC in the same stitch, pulling out your hook leaving the active loop hanging
2
Inserting the hook in the top of the first DC and pulling up the previous loop through.
3
CH 1 to finish.
To start a round with PC, begin with CH 3 which counts as a DC, and then add 4 DC in the same stitch, and finish the same as these steps.
Changing the colour
1
Switch to the new colour while finishing your current round.
2
When you are about to end the round with a SS, insert your hook to the first stitch but instead of pulling up that thread, insert and pull up the new colour.
3
Tie up the two loose ends to secure your stitch and work as usual.
Let's get started!
I have followed the VIBGYOR colour scheme meaning I start with the violet, then blue, green, yellow, orange, and end with red. Feel free to add more colours or more rounds as per your liking!
1
Round 1:
Start with a magic circle. If you don’t know how to make a magic circle, then simply ch6 and join to form a loop.
2
Make 8 SC inside the magic circle, join with a SS. Make sure to keep your stitches nice and loose for the next round. Do not tighten the loose end too tight or you may face difficulty placing the puff stitches.
3
Round 2:
CH 3 (counts as one DC) and make 4 DC in the same stitch, finish off like a PC. Make 1 PC each in the next 7 stitches. Do not join just yet.
4
Round 3:
Change the colour as instructed at the beginning and switch to blue.
5
Start with CH 3, 2 PC in the same stitch as CH 3 and 2 PS in each of the CH 1 spaces between the popcorn of the previous round.
6
Round 4:
Change the colour as instructed at the beginning and switch to green. Start with CH 3, 1 PC in the same stitch as CH 3.
*2 PC in next CH 1 space. 1 PC in each of the next CH 1 space*.
Rep from * to last CH 1 space. 2 PC in last CH 1 space.
7
Round 5:
Change the colour as instructed at the beginning and switch to yellow. Start with CH 3, 1 PC in the same stitch as CH 3. 1 PC in the next CH 1 space.
*2 PC in next CH 1 space. 1 PC in each of the next two CH 1 spaces.*
Rep from * to last CH 1 space. 2 PC in last CH 1 space.
8
Round 6:
Change the colour as instructed at the beginning and switch to orange.
Start with CH 3, 1 PC in the same stitch as CH 3. 1 PC in each of the next two CH 1 spaces.
*2 PC in next CH 1 space. 1 PC in each of the next three CH 1 spaces.*
Rep from * to last CH 1 space. 2 PC in last CH 1 space.
9
Round 7:
Change the colour as instructed at the beginning and switch to red.
Start with CH 3, 1 PC in the same stitch as CH 3. 1 PC in each of the next three CH 1 spaces.
*2 PC in next CH 1 space. 1 PC in each of the next four CH 1 spaces.*
Rep from * to last CH 1 space. 2 PC in last CH 1 space.
Pro Tip
You can keep adding more round if you wish for a bigger mandala. This one measures about 8 inches in diameter.
10
Once finished, tie in all your loose ends at the back.
Use a hoop to turn it a beautiful hanging decoration
1
To make a hanging loop, cut a small piece of rope and align it on the back of your mandala to stick it there with some fabric or craft glue.
2
Take the wooden hoop, line it with fabric glue and firmly place it on the mandala pressing down to make sure it sticks from all places. Dry the piece out and your Faagun Mandala is ready to hang!
Your beautiful Faagun Mandala for Holi is complete! Why not make a couple in different colourways for a beautiful wall display.
Follow Anab on Instagram for more pretty crochet inspiration @oony.by.anab, and show us your colourful makes by tagging #LoveCrafts - we can't wait to see!


