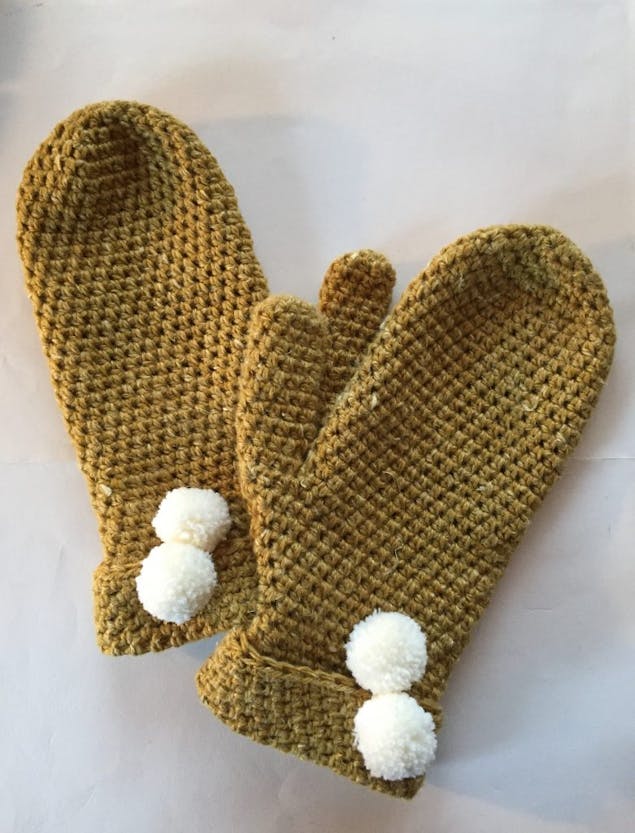
How to crochet simple and stylish mittens
Published on November 1, 2019 By Holly Butteriss 1 min read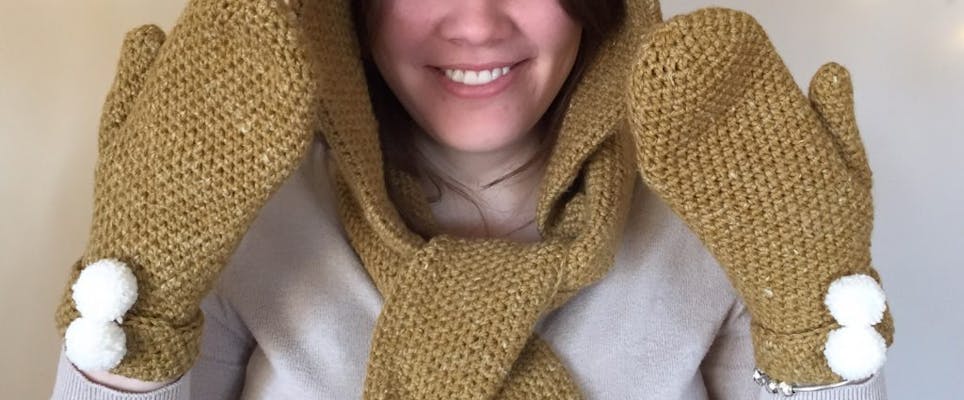
Keep your hands cozy this winter with this cute pair of simple mittens from Kate Eastwood! This easy step-by-step tutorial is the perfect project for a lazy Sunday afternoon, decorated with the sweetest little pom poms these mitts make a gorgeous gift for the holidays.
When finished the mittens measure approximately 24cm L, (.5cm wide and the thumb measures approx. 9.5 cm. The mittens are worked in HTR stitch (HDC in US crochet terms) and in a continuous round. When joining the thumb on to the mitten you may find a stitch marker is helpful. For my pom poms I used a small amount of cream DK yarn.
This tutorial is worked in UK terminology, but you can convert using our handy table
Materials
- 2 x balls of Rowan Hemp Tweed in Kelp
- Rowan Hemp Tweed
- 4.5mm hook.
- KnitPro Waves Crochet Hook
- Stitch marker
- Cream DK yarn
- Paintbox Yarns Simply DK - 10g Mini Ball
To make the main part of the mitten
1
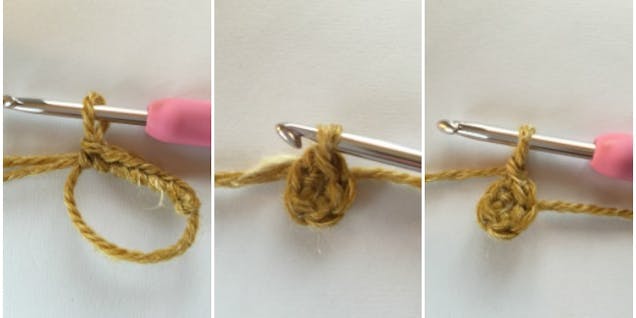
Round 1: Begin by making a Magic Ring and work 6 DC into the ring. Sl St to join and chain 1. You are now going to work in HTR for the rest of the mitten.
2
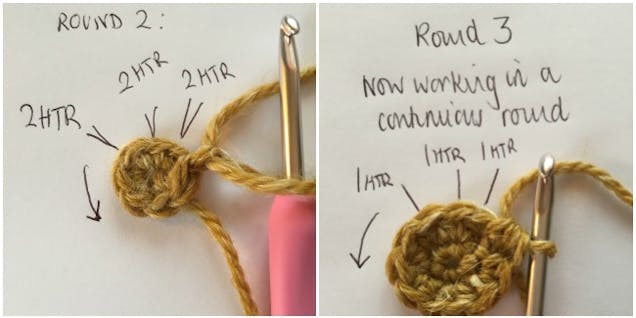
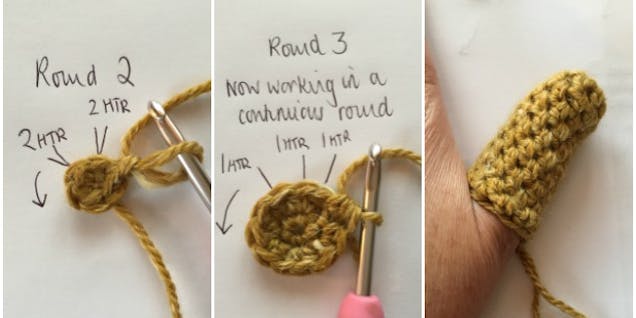
Round 2: Work 2 HTR in to each stitch from Round 1, 12 sts.
3
Round 3: *Work 1 HTR in to the next stitch and then 2 HTR in to the following stitch.* Work from * to * all the way around, 18 sts.
4
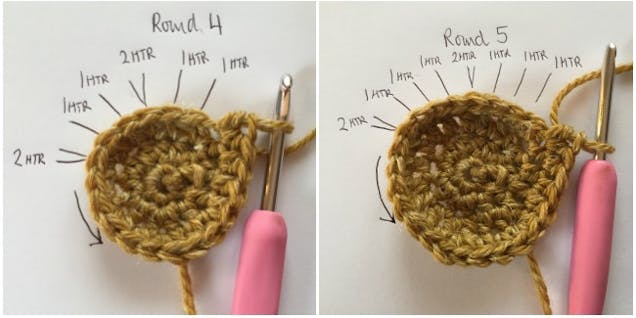
Round 4: *Work 1 HTR in to each of the next two stitches and then 2 HTR in to the following stitch.* Work from * to * all the way around, 24 sts.
5
Round 5: *Work 1 HTR in to each of the next three stitches and then 2 HTR in to the following stitch.* Work from * to * all the way around, 30 sts.
6
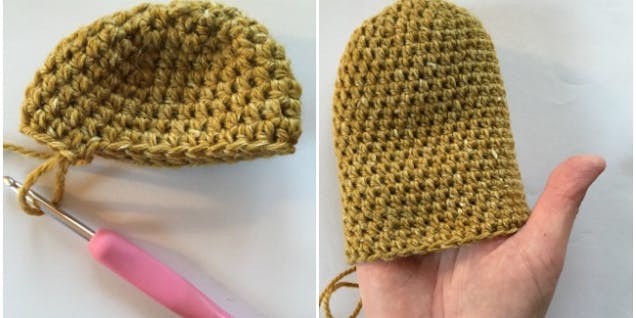
Now, working in continuous rounds of 30 stitches, work a further 19 rounds of HTR. The mitten should now be long enough to reach your thumb. (If you have a smaller hand work less rounds as needed.)
Finish off and sew in the ends.
To make the thumb
1
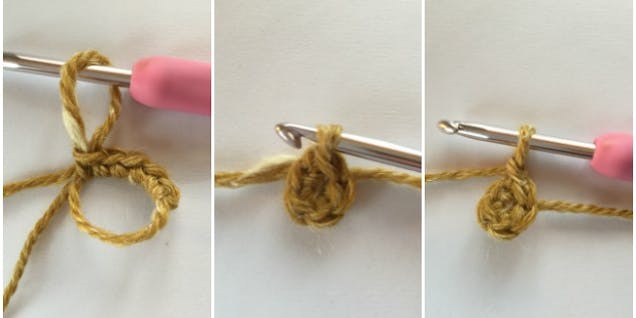
Round 1: Begin by making a Magic Ring and work 5 DC into the ring. Sl St to join and chain 1. You are now going to work in HTR for the rest of the mitten.
2
Round 2: Work 2 HTR in to each stitch from Round 1, 10 sts.
3
Round 3: Now, working in continuous rounds of 10 stitches, work a further 8 rounds of HTR. It should now be long enough to fit your thumb. (If you have a smaller thumb work less rounds as needed.) Do not finish off at this point as you are now going to join the thumb and the mitten together.
To join the mitten and thumb
1
At the end of your final round on the thumb, work 5 HTR on the thumb join the thumb to the mitten by working 30 sts around the mitten and then work 5 HTR around the thumb.
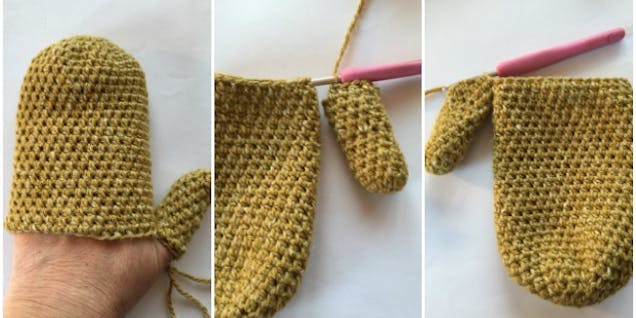
2
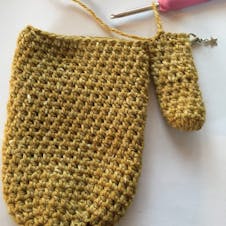
Lie your joined mitten and thumb on a flat surface and mark the center of the thumb with a stitch marker or piece of yarn.
3
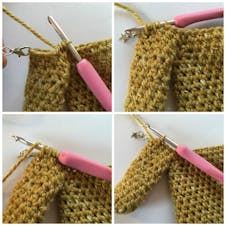
Now carry on working continuous rounds of HTR and decrease 2 stitches each side of the marker on every round (by working 2 HTR together) until you have 24 stitches, moving the marker up as you work.
4
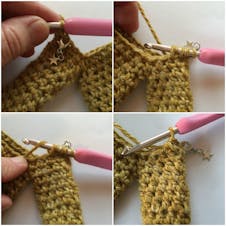
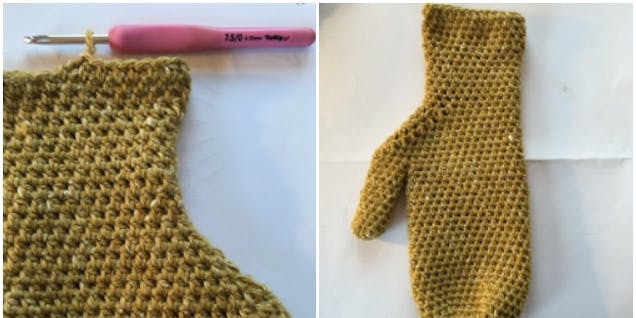
As you work your decreasing rounds you will see the shape forming on your mitten.
You are now going to work a few more rounds to make the turn up at the bottom of the mitten. Once you have 24 sts work a further 7 rounds of 24 HTR.
5
In the next round work 2 sts in each side stitch by working 2 HTR in to one stitch, 26 sts. This slight increase will allow for a comfortable (and not too tight) turnover.
6
Now work a final 7 rounds. Finish off and sew in your ends.
7
To complete my mittens I added two small pom poms to each mitten. When making the pom poms leave a long tail around the center of the pom-pom as you can then use this to sew your pom poms on to your mittens.
