How to make a pop up card
Published on June 23, 2021 By Sophie 1 min readLearn how to make a pop up card with this lovely project by Amy aka Amy’s Paper Mischief. Learn the card making basics to create the perfect celebration card, easy to customise for birthdays, anniversaries or just a little note to a loved one. Grab your cardstock, papercraft supplies and let’s get started!
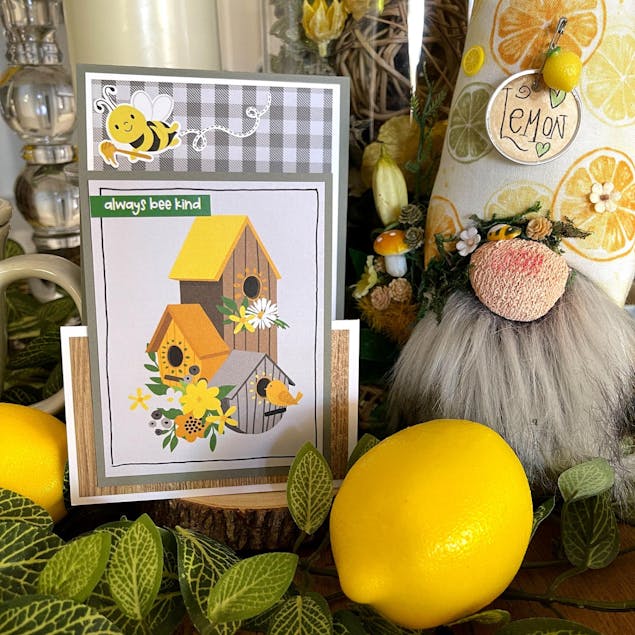
For this pop up card tutorial, Amy has created a beautiful design using the Sweet as Honey Collection of patterned paper for a delightful card to send to a loved one. Why not create a pop up birthday card or a simple design for the kids to give a go? Explore our whole collection of patterned paper to make your pop up card your own!
Materials
- LoveCrafts Heavyweight Cardstock 100lb 8.5" x 11" 10 Pack
- LoveCrafts Heavyweight Cardstock 8.5x11in – Slate
- LoveCrafts Heavyweight Cardstock 100lb 8.5" x 11" 25 Pack
- LoveCrafts Heavyweight Cardstock 8.5x11in – White Smoke
- Photoplay Paper PhotoPlay Collection Pack 12"X12" - Wild Honey
- Scoring tool & scoring platform
- Paper trimmer
- Adhesive
Pop-up card step-by-step
1
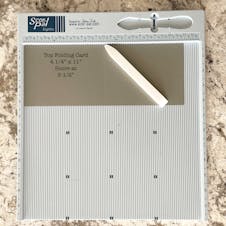
Cut 8½x11in Slate cardstock to create two top-folding card bases that measure 4¼x11in. Score the 11in side at 5½in to create your top folding card.
2
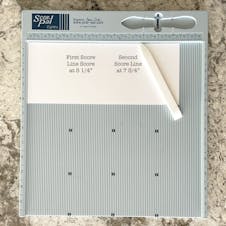
Cut 8½x11in White Smoke cardstock to create two pieces that measure 4x10½in and score one of the pieces at 5¼in and 7¾in (as shown). Set the second piece aside to use for another pop-up card.
3
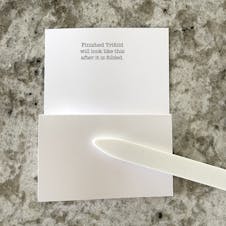
Fold the card in half at the first score line and fold back at the second score line to create your pop-up piece. Adhere this panel to the top folding Slate card base.
4
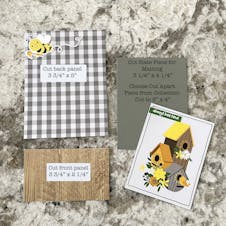
Choose your patterned paper with two coordinating patterns. Cut the back decorative panel to 3¾x5in Cut the front decorative panel 3¾x2¼in. Adhere each piece to the pop-up piece from the step above.
5

Cut a 3¼x4¼in piece from the Slate cardstock and a 3x4in piece from the White Smoke cardstock. Choose a 3x4in piece from the patterned paper collection. Decorate the white 3x4in piece with stickers.
Pro Tip
You could also add a photo, create a scene, use stamped images, ink blend a background or add a large sentiment to a 3x4in piece of White Smoke cardstock. This will be theh focal piece that pops out when you open the card.
6
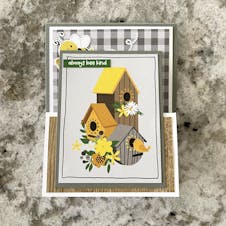
Once you have designed the focal element, mount the element on the 3¼x4¼in piece of Slate cardstock. Attach the focal element in the center of the front decorative panel that measures 3¾x2¼in. Only adhere the bottom portion of the designer element, so the top can move freely, without sticking to the back decorative panel.
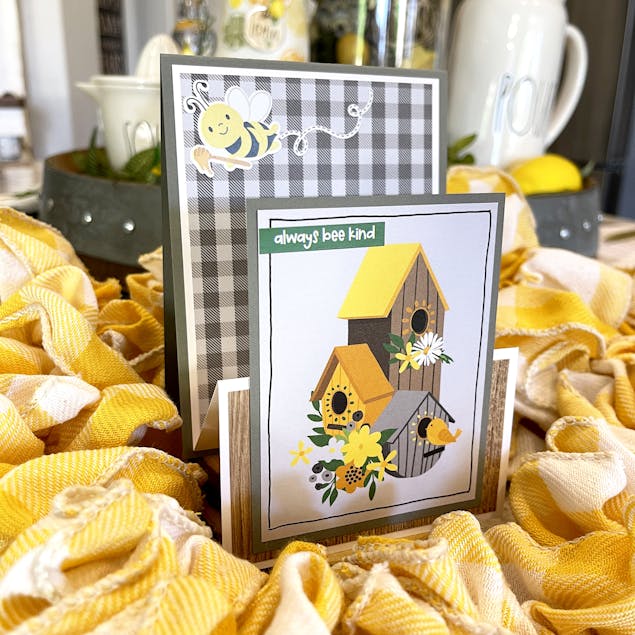
Now all you need to do is find a special someone to send this to and write a little message inside - they are definitely going to love this!
