How to sew a buttonhole
Published on September 26, 2018 By Emma Friedlander-CollinsKnowing how to sew a buttonhole can be super handy for so many sewing projects, from bags to cushion covers. But if you tend to think of sewing buttonholes as something associated with the advanced seamstress, you’re not alone! It is one of those things that requires you to get a bit technical with your sewing machine, replacing your normal foot with a buttonhole foot. If you’re a newbie, that can feel a bit intimidating, but we promise it’s as easy as pie, and we’re here to show you how it’s done. (Just remember that all you’re really doing is sewing a rectangle in a fancy stitch.)
If you’ve lost your zipper foot here’s our step-by-step guide to sewing a buttonhole with a normal sewing foot! If you were taught by your Grandma on an old Singer sewing machine, you may already know this technique. For those of you who don’t, here’s a little sewing hack, it’s a good one to have up your sleeve!.
Mark out your buttonhole as above, but this time make sure it’s just above where you want the actual button hole to be.
How to sew a buttonhole without a buttonhole foot
1
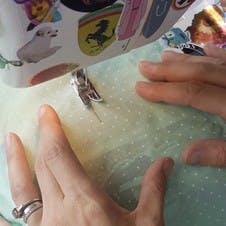
Set your sewing machine to zigzag stitch, place the fabric so that the line follows the centre of the foot, and sew from one end to the line other.
2
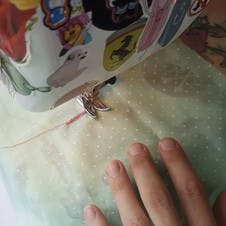
Lift the foot, turn the material, drop the foot and sew approx 10 stitches to make the end of the buttonhole.
3

Turn the work again and using the first line as a guide, sew another straight line.
4
Turn and complete the buttonhole with another 10 stitches. Open up the hole just as above, with a stitch ripper or sharp knife.
Sewing a buttonhole with a normal foot can be a little untidier than with a buttonhole foot, but if you take it slow, there’s no reason anyone would ever know the difference!
How to sew a buttonhole with a buttonhole foot
1
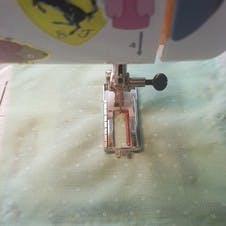
Attach the buttonhole foot. First you need to change that foot. Your buttonhole foot will look something like this.
A normal foot would cover your buttonhole markings up up, but the rectangular hole in the buttonhole foot makes it really easy to see where you’ve put those markings. . There’s usually a little lever at the back of the post that holds the needle, all you need to do is make sure the foot is in the raised position, lift the little leaver and the foot should drop off. (If you’re unsure, check the manual that came with your machine or the sewing manufacturer’s site, as all models can be slightly different!). . Place the new one under the post, lower the foot back down and it will all click into place.
2
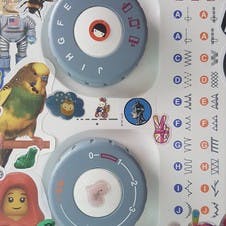
Switch to zigzag stitch. Now you need to change your sewing machine so that it’s on the zigzag setting, as close to 0 as you can get without it actually being on 0.
Pro Tip
This stitch makes the needle move from side to side, if you’ve never used it before, have a little experiment on a piece of scrap fabric.
3
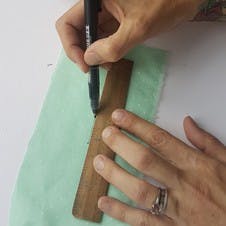
Mark-up the buttonhole. Make a dot a few mm or ⅛ of an inch on either side of the button, and join with a ruler. This extra space will allow enough room for the button to go through easily.
4

Sew buttonhole. Place under the zipper foot so you can see the line, keeping an eye on which side the needle is going to come down on. Sew a straight line, to the end of your buttonhole line.
5

Sew button hole edge. Line the foot up, turn your work, and drop the foot back down, sew approx 10 stitches, (again, making sure you know the side the needle is going to start from). Lift the foot, turn, drop the foot and sew down the other side of the line. Finish with another 10 stitches across the bottom edge of the buttonhole.
6
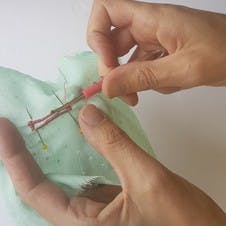
Open up the hole. Now you need to open up that buttonhole. A stitch ripper will often be enough to do this, but you can use a scalpel or a sharp pair of small scissors.
Pro Tip
Before you cut it, put a pin at either end to make sure that you don’t cut into the stitches.
7
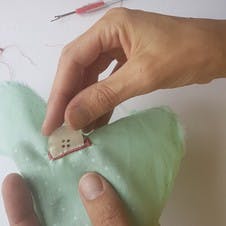
Finish up. Trim off any messy threads, and check your button goes through, don’t worry, it will!