How to make an A-line skirt
Published on July 25, 2019 By Sarah Jones 3 min read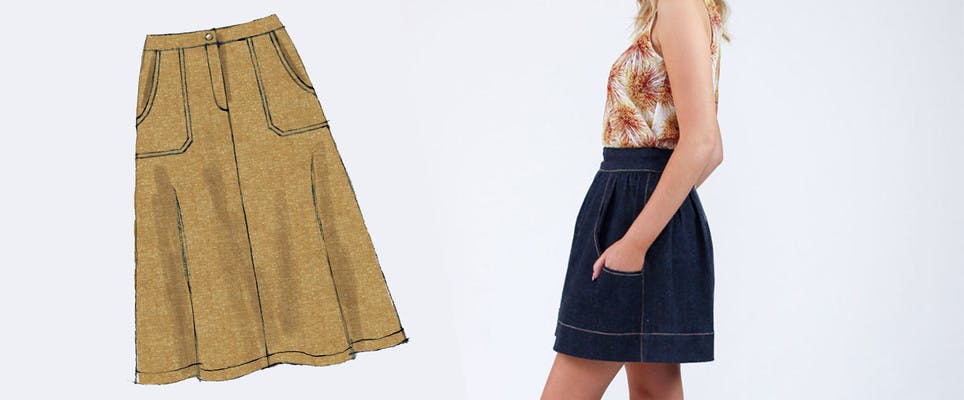
Want to know how to make an A-line skirt? Even inexperienced dressmakers can learn how to make an A-line skirt with no fear — it really is simple to make and a great way to learn how to use a sewing machine. The basic shape means it can carry a busy, printed fabric so choose your favourite fabric designs and get sewing!
What is an a-line skirt?
A-Line skirts are a classic wardrobe staple with vintage 70s silhouette. They have a fitted waist to flare to the hem of the skirt. It is a great skirt design that can be adjusted to your desired length and made in your favourite fabrics to add to your handmade wardrobe. They are a quick and easy making it a great beginner sewing project.
Materials
- 2 yards (1.8m) of quilt- or dress-weight cotton, cotton twill or denim (you can use contrasting fabric for the waistband and hem facings, if desired)
- Fusible interfacing
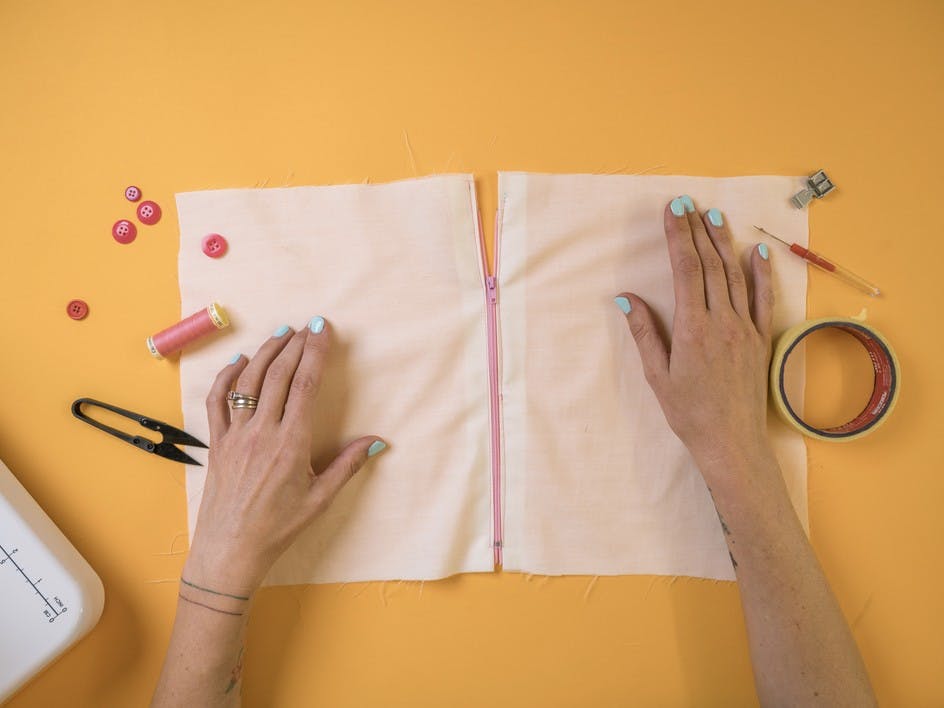
- 7″ (18cm) Invisible zip in coordinating colour
- Matching thread
- Hem guide or seam gauge
- Blind hem stitch foot
- Zipper foot
1. Prepping the Waistband and Skirt
The first step in learning how to make an A-line skirt involves prepping the waistband and skirt. Some waistbands are just that: a skinny band at the waistline that attaches to the rest of the skirt. In this case, you’ll be attaching a fatter waistband called a yoke: It has a shape of its own, adds some visual interest and allows greater support so you can adapt this pattern in infinite ways!
How to prep your hemline and skirt:
1
Fuse interfacing to waistband pieces. Cut a piece of interfacing slightly larger than the two yoke front pieces. Press the interfacing to the pieces, on the wrong side of each. At this point, you should have what looks like four identical pieces (unless you’re using contrasting fabric for the facing), except two have interfacing fused to the wrong sides. These are the yoke front pieces (with interfacing), and the other pieces are for the yoke facing.
2
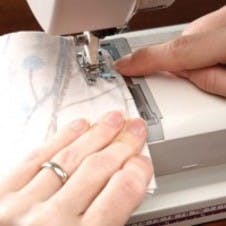
Stitch pieces. With the right sides facing, stitch the waistband pieces together at the right side seam, matching the notches and using a 5/8″ (1.6cm) seam allowance. Double check to be sure that this is your right (as you’ll be wearing the skirt) since you’ll want the zip side to be on your left. Press the seam allowance open. Repeat this step with the yoke facings.
3
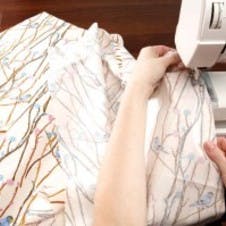
Stitch skirt front and back together. With the right sides facing, stitch the skirt front and back together at the right side seam, using a 5/8″ (1.6cm) allowance. The seam should be on the same side (of the finished skirt) as the yoke seam. Then press open the seam allowance.
2. Attaching the Patch Pockets and Waistband
Adding pockets is always easier when the garment is only partially finished, so it will lie flatter while you stitch them. For this skirt, you’ll attach cute little patch pockets. Unlike the on-seam pockets that you added to the carport wrap skirt, which are hidden, patch pockets can be seen right on the front of the skirt, giving it a more casual look. This is the second section of learning how to make an A-line skirt.
How to attach the patch pockets and waistbands:
1
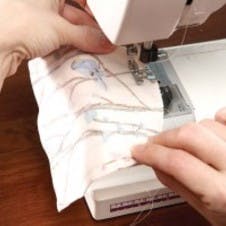
Sew pockets. You have two pieces for each pocket, so four pieces total. One is the pocket that will show to the public, and the other is the pocket lining. Stitch each pocket piece and pocket lining piece right sides together, leaving a small opening (to turn right side out later). Use a ½” (1.3cm) seam allowance.You should have two pockets. On each pocket, trim the seam allowance to ¼” (6mm), and clip the corners and curves. Then turn the pockets right side out and press.
2

Pin pockets to skirt. Pin the pockets in place on the skirt front. Placement is up to you, but a good rule of thumb is about 2″ (5cm) from the top raw edge and 4″ (10cm) from the side raw edges of the skirt front. Feel free to “try on” the skirt to check the placement. Also keep in mind that the yoke on this skirt drops about 4″ (10cm) from your waistline, and take that into account.
3
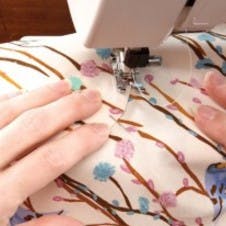
Sew on pockets. Sew the pockets to the skirt front. Stitch around three sides of the pocket close to the pressed edges. As you work your way around the lower edge of the pocket, catch the small opening (that you used to turn the pocket right side out) to close it up. Handy, one-step stitching!
4

Stitch waistband and skirt together. Before moving on, now’s a good time to add the yoked waistband to the skirt. Pin the yoke (the piece with the interfacing) and skirt with the right sides together, matching the side seam and notches, and lining up the raw edges along the top of the skirt. Stitch the two together using a 5/8″ (1.6cm) seam allowance. Then press the seam allowances toward the yoke.
3. Adding the invisible zip
Invisible zips are meant to be just that: invisible. There’s a special foot for your machine that will install them, which is what I use. Having said that, for years and years, I installed these with my standard foot, so you will be fine using whatever you have while learning how to make an A-line skirt. FYI, the invisible zip is installed before you stitch any part of the left side seam, so no tacking here!
How to add your zip:
1
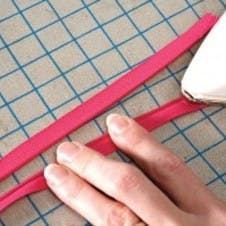
Press your zip. Take a look at the front of the invisible zip. Notice how you don’t see the teeth? Now flip it over—there they are! The teeth are constructed here to roll to the back and pull the fabric of the seam with them, which is part of the invisibility magic. To get it all stitched together well, though, you want to open those teeth out and then stitch the fabric to the zip tape. When the teeth roll back into place, the fabric will go with them.
Start by placing the zip face down on the ironing board, unzipped. With the very tip of your iron, roll the teeth over so they are flat rather than curved. (They’re plastic, but they won’t melt—but don’t hang out too long.) Press the zip teeth to open on the back of the zip. This allows you to get super close to the teeth while you’re stitching.
2
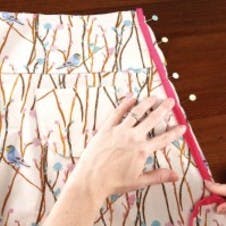
Pin zip to side of skirt. On the open the left side of the skirt, pin the zip with the teeth on the actual seam line – you’ll be stitching the zip tape, but the teeth themselves are the seam line for the rest of the seam, so we want those puppies right on the line of stitching. The teeth should be facing the centre of the skirt, not the raw edge. (This is opposite of how you’d expect to line things up, but it works out in the end.) I usually begin with the front of the skirt and then do the back, but it really doesn’t matter where you begin.
3

Stitch zip to skirt. Replace the machine’s standard presser foot with your zipper foot (or invisible zipper foot, if you’re lucky enough to have one). Stitch super-duper close to the teeth all the way down the zip, stopping when the tip of the zipper foot touches the zip pull. (If you’re using the invisible zipper foot, use the groove on the bottom to guide your stitches.)
4
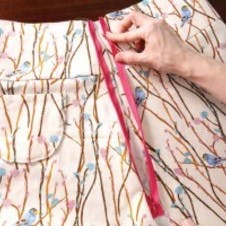
Repeat with other zip tape. Now pin the other side of the zip to the other side of the skirt. As before, the tape goes along the raw edge and the teeth face in toward the center. Be extra careful to ensure that the two zip tapes line up just right. If the tops of the zip tape aren’t aligned, when the zip is installed the seam will be crooked, and the skirt won’t lie flat against the skin.
Stitch the tape to the skirt as you did in step 3. Then zip it shut.
5
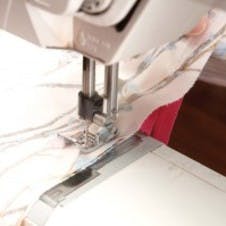
Stitch remainder of side seam. Now move the lower zip tape out of the way and begin to stitch the remainder of the side seam. Start just above where the zip stitches end and then carry the seam down the rest of the side of the skirt. This is the toughest part of working with an invisible zip: getting that seam line in just the right place in relation to the stitches along the edge of the zip. If they’re too far away, your zip will appear puckered. Take your time and stick it out – you’ll get there!
6
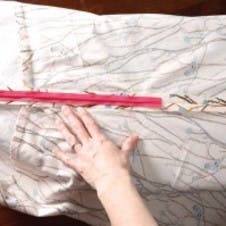
Press open seam allowance. Press open the seam allowance below the zip. The remainder of the seam allowances lie along the zip tapes now and will lie flat all by themselves. Aren’t you proud of yourself?
4. Completing the yoked waistband
A waistband is usually a piece of fabric 2″ (5cm) in width or less that encircles the waist, gives the skirt body something to attach to and provides structure and support for the rest of the garment. A yoke, on the other hand, is a wider piece of fabric that does all of the above and provides additional shape and visual interest to the piece. As you know, in this skirt, we’re using a yoked waistband to allow for a nice, A-line shape that will flatter any figure and to give a little more support in the tummy area. After all, who wants to make a cute little skirt that you can’t wear on your less-than-perfect days?
How to complete your waistband:
1
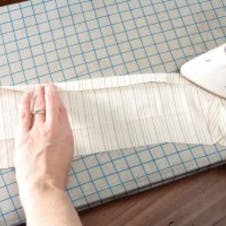
Press edge of waistband facing. Fold over the longer (which is the lower) edge of the yoke facing 5/8″ (1.6cm). Press the fold. Remember, the yoke facing is the piece without the interfacing you stitched earlier. (I’m using a yoke facing in contrasting fabric.)
2
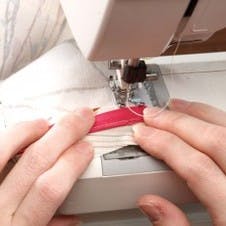
Stitch facing to yoke. Open up the zip and place the yoke facing right sides together with the yoke of the skirt, lining up the raw edges. The facing should extend beyond the waistband by 5/8″ (1.6cm) on either end of the zip (where you’ll fold it under later). Pin the facing in place. Then stitch the facing to the yoke all the way around the upper edge. (FYI, it’ll be easier to see your starting and stopping points if you place the work so the facing is on the throat plate and the remainder of the skirt is on top.) When you’re finished, press the seam allowance in the direction of the facing.
3

Understitch facing. Understitching is a technique that attaches the facing to the seam allowances to prevent it from rolling to the outside and marring the shape of the skirt. This part of learning how to make an A-line skirt sounds awkward and tricky, but it’s actually simple to do and makes a huge difference in fit.
Lay the fabric on the throat plate with the facings wrong sides up to you (and the seam allowances underneath). Using a 5/8″ (1.6cm) seam allowance, stitch all the way around the waistline, parallel to the seam, through the facing and seam allowances only – and not through the outer waistband fabric. Use your default stitch length and backtrack at each end.
Because you’ve pressed the seam allowances away from the yoked waistband pieces and toward the facings, the stitches will show on the inside of the skirt and along the seam line on the facings, but not on the outside of the skirt, on the yoke itself. A neat part of learning how to make an A-line skirt, huh?
4
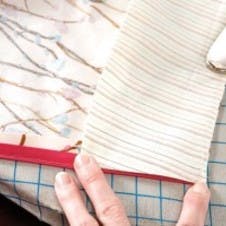
Press upper edge of facing and sides. Flip the facing back to the inside of the skirt and press the upper seam flat. The lower folded edge should cover the stitches that attach the yoked waistband to the skirt.
Also fold under the facing’s raw edges at the zip, lining them up with the inside of the zip teeth. Press the folds in place.
5
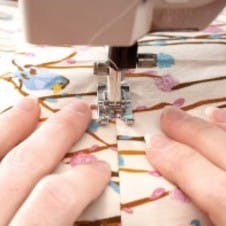
Gutter stitch. Place the skirt right side up on the machine. Gutter stitch the lower edge of the facing in place along the seam that attaches the yoked waistband to the skirt.
6
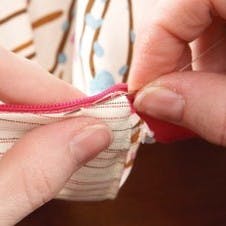
Stitch side edges to zip. Hand stitch the facing’s folded side edges to the zip tape using a slip stitch.
5. Hemming the Skirt
Ease is that little extra amount of fabric that allows things to fit properly and is vital while learning how to make an A-line skirt. Ease stitching uses thread to take up that extra fabric so that two pieces that don’t fit flawlessly go together smoothly. To set up for the hem, you’ll first do a double fold, using ease stitching to help it lay flat.
How to hem your skirt:
1
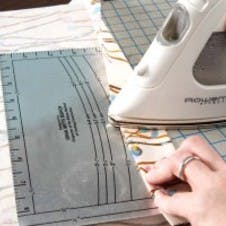
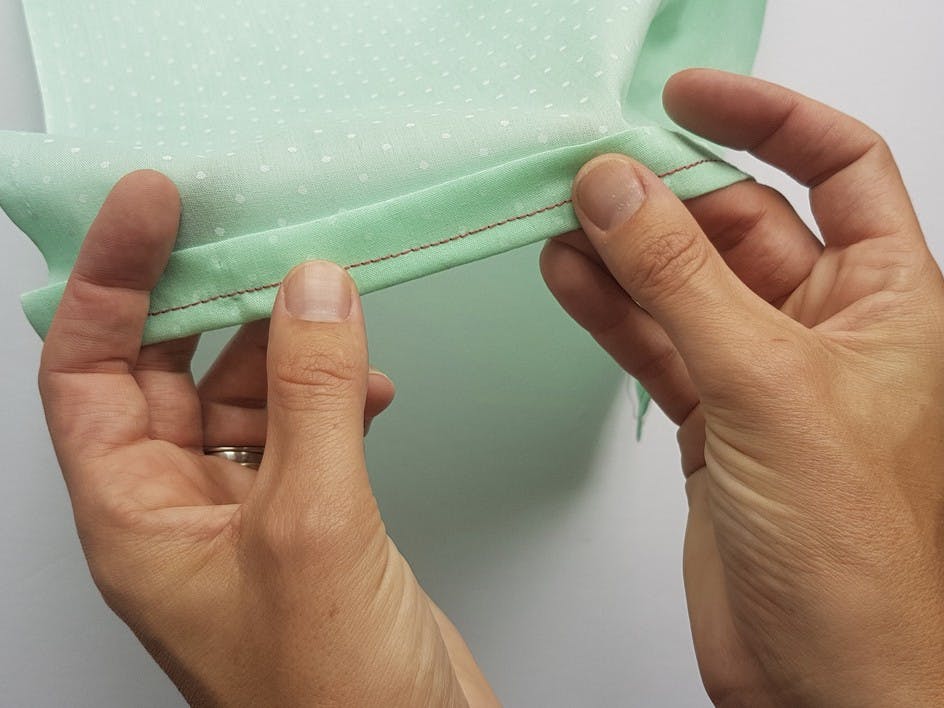
Fold hem. Turn the skirt wrong side out and fold up the lower edge (the hem) ½” (1.3cm) and press. (This is a great place to use a hem guide or seam gauge.) Then fold up another 1½” (4cm) and press in place (which is a total of 2″ [5cm] for the hem). You’ll notice that the folded edge doesn’t quite lie flat against the rest of the skirt – that’s because the A-line shape makes the circumference of the lower edge slightly larger around than the skirt above it, so they don’t fit together perfectly. In the next part of learning how to make an A-line skirt, we’ll show you how to fit that.
2
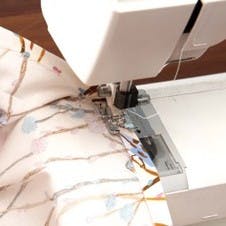
Run gathering stitches. Fold up the first (½” [1.3cm]) fold at the hem and stitch a row of gathering stitches near the edge of the hem. Then run another row of stitches just inside those, closer to the fold. (To make the next step easier, you might consider running multiple sets of gathering stitches [starts and stops] so you have a bunch of sections of gathering threads rather than one long one that goes all the way around.)
3
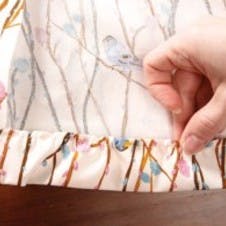
Pull up ease stitches. Fold up the second (1½” [4cm]) hem fold. Using the ease stitches, pull up on the ends of the thread and ever so slightly gather the fabric at the hemline, as shown. This will reduce the length of the edge at the hem. Do this all the way around the hem, taking care to make the hem match the circumference of the skirt above it and to adjust the gathers so they’re even all the way around. (By the way, you won’t have true gathers here. You should just have very slight puckers in the fabric.)
After the ease stitches have all been pulled up, use your iron’s steam to relax those puckers and help your hemline lie flat.
To give a really professional look to this skirt, you’ll use the blind hem stitch. The blind hem stitch works like this: The machine stitches straight for a bit just on the hem allowance, and then it jumps out and grabs the rest of the skirt and connects the two. On the outside, all that shows is the itty-bitty single stitch where the machine jumped out, and not all the long stitches, which are hidden in the hem allowance inside the skirt. It’s pretty neat, but I strongly recommend doing some practice stitches with this technique first before working on your skirt.
4
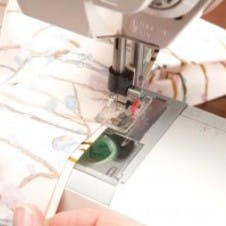
Fold fabric stitch blind hem. How the fabric is folded is the key to the blind hem stitch. Place your skirt wrong side up on your work surface with the hem folded up facing you. Then take the hem allowance and 2″ (5cm) of the skirt, and fold them back underneath the rest of the skirt so that just ½” (1.3cm) of the hem peaks out at you. The right sides of the skirt are touching one another, and the first fold you placed at the lower edge of the skirt (in step 1) is facing up at you.
Set your machine to the blind hem stitch. This is the one with the icon that looks like a heartbeat – long straight line, then a carrot, then more straight line. Replace the presser foot with the blind hem foot, if you have one. (If you’re not using a blind hem foot, your standard foot for zigzag stitching will work fine, but take your time and really watch your work, because the regular foot won’t keep the edges lined up for you the way the special foot will.)
Too create the stitch, begin with the hem allowance extended under the presser foot. You’ll see that the needle jumps to the left every six or seven stitches – the goal is to line up the needle so that when the jump comes, it snags just a single thread of the fabric on the fold.
5

Finished! In the finished project, you’ll see where the straight stitches are on the hem allowance (invisible to the outside) and the carrot stitches are grabbing a single thread of the rest of the skirt, making nearly invisible indentations. Learning how to make an A-line skirt was easier than you thought, huh?
