Learn the magic loop knitting method with this simple tutorial
Published on June 21, 2021 1 min readWant to learn how to knit in the round? The magic loop is where it all begins! Ideal for knitting snuggly socks, sweaters and hats in the round to create a tube-like shape. So, pick up your circular needles and follow Merion’s simple steps and video tutorial to learn the magic loop technique.
What is the magic loop in knitting?
Magic loop knitting is the clever technique of making a small circle while using a single pair of circular needles, which you can then go on to knit sleeves, socks and similar small projects. Knitting in the round means that you’ll knit in one continuous piece and the magic loop will help with this! If your circular needles are a little too long for the small circumference of your project, the magic loop method will allow you to still knit in the round no matter your cable length.
While you can use DPNs, we recommend circular needles when making a magic loop. When it comes to the length of the cable on your circular needles: the longer the better! You can use this method to make so many fun projects including this cozy hat in the round.
How to join the round using magic loop
1
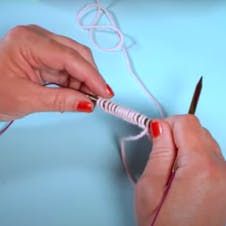
Setting up your magic loop. Cast on 16 stitches using any method.
Pro Tip
In this demonstration Merion starts with 16 stitches, however when working on a new knitting project, your pattern will tell you how many stitches to cast on.
2
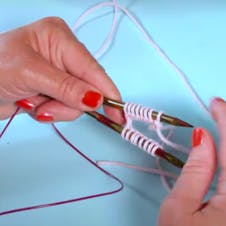
Divide the stitches on your needle. Slide half the number of stitches on your needle onto the cable, bend the cable in half and move these round to the other needle. You should now have an equal number of stitches on each needle. This tutorial leaves us with 8 stitches per needle.
3
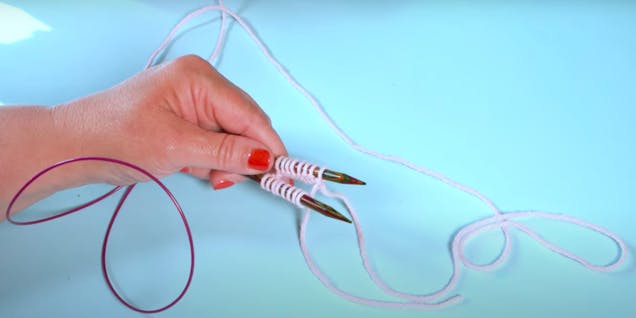
Check everything’s in the right place. The back needle should always be the one attached to the working yarn. The cable will be neatly on your left hand side and the tips of your needles on your right. Once everything’s in place you’re ready to join your magic loop!
Pro Tip
When knitting in the round using regular knit stitch with magic loop, the inside of your loop will be the purl stitches and outfacing fabric will be the flat stockinette stitch.
4
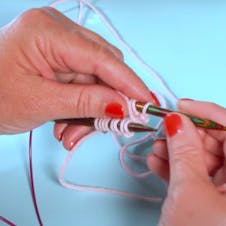
Knit the stitches on your front needle. Place your working yarn to the side, out of the way. Slide your stitches off the back needle leaving them on the cable. Bring your back needle to the front, taking hold of your working yarn, ready to knit the stitches on your front needle.
5
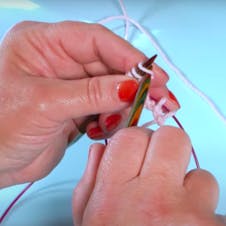
Join the round. Your first stitch is the most important as it will connect the two ends to make your circle, so try to keep the gap as tight as possible. Simply knit this stitch. Continue knitting all the stitches on that needle.
6
Turning your work, When all the stitches on the back needle have been knitted, turn your work, put your working yarn to the back and pull the cable through so the stitches are now on your front needle. Now, pull the back needle around, pick up your working yarn and continue to knit.
Pro Tip
Use a stitch marker to see how many rounds you’ve knitted. This will help you keep track as you work through your pattern.
7
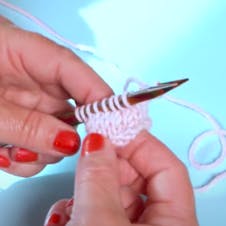
Continue to knit. Turn the work around as you go, repeating step 5 and 6. As you continue to knit your fabric, you’ll start to see your beautiful stockinette stitch emerge.


