How to create an incredible vintage tiered cake
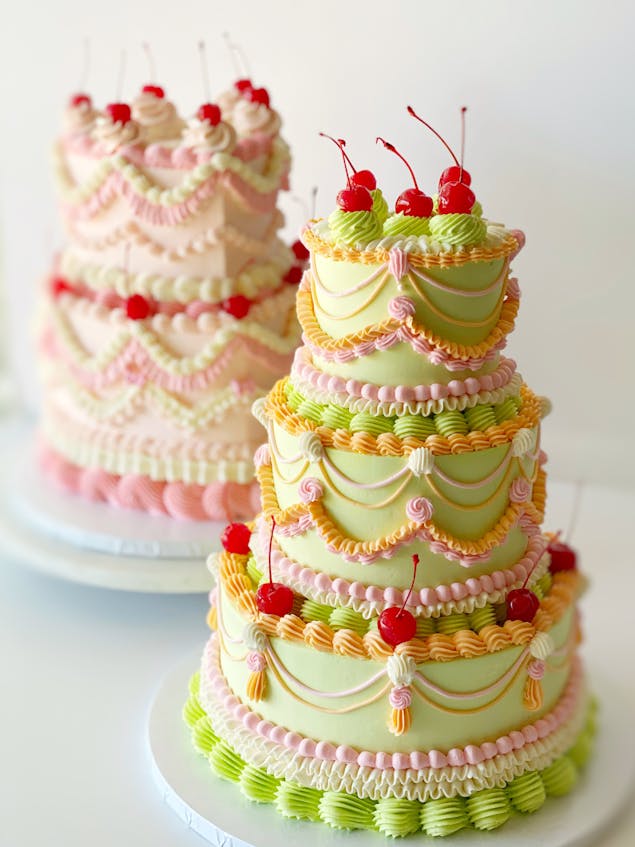
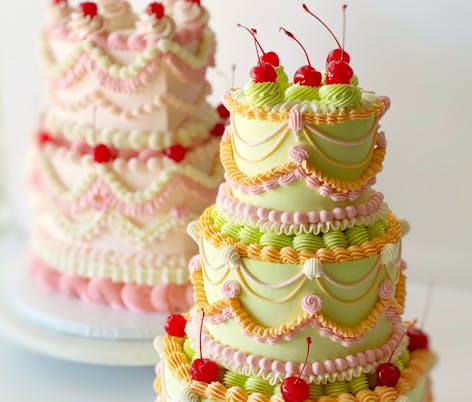
Published on July 18, 2022 1 min readTiered cakes with oodles of ornate frosting are making a comeback! Piled high and perfectly piped, these vintage cakes make the most impressive bakes for any celebration – weddings included! Want to create an amazing tiered kitsch cake at home? Lindsey from Crumby Bakeshop shows you how it's done!
Materials
- Ateco Decorating Turntable
- PME 13" Palette Knife Angled Blade
- PME Stainless Steel Plain Side Scraper (5 x 3.5")
- Wilton Icing Colors, 8-Count Icing Colors
- Wilton 12-Inch Disposable Pastry Bags, 100-Count
- Wilton 12-Inch Disposable Pastry Bags, 100-Count
- Wilton Starter Decorating and Piping Tip Set, 9-Piece
How to make a vintage tiered cake, step by step
1
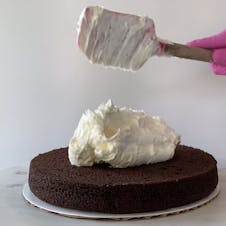
Start by baking your favorite sponge cake recipe. For each tier, stack cake layers with buttercream filling by placing a large dollop of buttercream on the cake layers and smoothing it with an offset spatula.
2
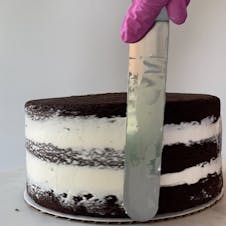
Once the layers are stacked, use a spatula to smooth any excess buttercream on the sides of the cake. Chill the cakes in the refrigerator for about 20 minutes to allow the buttercream to set and prevent the layers from sliding.
3
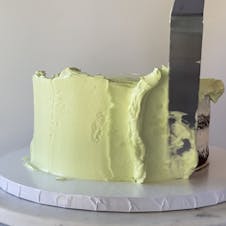
While the cake is chilling, mix buttercream in the color of your choice on low in a stand mixer until smooth and free of air bubbles. Now it's time to ice the cakes. Start by spreading an even layer of buttercream on the top of the cake, then cover the sides. Use a cake scraper to smooth the sides by applying light pressure while holding the scraper at a 90-degree angle and gently turning the turntable. Scrape excess buttercream with each turn and wipe the scraper with a damp towel if necessary, to keep it clean. Fill in any holes with extra buttercream and continue to scrape the side of the cake until smooth. Repeat the process for each tier.
Pro Tip
Cut circles from parchment to match the size of each tier. Fold each parchment circle in half 2-3 times to create even sections. Place the parchment circle on top of each tier and use a spatula to make small marks in the buttercream as a guide for your piping. Remove the parchment and stack the cakes.
4
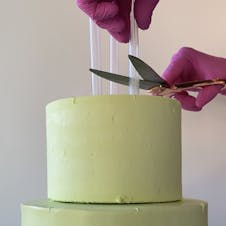
Cut wooden dowels or plastic straws to the height of the cakes, placing them in the centre of the bottom and middle tiers to provide support when you stack the cakes.
5
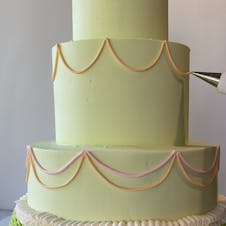
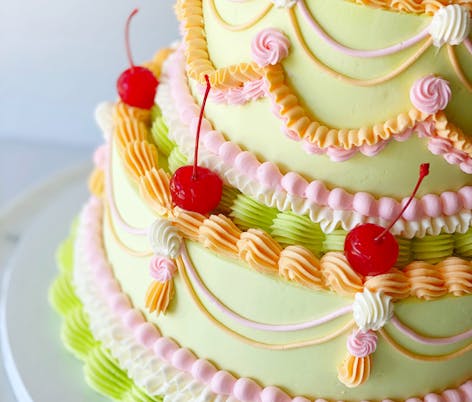
Pipe the swags using a small round piping nozzle. Begin by touching the tip to the top edge of the cake and applying firm pressure as you pull away from the cake and let the string of buttercream drop as far down as you would like. Maintain pressure as you pull back up to end of the section, allowing the buttercream string to attach to the side of the cake.
6
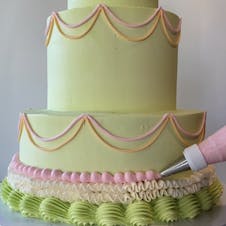
Use a large open star nozzle to pipe a shell border around the bottom of each tier. Continue to add layers of petal tip ruffles and a beaded border.
7
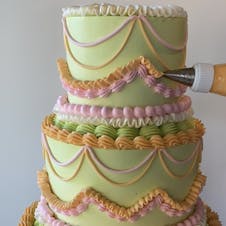
The key to the vintage look is layering. Employ a variety of piping nozzle shapes and sizes to create additional borders, ruffles, rosettes, etc. until you are satisfied.
8
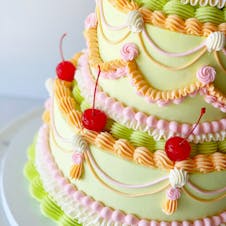
Top with maraschino cherries for maximum cuteness!
Et voila! A vintage tiered cake that's guaranteed to be the talk of the party!
