Crochet a fabulous floral baby blanket
Published on 16 September 2019 1 min read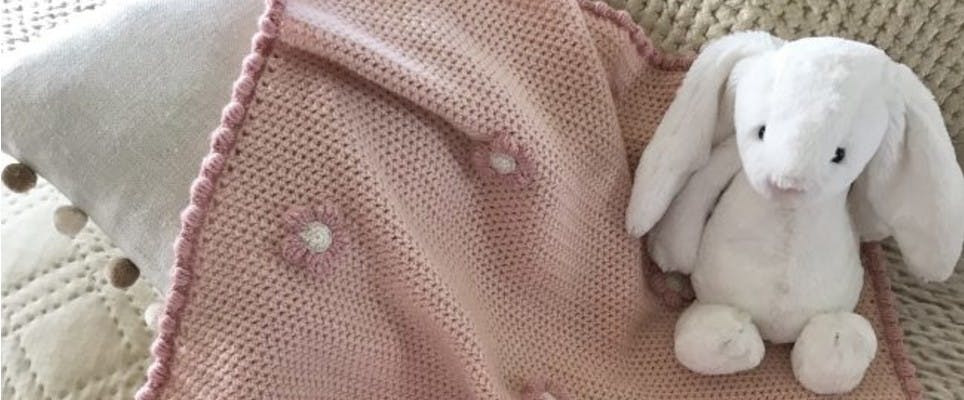
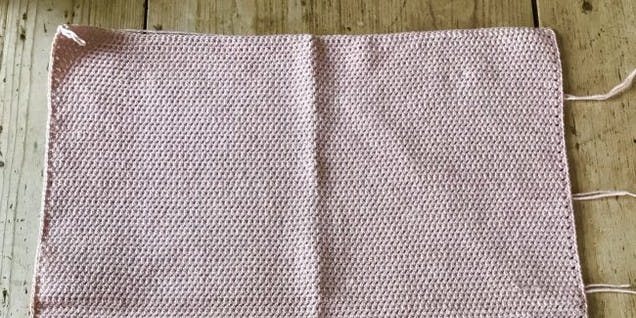
Nothing celebrates the arrival of a new baby like a lovingly crocheted gift, and this gorgeous baby blanket by Kate Eastwood is one of our favourites! This super soft blanket is dotted with delicate flowers and is designed to fit a car seat or crib, making the perfect baby shower present.
The best part? It couldn’t be easier to make! Worked in a simple htr stripe using Willow & Lark Nest yarn, this blanket is guaranteed to keep baby snug with a luxuriously soft and warm feel.
Materials
- Willow & Lark Nest in Fondant Pink x 6 Balls
- Willow & Lark Nest in Milk x 1 Ball
- Willow & Lark Nest in Rose x 1 Ball
- 4.5mm Crochet Hook
- 3.5mm crochet hook
- Needle and Thread


Ready to get to work? The main part of the blanket is worked in rows of half trebles, htr then finished off with a bobble border. The finished measurements of the blanket are around 56cm x 64cm.
How to make the blanket
1
Using a 4.5mm hook and the colour Fondant Pink work a chain of 93. Starting in the second chain from the hook work a row of HTR. At the end of the row chain 1 and turn. 92 sts. Repeat each row as above until your work measures approx. 53cm.
2
Finish with a Right Side row. At the end of the row continue on around the blanket working in DC. Work 2 to 3 stitches in to each corner stitch. At the end of the round, Sl St to join and finish off.
3
Now join in the Rose coloured yarn and work a second round of DC all the way around the blanket, working 2 to 3 stitches in to each corner stitch. Sl st to join at the end of the round and chain 1.
How to make the bobble border
1
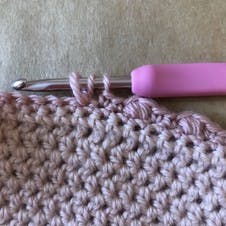
Turn your work so that you have the Wrong Side facing you and DC 2. * Yarn over and pull up to approx. TR height, five times. This will give you 11 loops on your hook. Yarn over and pull through all 11 loops. Chain 1.
2
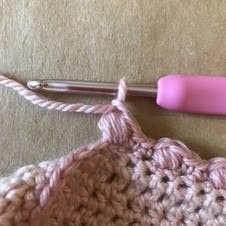
DC 2. * Repeat from * to * all the way around the edge of the blanket.
3
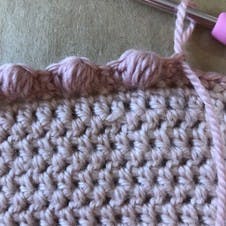
At the end of the round Sl St to join and finish off. Sew in all the ends.
How to make the flowers
1
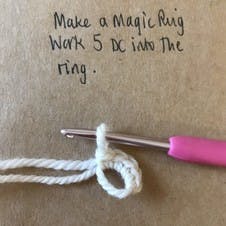
Round 1: Make a Magic Ring and work 5 DC in to the ring.
Pro Tip
The flowers are worked in the Milk and Rose shades with a 3.5mm hook. You’ll need to make around 14 flowers.
2
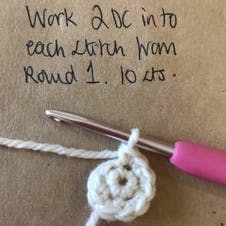
Round 2: Work 2 DC in to each stitch from Round 1, 10sts.
3
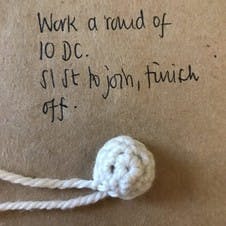
Round 3: Work a round of 10DC. Join with a Sl St at the end of the round, finish off and sew in the ends.
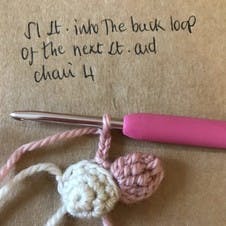
4

Join in the Rose yarn with a Sl St and *chain 4. Work 4 DTR all into the same stitch, leaving the last loop of each stitch on the hook. You will now have 5 loops on your hook. Yarn over and pull through all 5 loops, chain 1 to close the bobble. Chain 4 and Sl st in to the next stitch*. Sl St in to the next stitch and repeat from * to *
5
Make 5 petals in total, Sl St to join and finish off, sewing in any ends.
Once you have made all of the flowers, lay the blanket on a flat surface and position the flowers where you want them to be. Pin in place with safety pins, then use a needle and thread to stitch the flowers in place.