Getting started with machine sewing
Published on 21 January 2022 By Sarah J 4 min readEver wanted to learn how to use a sewing machine? You’re in the right place! Lisa Comfort from Sew Over It chats through the essential tool kit you will need, how to thread your machine and explains how to make your first steps in sewing. Follow along with the video tutorial or find all the information you need right here.
Your essential sewing kit
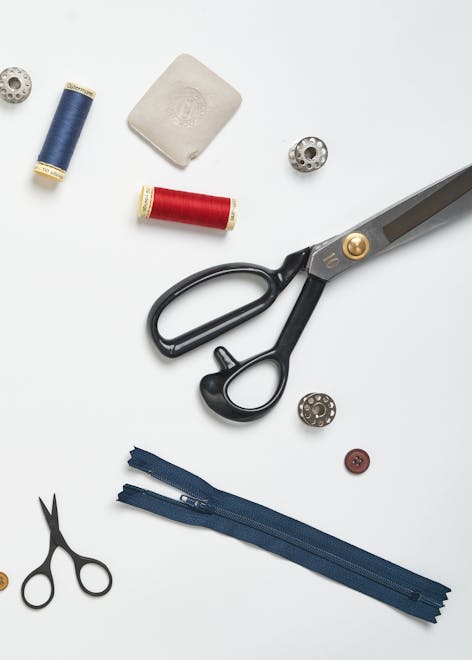
You may pick up some other useful tools along your sewing journey but these are some of the basics to have on hand as you get started!
- Fabric. It's always good to start sewing with a nice easy-to-handle fabric like cotton.
- A sewing pattern. This Pussy Bow Blouse pattern is a great one for beginners!
- A sewing machine.
- Pins. Using long, sharp pins with a plastic head makes it easy to hold on to and threads through lots of layers of fabric with ease - going for a higher-quality pin will help with this! Having a magnetic pin dish comes in really handy; it makes it really easy to pick up the pins from your sewing table!
- Measuring tape. Imperial and metric for all your projects.
- Ruler. You can use a straight 30cm ruler but if you are starting to alter patterns, it’s worth investing in a special pattern master ruler like this one here.
- A fabric marker pen or tailor’s chalk. This is super useful to make marks on your fabric that can be easily washed away. A fabric pen is good for light fabrics and will come off with ease. The chalk is good with darker fabrics and comes in pen or traditional triangle form.
- Embroidery scissors. For the smaller snips of thread as you go along!
- Fabric scissors. Choosing a good pair of fabric scissors will really help! Opt for a pair with a mid-length blade that is nice and weighty. Keep your blades nice and sharp by only using your scissors for fabric - using them for paper and other materials can lead to them becoming blunt.
- Bobbin. This will come with your machine and can be plastic or metal.
- Unpicker. For those inevitable mistakes as well as for removing internal seams, make sure you have a sharp unpicked in your toolkit. A little tip - rub the metal tips with silver foil to sharpen them!
How to thread your machine
For new sewing machine users, threading the machine can seem daunting. There are just three main elements and once you have mastered it, there is nothing stopping you!
1
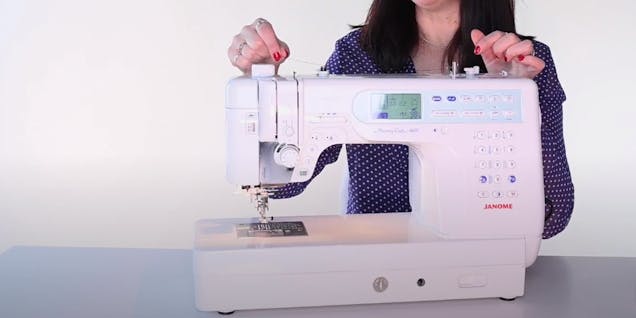
Wind the bobbin. This is first thing to do. Put your spool of thread on the top of the sewing machine, on the spool pin.
2
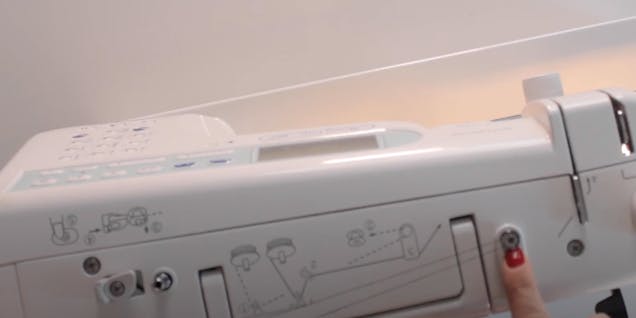
Pull the thread out and wind it around the bobbin winding tension disc at the top of the sewing machine. Put the bobbin on the bobbin pin and take the end of the thread and wrap it around the bobbin.
3
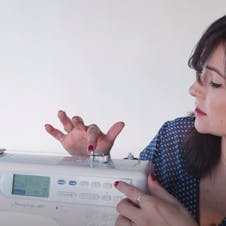
Start the bobbin winder by pushing down on the foot pedal or by pressing the bobbin winding button. Disengage the needle to stop it going up and down while you are winding your bobbin. Completely fill the bobbin with thread before removing it. You are now ready to thread your machine.
4
Thread the top part of the machine. Place the thread onto the spool pin. Wrap the thread around the thread guide. You will be looping it around the tension discs on the bottom, and then back up towards the top along and through the second thread guide. You will then need to wind the thread around the take up lever (which looks like a little rabbit ear!) .
5
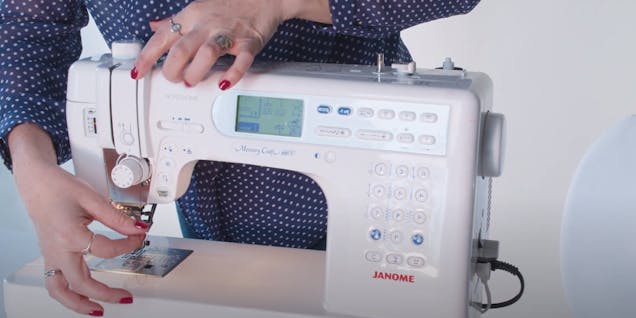
Pull the thread back down the machine towards the needle. Thread the needle through the small eye in the needle and pull several inches of thread out the other side. The upper half of your machine is now threaded and you just need to thread the lower half before starting to sew!
6
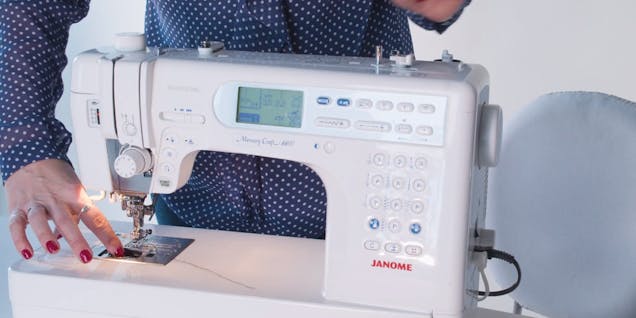
Thread the lower part of the machine. Remove the bobbin's case covering under or to the side in front of your needle. Here you will find the bobbin case, which you need to place the threaded bobbin.
7
Drop it in with a piece of thread either to the left or right depending on the instructions on your machine.
8
Turn the hand wheel to send the needle down and it will catch thread from your bobbin. Pull the thread out and cut it on your cutter so its not too long. Your machine is threaded!
Some beginner tips!
- As a beginner, stick to a tension of around 3-5.
- For most straight or zig zag stitching you just need a standard presser foot. You will need to change them if you are going to do a buttonhole or a zip. They are easy to change with the machine’s levers.
- You can get a digital or manual machine. If you have a digital machine, don’t be intimidated by all the stitches shown on your machine display. They are generally very intuitive and easy-to-follow.
- Generally if you sew with a straight stitch, stitch to 2.2 to 2 and a half. Zig zag stitching is good for stretchy fabrics or to stop edges from fraying on a seam allowance.
- If you are a beginner, a speed option allows you to slow things down when you are starting out.
How to sew
Just relax! What's the worst that can happen? Remember you are learning and so you will make mistakes.
Make sure you are sewing in a nice space. Ensure it is well-lit and you are sitting in a comfortable chair with a cushion to support your back. Put your machine on a table and have it at the right distance from you to make it easy to sew. Get yourself a cup of tea and start sewing!
To start, we will sew two pieces of fabric together because in almost all sewing that’s what you will be doing! Here, we use calico which is unbleached cotton and very easy to work with and great for practice runs!
1
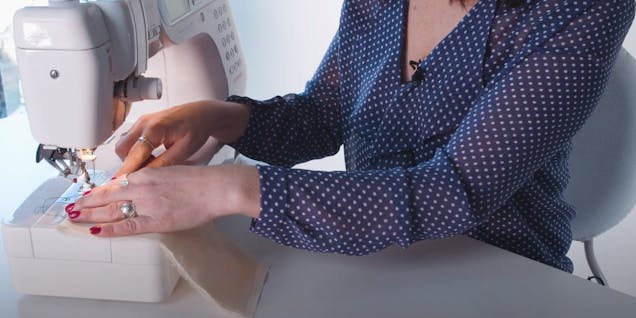
To start sewing, tuck the fabric under the presser foot. Line up the edge of your fabric at the number 10 guide. The guide ensures you have a 10mm or 1cm seam allowance, which is the most common allowance in most patterns. Stick to the same seam allowance in one project and always check them before sewing.
Lower the presser foot to hold the fabric in place.
Get your foot pedal in the right position that is comfortable for you - kind of like driving a car!
Start to sew a couple of stitches in from the edge of the fabric, by pressing down on your pedal. Avoid working right on the edge of your fabric and it can get tangled up!
2
Turn the speed down and go nice and slowly. Do a few stitches and then stop. To make sure the seam doesn’t come undone, we are going to go back over the stitches you have done. You will find a back stitch lever or button which you press down at the same time as your pedal to send the direction of your sewing backwards. Stitch back over your stitches and then back forwards to secure the seam.
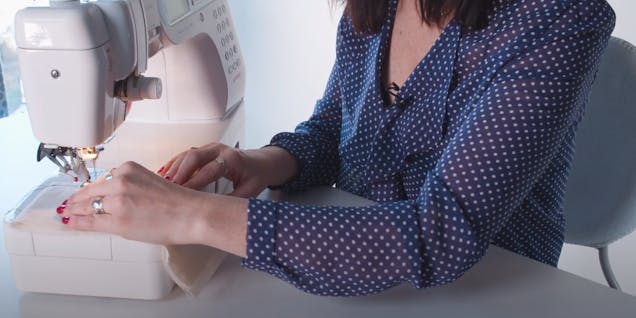
To hold your fabric in place, put one hand on either side of the needle and let the teeth pull the fabric through, making sure to keep your fingers out of the way. My hands are just guiding and steering the fabric along its way! Make sure your fabric stays against the number 10 guideline and use your hands to keep the fabric nice and flat - this is particularly important with big pieces of fabric.
3
At the end of your sewing, you need to finish the seam again by doing a few reverse stiches to create a tear-proof finish.
Lift your fabric out of the machine. Cut the thread using the machine’s cutter and then trim the threads on your fabric.
There you go! You’ve done your first bit of machine sewing!


