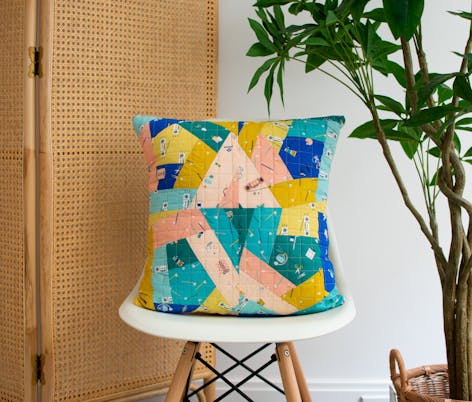
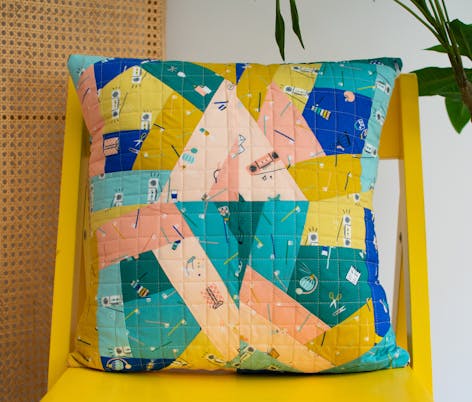
Learn how to make a crazy quilt cushion with this tutorial!
Published on 2 July 2021 2 min read
Have you ever wanted to learn how to make a crazy quilt? Well look no further! These quilts made up of crazy patchwork fabric scraps are super fun to make and are a great way to use up old pieces of fabric and get creative with your quilting! Forget the usual quilt blocks, crazy quilts are all about irregularly shaped patterns and clashing colours. This tutorial from Amanda at Broadcloth Studio will show you how to make crazy quilt blocks, step-by-step, so you can make your very own quilt!
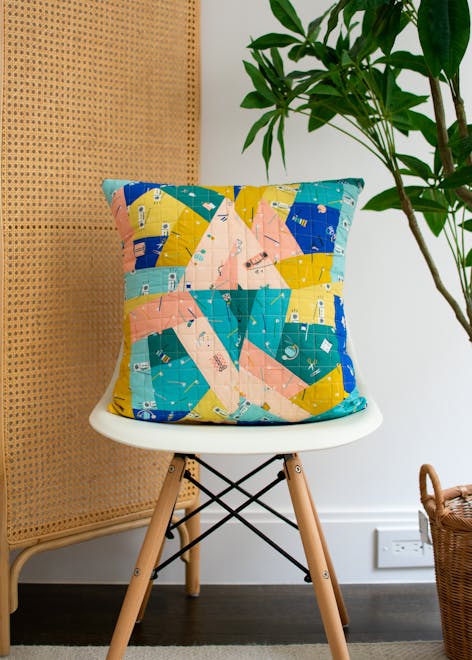
Learning how to make a crazy quilt means you’ll need to be ready to improvise! Getting creative like that can be overwhelming though, so this crazy quilt tutorial is a great way to dip your toes into the wide world of improvisational patchwork!
With a free flowing ‘see where it takes you’ patchwork technique, you’ll be making awesome crazy quilt blocks in no time. Plus you can easily adjust the pattern to use up even more fabric scraps to create a larger quilt. The most important thing to remember is to not overthink it and have fun!
Things to note:
Finished Size: 17.5” x 17.5” throw pillow (or an ~18”x18” mini quilt)
Width of Fabric (WOF): assumed to be 42”
Seam Allowance: all cutting instructions factor in a ¼" seam allowance
Materials
- Quilt Top Fabrics: eight (8) 10” x 10” scraps
- Ruby Star Society Whatnot Junior Layer Cake
- Pillow Top Backing: ¾ yd. fabric
- Pillow Back: ½ yd.
- Batting: enough to cover 21” x 21”
- Pillow Insert to fit ~18” x 18” throw pillow
- 9.5” x 9.5” (or larger) square ruler
- Olfa 16.5" x 16.5" Non-Slip, Frosted Advantage Acrylic Ruler
- General sewing supplies
Cutting
1
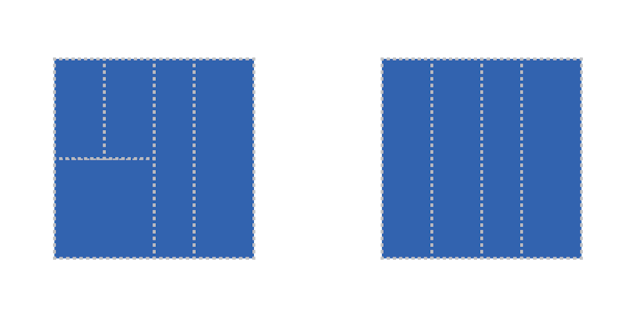
From four (4) of your 10” x 10” scraps, cut: 2” x 10” (1), 2.5” x 10” (2), 3” x 10” (1)
From four (4) of your 10” x 10” scraps, cut: 2.5” x 5” (2), 5” x 5” (1), 2” x 10” (1), 3” x 10” (1)
2
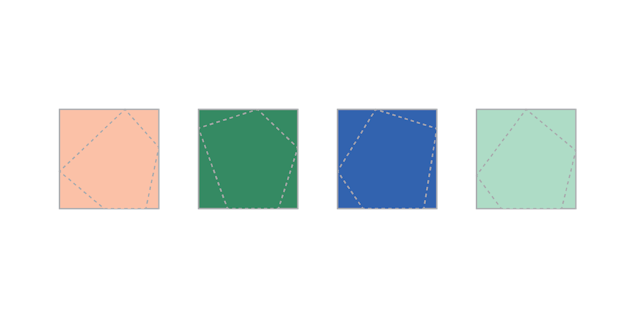
Cut your “wonky” pentagon centres.
Take your four (4) 5” x 5” squares and cut an irregularly shaped pentagon shape from each. There is no “right” way to cut these, just try to keep them as large as you can and try to avoid having one of the angles be a 90-degree right angle.
Assembling your crazy quilt blocks
This mini quilt/pillow top is made up of four (4) 9.5” x 9.5” square blocks. The blocks are built in a circular fashion around an irregular centre pentagon. To build the blocks, you will add a strip to one side at a time, before pressing, and trimming to match the straight line edge of the piece, then repeating adding strips until you have a large enough piece to trim down to a 9.5” x 9.5” block.
Before I dive into sewing, I like to divvy up my pieces into four piles, starting with my pentagons then dividing up my 10” long pieces between the pentagons. There should be six strips per pile: don’t worry too much about how many of each width is in each pile, just eyeball it to make sure all the 3” wide strips aren’t in one pile etc. Then to finish, add one of the 2.5” x 5” pieces to each pile and set aside the other four 2.5” x 5” pieces to use as needed/as you want when building the blocks!
Assembly
1
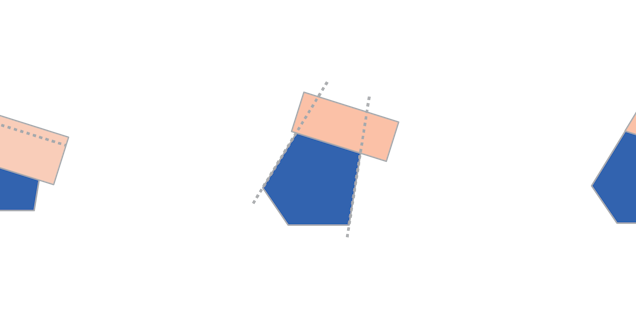
To start, take one of your wonky pentagons. Grab one of the 2.5” x 5” pieces and pick one of the sides to sew first. Following the illustrations, line up one corner of the 2.5” x 5” piece with the corner of the pentagon, allowing the 2.5” x 5” piece to overhang the pentagon by about ¼” (this does not have to be exact!). Pin in place and sew with a ¼” seam allowance.
2
Press so the seam is pressed away from the centre pentagon.
3
Trim the 2.5” x 5” piece, using the edges of the pentagon as a guide.
4
Take one of your 10” strips and following the same process, sew it to the “next” counter-clockwise side of the pentagon.
5
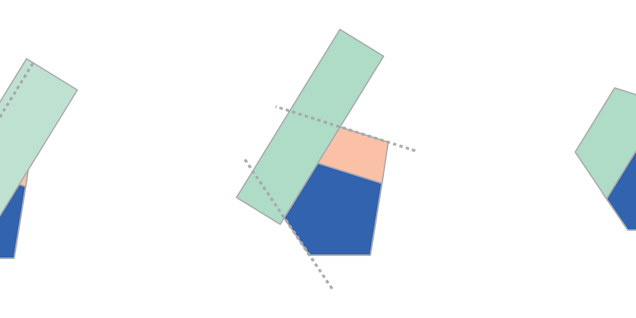
Press, trim, and move to the “next” side counter-clockwise. As you trim, do not throw away any of your scraps. If at any point you realize you misjudged the edge when you pressed and you don’t have quite enough excess to trim down to match the other edge, don’t panic!
Just adjust the ruler till you do have just enough overhang and trim (remember: it doesn’t have to be perfectly parallel to the original edge of the pentagon!)
6
Repeat Step 4-5 until you’ve used up all your 10” long strips from this pile. As you go, if you find that you need to lengthen one of your strips, just dive into your scrap pile and cobble a longer strip together: it’ll just add to the haphazard look of the patchwork!


7
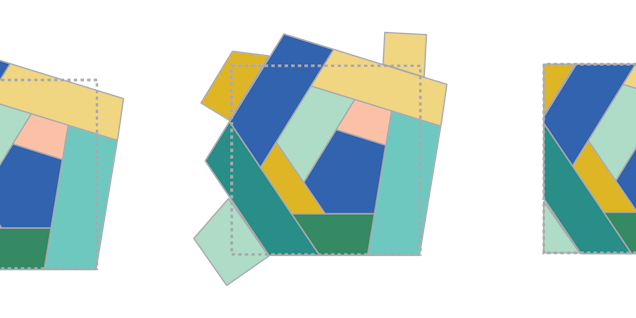
Once you’ve added all the strips from the pile, use your 9.5” x 9.5” ruler to check to see where you need to “fill in” the square. Add your larger scraps at the corners as necessary.
8
Press then trim the block to 9.5” x 9.5”.
9
Repeat until you have four (4) blocks.
Pro Tip
Another method of building these sorts of scrappy blocks is called “foundation piecing,” where you sew your pieces to a piece of muslin as you go.
Since you’re sometimes sewing and cutting across the grain of the fabric, it can easily get stretched and the muslin helps stabilize the patchwork so that the block doesn’t start to stretch or become too wonky.
Because of the smaller size of these blocks and because our strips are all cut with the grain, I’ve opted to not use muslin as a foundation, but it is something to keep in mind to try and experiment with!
Pillow top assembly
1
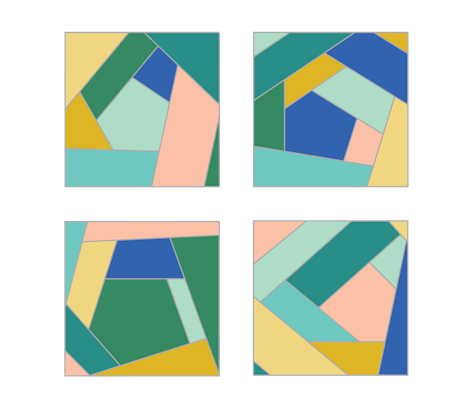
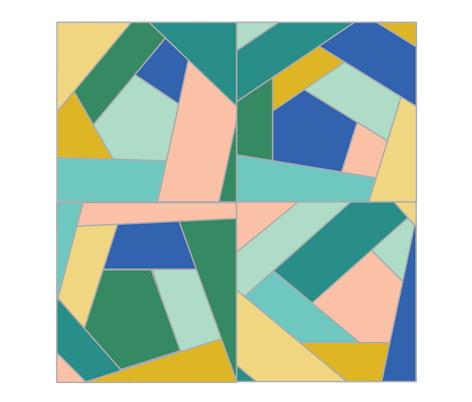
One you decide on a layout of your four scrappy blocks, sew the top two and then the bottom two together. Press the top half’s seam in one direction and the bottom in the other so that the seams nest when you sew them together. Sew the two halves together and press.
Quilt
1
Pillows are a great way to use up scraps of fabric for the pillow top backing and scraps of batting! For the pillow top, you’re going to need backing that is 21 x 21” (yardage or a patchwork of scraps) and batting to match.
2
Make your quilt sandwich, placing the backing fabric wrong side up on a flat surface. Next, layer on your batting and the quilt top right side up. Baste as you normally would and then quilt to make you happy.
Finishing instructions
1
To finish your pillow using the envelope closure method, you’re going to need to cut two 13” x 18.5” pieces of backing fabric. Next, hem both pieces along one of the long sides: fold over twice at ½” (pressing the edge after each fold), pin in place, and sew a ¼” seam from the edge.
2
Place your quilted pillow top right side up on a flat surface. Place one of your back pieces right side down, lining up the unfinished edge with the edges of the pillow top (the hemmed edge should be towards the centre of the quilt top).
Repeat with the other back piece: there will be a couple of inches of overlap of the back pieces in the middle of the quilt top. Pin in place.
3
Sew all the way around the edge of the pillow with a ½” seam, backstitching when you start and stop.
Pro Tip
The envelope closure method has an “exit” built in, so there is no need to leave a space to turn the pillow inside out.
4
Trim your corners and turn it inside out. Insert your pillow form and give the pillow a hug (this helps fill in the corners). Then step back and admire!
