DIY Floral Headband by The Queen Stitch
Published on 15 August 2018 By Meg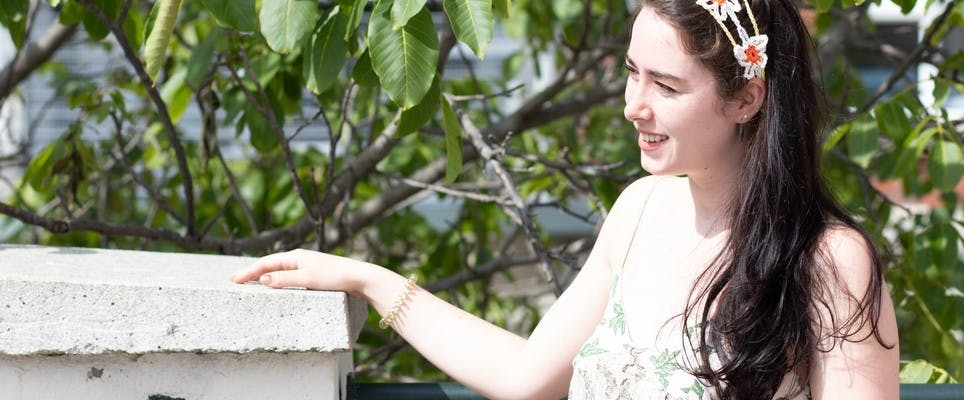
When the sun is shining and the birds are singing, the only accessory you’re going to want to wear is the prettiest of headbands. This easy floral headband by The Queen Stitch is the perfect option! Use up your scraps and create something you love.
Pattern Notes:
4mm Hook
Cloth headband, measures 20” around (50.8 cms)
Flowers approx. 2.25 inches sq (5.71 cms)
Difficulty level: easy
Stitch Notations:
ch – chain, sl st – slip stitch, sc- single crochet, CA – Colour A: Blood Orange, CB - Colour B: Paper White, CC – Colour C: Daffodil Yellow
1
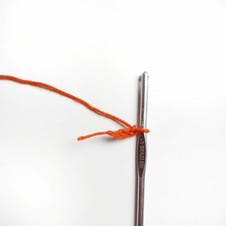
Starting the flower centres. With CA, you’re going to ch 4, then sl st to close and create a magic loop.
2
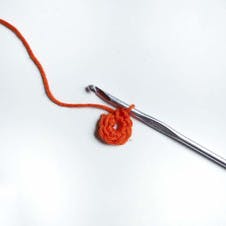
Finishing them off. Next, you’re going to sc 8 and then sl st to close. Cut and tie off.
3
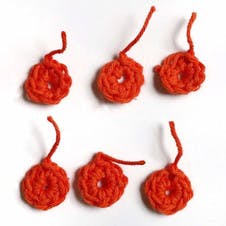
Repetition. Repeat 5 more times, ending with a total of 6 flower centres.
Pro Tip
If you have particularly thick hair or you feel that your head is on the bigger side of average, you may want to create 7 flowers instead of 6.
4
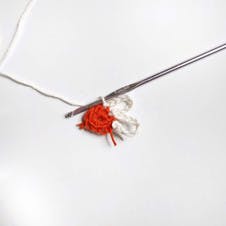
To start the petals for the first flower. With CB tie onto one of the centres and ch 8.
5
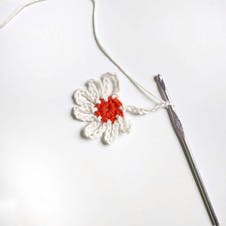
Complete the flower. Then sl st into the next stitch, repeat 7 more times to form a full flower. Sl st to finish and then cut and tie off.
6
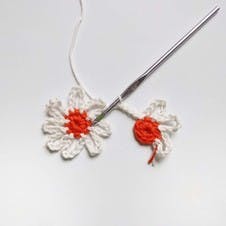
Second flower. Start the second flower just as you did the first. When you get to the 4th petal you’re going to ch 4 and sc around the 8th petal of the first flower. Then ch 4 and sl st into the next stitch to finish the petal.
7

Finish it off. Complete 4 more petals. Them cut and tie off.
8
Repetition. Repeat until you have 4 flowers, chained at the 4th and 8th petal.
9
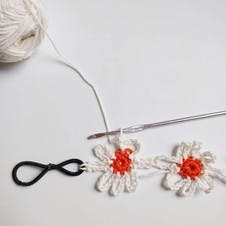
The 5th flower. Start this flower just like you did the others, by tying on and creating 3 petals. On the 4th petal connect to the end of the hair tie with a sc, then continue around. The 8th petal should connect back to the flower chain.
10

The 6th flower. Just like you did with the previous end, repeat on the other side to close the loop of the head band. Cut and tie off. Weave in and cut off all ends from the flowers.
Pro Tip
You can leave your headband as just flowers or you can add a border for more stability.
11
Starting the border. With CC, tie onto the hair tie with a sc. Then you’re going to ch 7 and sc to ouconnect to petal 1. Next, ch 4 and sc to connect to petal 2.
12
Finishing it off. You’re going to ch 11, then sc to flower 2, petal 2. Then, ch 11 and sc into flower 3 petal 2. Repeat this until flower 6. Then ch 4 and sc into petal 3. Then ch 7 and sc into the hair tie. Cut and tie off.
13
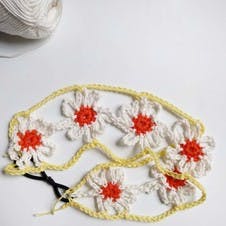
Repetition. Turn the headband around, repeat on other side. Pull ends through the loops on the hair tie to tuck them in, then trim.
Pro Tip
If you’re a tight crocheter, and your petals are curling, you may need to block your headband so that the flower petals stay flat.
Materials
- Paintbox Yarns Simply DK
- I used paintbox scraps in 3 colours, you don’t need more than 50 yards (45.72 metres) in each colour. Any scraps will do!
- Pony Easy Grip Crochet Hook
- A hair tie with knot tied in the middle, so there are two even loops