How to pick up stitches
Published on 19 December 2018 By Amy Kasper 3 min read
If you're not a fan of sewing, picking up stitches is a brilliant way of knitting garments in a continuous piece. Great for knitting neckbands, the front of cardigans and anywhere where you’d like a nice sturdy edge. Amy Kaspar talks through two different techniques to choose!
Picking up stitches gives a knitted piece more stability, even if you're picking up and knitting to continue in the same direction you were already knitting. Seams and pick-up edges prevent a bit of stretch that naturally occurs in our stitches, which means it's great if you're after a sturdy edge!
Two techniques to pick up stitches
There are generally two different techniques when it comes to picking up stitches in knitting patterns. Designers or patterns will either say, “Pick up *x amount of stitches*” or “Pick up and knit *x stitches*.”
Both serve the same purpose, but one goes from left to right, and the other goes from right to left. Which method you use often depends on the construction of the garment.
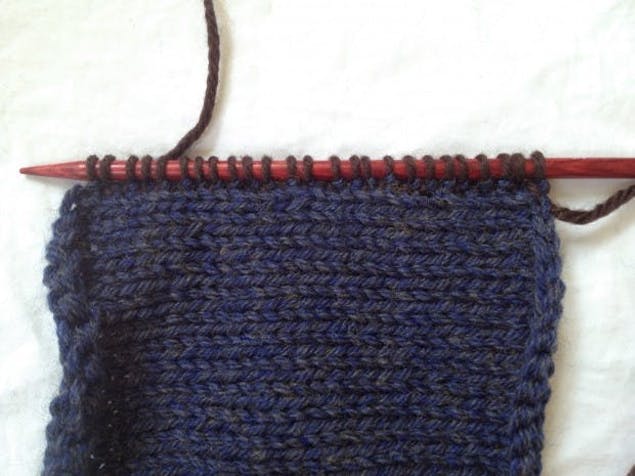
I'll show “pick up” on the garter stitch (right) edge, and “pick-up-and-knit” will happen on the stocking (left) edge. This swatch is a great example of why gauge is so important. The swatch was knitted left to right, and there is the same number of rows on both sides of the swatch!

If you're looking for ways to pick up dropped stitches then we have 4 techniques for you to try.
Technique 1: How to 'pick up' stitches
Step 1 - Pick up your stitch
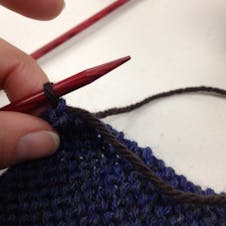
To pick up stitches, start on the left edge of your piece with the right side facing. Insert the left needle into the middle of the edge stitch, or between the first and second stitch; you can do either, but make sure you are consistent about it! Wrap the yarn around the needle clockwise, just like when you knit, and pull the loop through the stitch.
Step 2 - Keep going to the end of the row
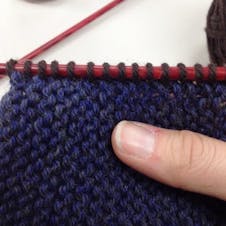
Continue in this manner, from left to right along the garter ridges, until you get to the end of the row. Give each loop a slight tug so your pick-ups are not too loose; you want to mimic your knitting tension.
Step 3 - Time to knit
Now you have live stitches on your row you can start knitting. Since they're secured through the back of the piece, they'll stay attached.

If you have too many or too few stitches, no biggie. Just pull it out and try again! Your new yarn is not attached to your old yarn, so you're not affecting the rest of the piece by ripping out and picking up again.
Technique 2: How to 'pick up and knit' stitches
Step 1 - Pick up and knit
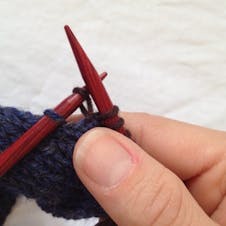
To start, insert your left needle into that first stitch on the right edge, and wrap the yarn around the needle in the same direction as you knit.
Step 2 - Pull loop through inserted stitch
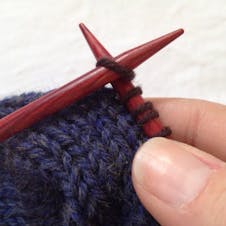
Pull that loop through the inserted stitch. Then, go ahead and stick your right needle into this loop and knit it normally. Give the stitch a little tug so it hugs the needle. The stitch then appears on the right needle, so your next picked up stitch is to the left of the first one.
Pro Tip
On stocking stitch, aim for picking up four stitches for every five rows, or try whatever the instructions on the pattern tell you and see if that gauge works for your piece.
It's okay to reduce the number of stitches
All knitters are different, so if a designer tells you “pick up 145 stitches,” and your button band looks like a ruffle instead of a clean and flat piece, it is okay to reduce the number of stitches you pick up.
How to decide which technique to use
It's usually a matter of preference – or depends on the construction of the finished piece.
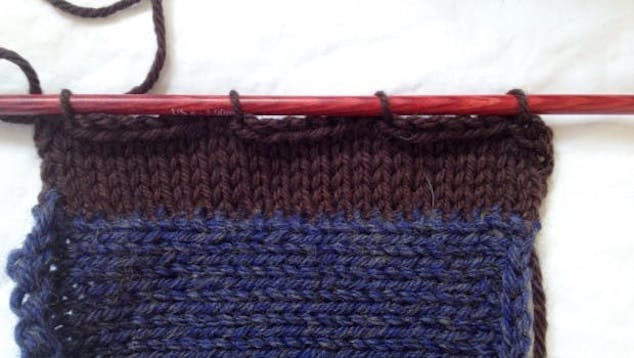
This looks like a pretty decent ratio of picked up stitches, if you look at the next swatch. I used the needle to prevent curling, but again, I did not wet the piece and block it so you could get a true view of how the sizes of the pieces relate to each other.
Pick up your needles, pick up your yarn, and pick up some stitches! Once you master the fiddly bit of pulling through the loop, the rest is a breeze. You can do it!