Jasmine Stitch Cushion by Anna Nikipirowicz
Published on 31 January 2019 By Anna Nikipirowicz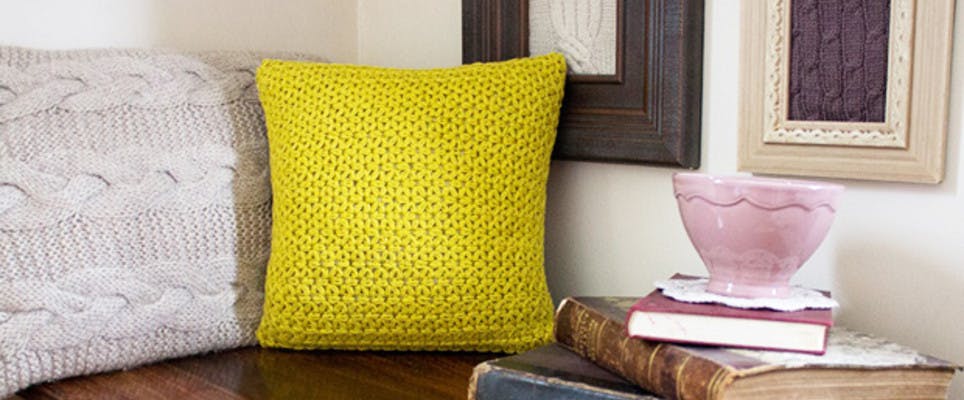
We love this stunning cushion from designer Anna Nikipirowicz, which is sure to brighten any home. Learn how to work the jasmine stitch in this free tutorial and make your very own!
Jasmine stitch, also known as Thai crochet, has been around for a long while, but recently it is having a very well deserved revival, completely unsurprisingly as this stitch is absolutely beautiful! As you crochet you form lovely jasmine flowers, since I’ve tried it out I have been totally addicted.
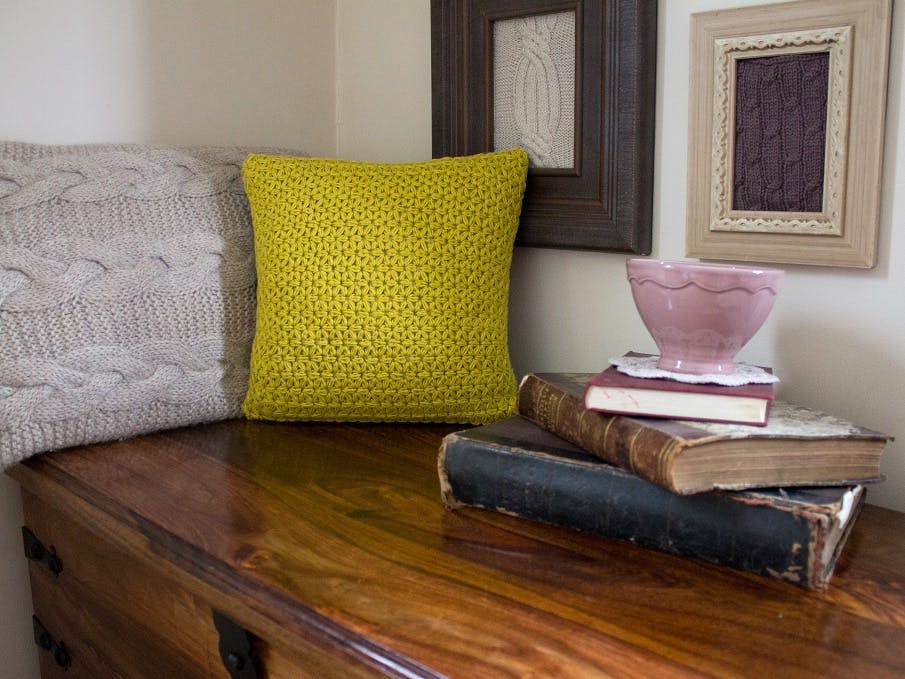
It is not an easy stitch to master, but once you get going you will not be able to put your hook down. I have taken you step by step through foundation row, first and second rows. I tried to be as clear as possible and hope you find my instructions easy. I have also included instructions on how to back the cushion with fabric and insert a zip, however you can just make two sides of cushion in jasmine stitch and join together, taking into account you will need more yarn.
Jasmine stitch uses a lot of yarn and works very well in bouncy yarns such as wool as the stitches puff up wonderfully, however I think it looks lovely made in cotton as well. For a cushion cover, cotton is perfect due to ease of washing.
Materials
- Rowan Summerlite DK
- 2 x balls in Summer (453)
- Addi Duett Coloured Needle/Hook 15cm (6.5in)
- Size 4mm
- Material of choice for backing – 35 x 35 cm (13.7 x 13.7 in)
- 1 x Cushion pad size 35 x 35 cm (13.7 x 13.7 in)
- 26 cm (10 in) close ended zip in matching colour
- KnitPro Tapestry Needle Set
- Pony Gold Eye Sewing Needles
- Matching thread
- Dressing pins
Finished size
The completed cushion measures approximately 33 x 33cm (13 x 13 in).
Tension
2 full flowers to 9 cm (3.5 in)
Pattern note: keep your chains and yoh nice and loose at all times, only tighten your yarn when making your final double crochet on top of each section of puffs.
Foundation puffs
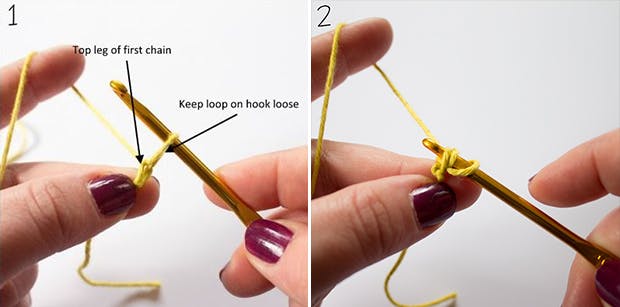
1: Make a slip knot and one chain, keep the loop on hook nice and loose.
2: Yoh, insert hook into top leg of first chain.
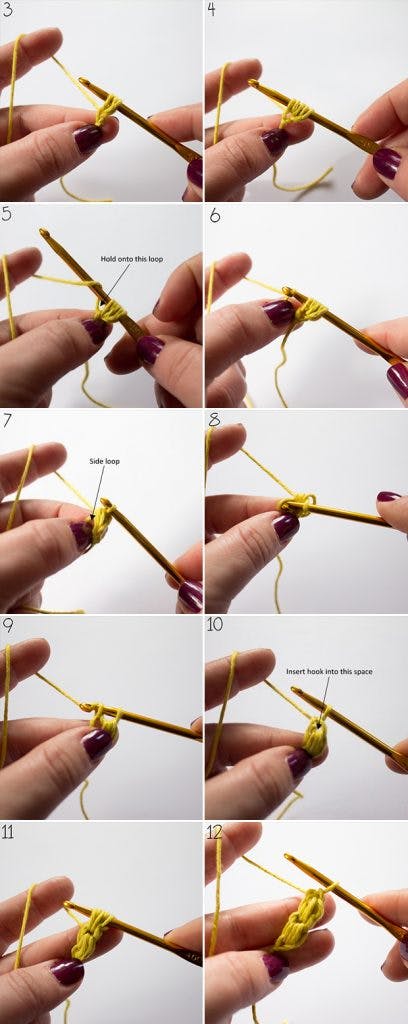
3: Yoh and pull through the stitch. 3 loops on hook, do not pull loops tight, keep loose.
4: Yoh and insert hook into the same space as step 1, yoh and pull through the stitch. 5 loops on hook.
5: Yoh, grab hold of the yarn that is feeding into the project as indicated on pic 5.
6: Hold on to the yarn with your thumb and middle finger and pull yarn and hook through all 5 loops.
7: One loop left on hook and one side loop.
8: Insert hook into side loop.
9: Yoh and pull through loop. 2 loops on hook.
10: Yoh and pull through 2 loops on hook. 1 loop left. That is the first foundation puff made. To work the following puffs continue as follows: Remember not to pull tight on the loop, but keep it loose, [yoh, insert hook into space on top of first puff and indicated on pic 10, yoh and pull loop through] twice, 5 loops on hook.
11: Repeat steps 5 to 10.
12: 2 foundation puffs made.
Continue repeating steps 5 to 10 until you have 22 puffs. Please note that my sample for this tutorial is made out of 7 puffs.
First row
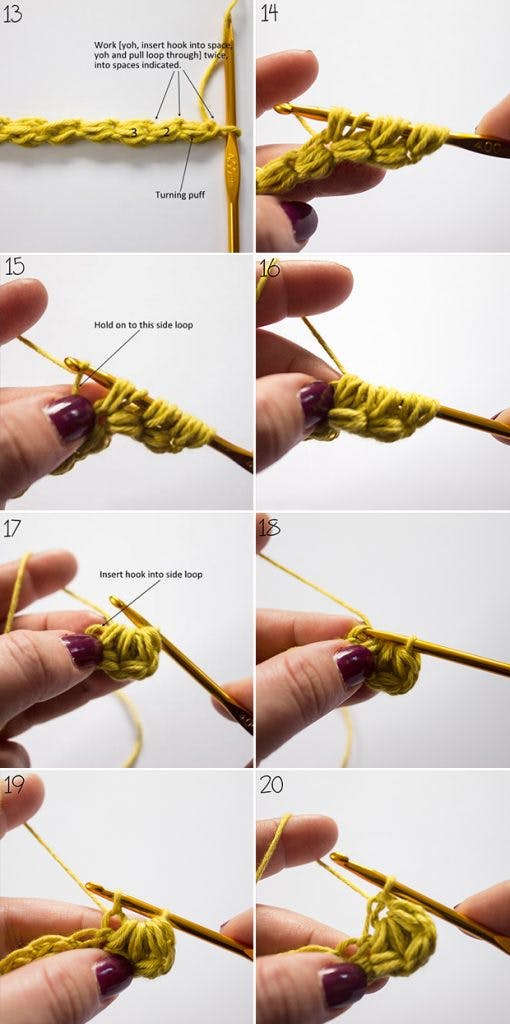
13 & 14: The last puff made will be the turning puff for second row. You will work [yoh, insert hook into space, yoh and pull loop through] twice, into top of turning puff (5 loops on hook), then into space in between turning puff and next puff ( loops on hook) and then into space between 2nd and 3rd puff (13 loops on hook).
15 & 16: Yoh, as before; grab hold of the side loop and pull yarn and hook through all 13 loops on hook.
17 & 18: 1 loop left on hook and 1 side loop, insert hook into side loop, yoh and pull loop through.
19 & 20: 2 loops left on hook, yoh and pull through both loops on hook.
Half of first flower is made.
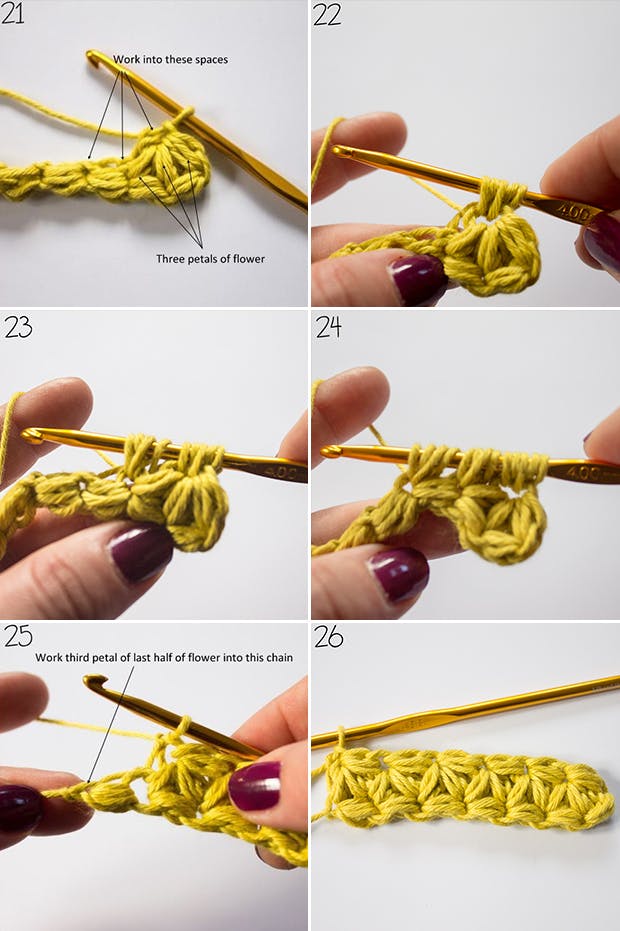
21 to 24: To make the next half of flower work [yoh, insert hook into space, yoh and pull loop through] twice, into top of three petals (5 loops on hook) pic. 22, then into space at the base of third petal (9 loops on hook) pic. 23 and then into space between next two puffs (13 loops on hook) pic. 24, repeat steps 15 to 20.
25: Repeat steps 21 to 24 until end of row, working third petal of last half of flower into the first chain made at the start of work, turn.
26: Second row is now completed.
Second row
On this row we will work second half of flower.
Working turning puff as described in steps 1 to 10 and all half of flowers as described in steps 21 to 24.
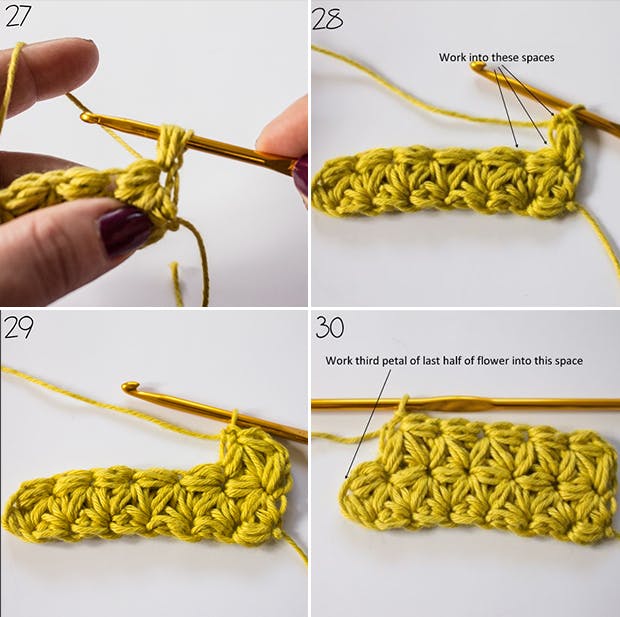
27: Keeping the loop on hook nice and loose, work 1 turning puff into space at the base of chain.
28: To make the next half of flower work [yoh, insert hook into space, yoh and pull loop through] twice, into top of turning puff (5 loops on hook), then into space at the base of turning puff (9 loops on hook) and then into space between next two puffs (13 loops on hook), repeat steps 15 to 20.
29: second half of flower is completed and you can see now first full flower.
30: Repeat steps 21 to 24 until end of row, working third petal of last half of flower into the space at top of turning puff made at the beginning of last row, turn.
Continue repeating steps 27 to 30 for 20 more rows.
Fasten off.
Making up
Weave in all ends and press gently.
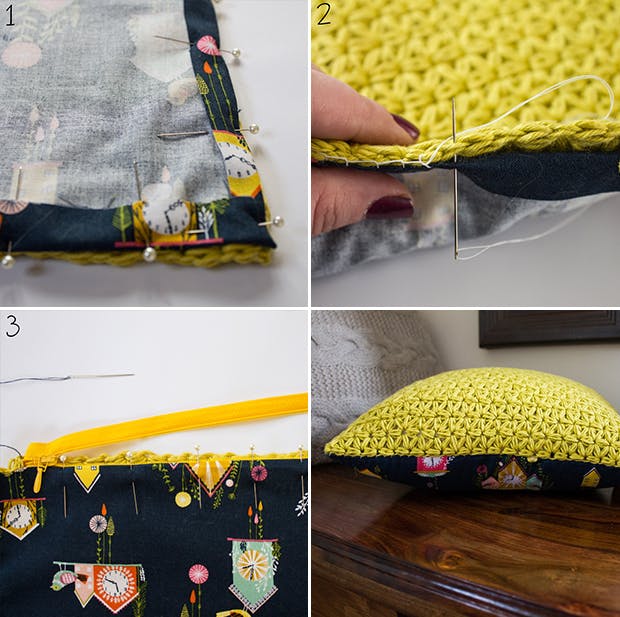
1: Press 1cm seam allowance around each side of fabric. With wrong side facing the crochet side, pin fabric in place around 3 sides and 3.5cm in on both sides on the 4th side, leaving middle unpinned for zip.
2: With sewing thread and needle, and using the overlocking stitch, sew together fabric side to crochet side, remembering not to sew over the opening for zip.
3: Turn the cushion right side out and pin one side of the zip in place around top opening using dressing pins, then sew in place. Repeat on the other side of the cushion. Insert cushion pad.