Make this beautiful macramé tealight cover
Published on 12 October 2021
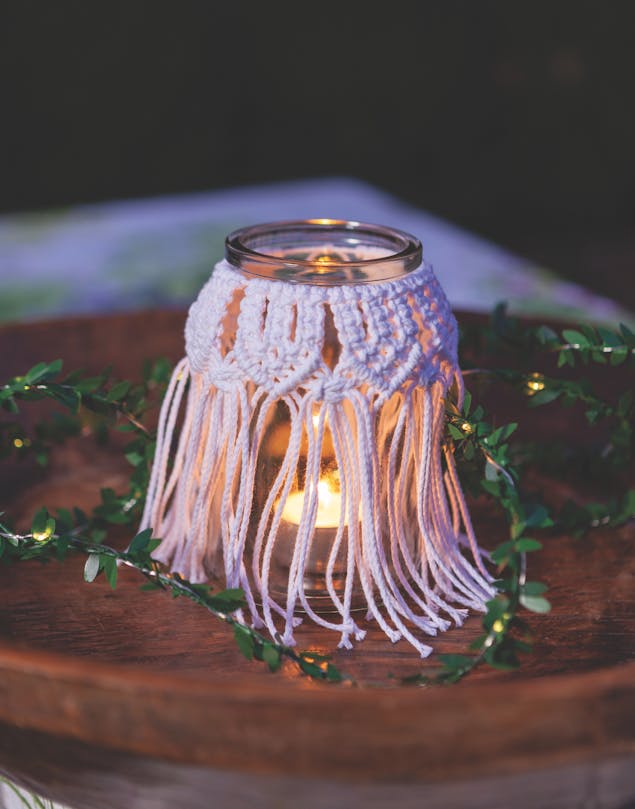
As the nights begin to get longer this dreamy macramé tealight or vase cover is perfect for giving evening soirees a touch of homemade luxe. This beautiful pattern from Macramé for the Modern Home by Isabella Strambio is so easy to make with its simple knots, you'll be addicted after the first one. We recommend using battery or solar powered tealights instead of real candles, for safety. Gather some natural dyed 3 ply string and follow these simple steps!
Finished size
20 x 15cm (8 x 6in) this fits a jar, tealight holder or vase with an opening 8cm (3in) in diameter and 15cm (6in) tall.
Knots used
Lark’s head knot
Square knot sinnet
Alternating square knots
Diagonal double half hitch knot
Square knot with multiple filler strings
Materials
- 26m (85½ft) of 2mm 3-ply string:
- 8cm (3in) diameter vase or jar
- Measuring tape
- Scissors:
- Fiskars Classic Needlework Scissors
- Masking tape
Shop Macramé chord
Preparation
1
Cut one 55cm (22in) string. This goes around the opening.
2
Cut thirty-six 70cm (27½in) lengths of string.
Pro Tip
The pattern of this design repeats itself every three sinnets, so add or subtract multiples of twelve strings to make your cover larger or smaller.
Once you've prepared all your materials you're ready to start!
How to make
1
Fix the 55cm (22in) long string on a flat surface with masking tape.
2
Tie the thirty-six strings in the middle, using the lark’s head knot.
3
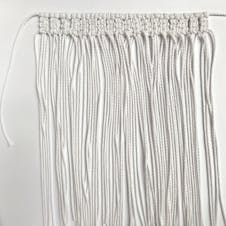
Make a row of eighteen square knot sinnets, each with three square knots.
4
Tie two alternating square knots, below the first three sinnets.
5
Tie one alternating square knot on the next row.
6
Take string 1 as your guide and make diagonal double half hitch knots with strings 2 to 6.
7
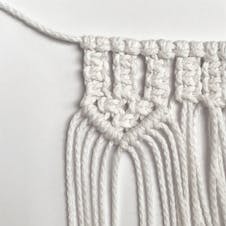
Repeat on the opposite side using string 12 as your guide. Close the ‘V’ with a double half hitch knot.
8
Repeat steps 4–7 with the remaining sinnets, working in sets of three.
9
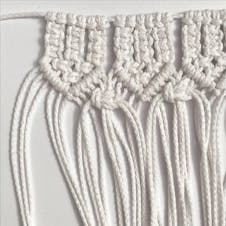
Make a square knot with multiple filler strings between each of the triangle shapes.
10
Tie your macramé onto your vase or jar then trim the strings to the desired length.
