Take it slow with this fab punch needle pillowcase tutorial!
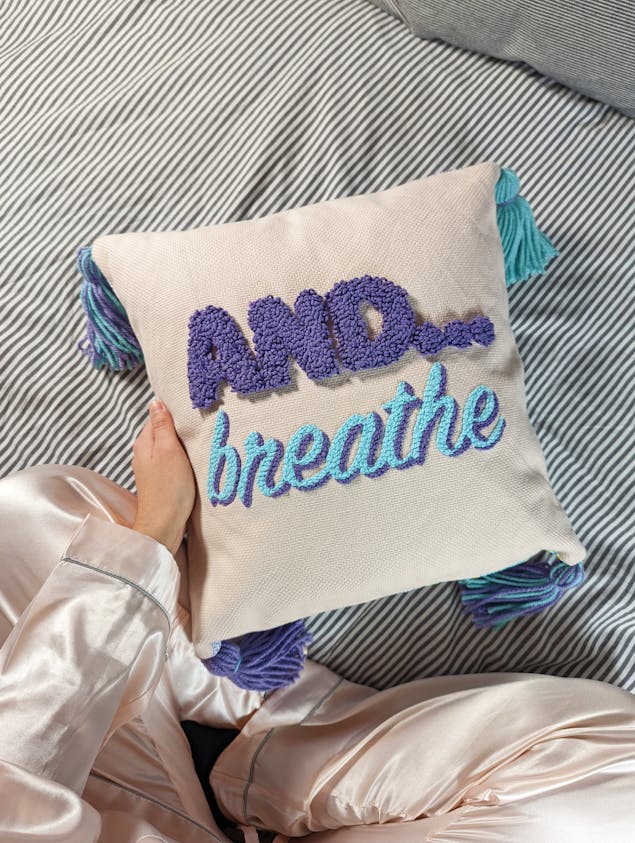
Published on 18 January 2022 By Saphia 1 min readLearn how to make this mindful punch needle pillowcase. The perfect embroidery project if you’re looking to slow down and unwind in the comfort of your own home! Saphia from textilesbyphia chose to use Veri Peri shades of purples and blues to promote tranquillity, peace and positive vibes. Whether you’re looking to DIY something cute for your bed, or looking to add some fun textures to your sofa, these simple steps will guide you through your next dreamy decor make!
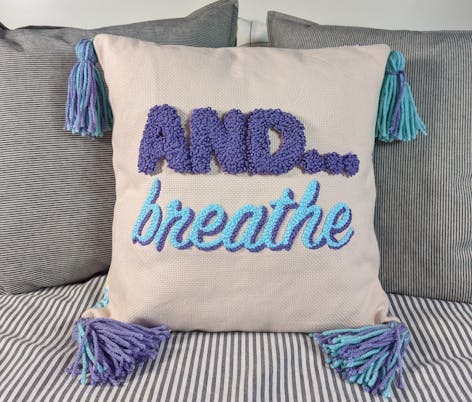
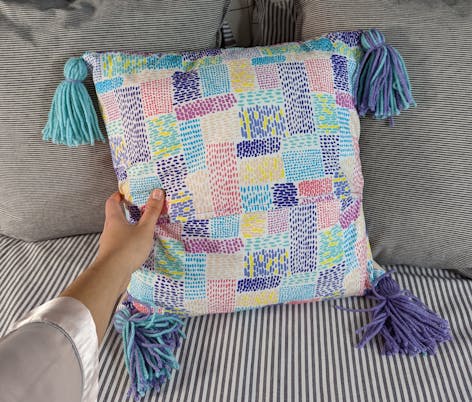
Good to know
The finished pillowcase measures 40 x 40 cm square and features an envelope closure on the back. The embroidered fabric panel is lined with plain cotton fabric to protect the stitches from the wash. Wash inside-out by hand in warm water.
Materials
- Fabric scissors
- Masking tape:
- Masking tape
- Pointed sharp large eye sewing needle
- Hemline Chenille Needles - Sizes 18 - 22 (6)
- Tailors chalk:
- Hemline Triangle Tailors Chalk - Assorted Colours Pack of 3
- Sewing thread
- Sewing machine
- Tracing paper:
- Hemline Tracing Paper - Plain 76 x 102cm
- Heat transfer pen
- Iron
- Measuring tape
- Punch needle fabric glue:
- Rico Punch Needle Fabric Glue 250ml
- 3mm punch needle
- Rico Wooden Punch Needle
- 12 inch (30.48 cm) embroidery hoop:
- Elbesee 12 inch (30.48 cm) Wooden Embroidery Hoop
- Monks cloth, 20in x 55in in Powder pink:
- Rico Monks Cloth - Powder 20in x 55in
- Patterned cotton fabric, 0.5 m:
- LoveCrafts Painterly Blooms - In the Flower Beds
- Plain cotton fabric, 0.5 m:
- Robert Kaufman Kona Cotton
- Paintbox Yarns Cotton DK in Dusty Lilac and Washed Teal:
- Paintbox Yarns Cotton DK
- Paintbox Yarns Simply Chunky in Dusty Lilac and Washed Teal:
- Paintbox Yarns Simply Chunky
- Cardboard paper, approx 10 cm x 13 cm
- Dressmaker pins:
- Korbond Dressmaker Pins

Getting started
Pro Tip
Before you get started, machine wash all of your fabric. This allows for any shrinkage to occur before you measure and cut them to size. Monks cloth frays super easily, so make sure to finish the frayed edges with a zigzag stitch or machine washable glue before popping it in the wash! Once washed, the Monks cloth will be creased, so do give it a good shaking. Press and steam with an iron a few times, front and back whilst it's still a little wet for a smoother finish.
1
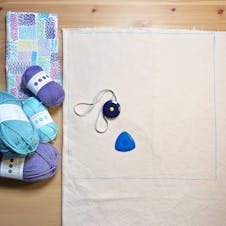
With tailors chalk, draw a 43 x 43 cm square on the monk's cloth. Use the woven lines on the fabric as a guide.
2
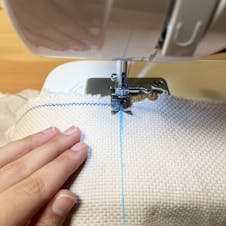
Sew over your drawn lines with a zigzag stitch to avoid the fabric fraying after cutting. Cut out the square close to the zigzag stitching.
3
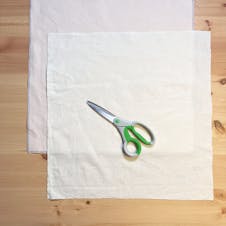
Cut a 43 x 43 cm square of the plain fabric.
4
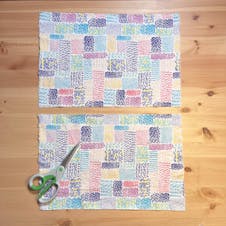
Cut a 43 x 56 cm rectangle of the patterned fabric. Fold the long sides together and cut in half at the fold line.
Time to embroider your design!
1

Print your template. Make sure it fills an A4 page and is not cut off on your printer settings. Trace the word ‘AND…’ with the heat transfer pen, and the word ‘breathe’ in pencil.
Pro Tip
To help find the middle point of your monks cloth square, fold it in half twice, press with an iron, and go over the fold lines with tailors chalk.
2
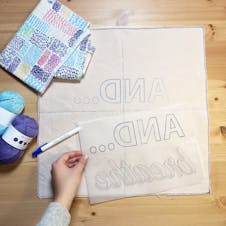
With the ‘AND…’ tracing facing down, position your tracing paper in the middle of the monks cloth. Pin down and press with an iron on mid-heat and no steam, until the design has transferred.
3
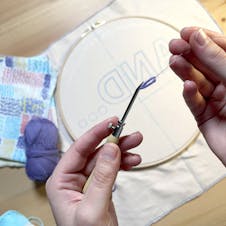
Stretch your monks cloth onto the embroidery frame until it’s drum tight. Insert and secure your 3 mm punch needle into the handle, with an approx length of 3.5 cm. Thread your needle with the Paintbox Yarns Cotton DK in the Dusty Lilac.
Pro Tip
When embroidering, leave some yarn loose from the yarn ball to ensure there is no tension when punching your stitches. Keep your embroidery tidy as you go along by trimming yarn ends on the opposite side of the fabric.
4
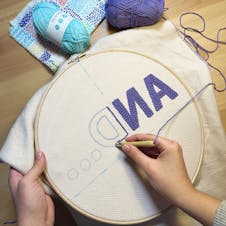
Embroider the ‘AND…’ transfer, making sure your stitches are being punched neat and tightly together.
5
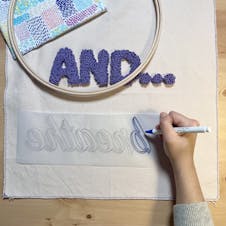
Remove your monks cloth from the embroidery frame and turn the fabric around, loop side up. Cut off the ‘AND…’ from your tracing paper, and trace the reverse of the ‘breathe’ pencil tracing with the heat transfer pen.
6
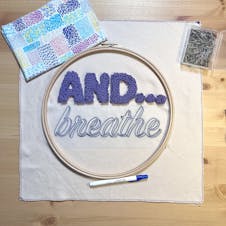
Center the ‘breathe’ tracing under the ‘AND…’ embroidery, pin and press with an iron until it has transferred.
7
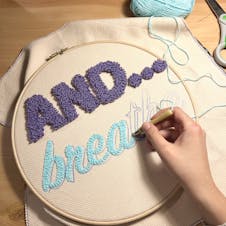
Stretch your monks cloth back onto the embroidery frame. Thread your needle with Paintbox Yarns Cotton DK in the Washed Teal. Embroider the main font body of ‘breathe’ with neat flat stitches.
8
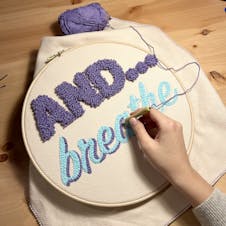
Switch back to Paintbox Yarns Cotton DK in the Dusty Lilac and embroider the ‘breathe’ shadow font. Remove your fabric from the embroidery frame.
Pro Tip
Before securing your embroidery with glue, press it with an iron to shrink and tighten up the stitches.
9
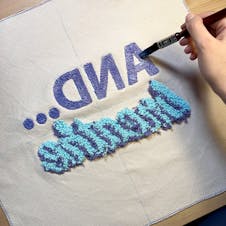
Turn to the back of your embroidery and secure it with the glue. Leave it to dry for 6-12 hours.
Sew your pillowcase together
1
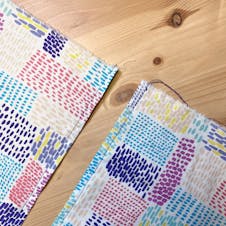
With each of your cut patterned fabric pieces, and on one of their 43 cm edges, fold a 1 cm seam, pin and iron. Fold again, pin and iron. Sew the seams with a straight stitch.
2
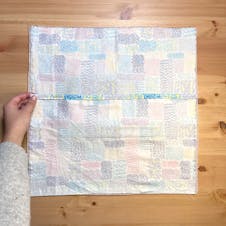
Layer all your precut fabric together, with the right sides facing together. (In the order of: the plain fabric, monks cloth with embroidery facing up, patterned fabric piece one facing down, patterned fabric piece two facing down)
3
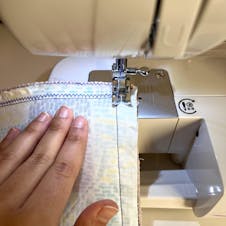
Sew the pieces together with a straight stitch and 1.5 cm seam allowance. Add a zigzag stitch close to the straight stitch to prevent the fabric from fraying.
4
Trim the excess fabric around your square close to the zigzag stitch.
Add some tassel fun!
1
Wrap any of the Paintbox Yarns Simply Chunky around your cardboard paper 30 times (15 times if you want to mix two colours at the same time).
2
Thread another piece of yarn to the top of the yarn wrapping and create a tight double knot.
3
Remove the yarn wrapping from the cardboard and knot another piece of yarn approx. 3 cm from the top to make the head of your tassel. Use a contrasting colour for this if you wish.
4
Trim the skirt of the tassel to your desired length. Repeat steps 1-4 to make 3 other tassels.
5
Attach the 4 tassels to the corners of the pillowcase using the excess yarn from the knot at the top of your tassels. Secure them to the corners with tight double knots on the inside of your pillowcase.
Voilà! Time to sit back on your cushion and... relax!
