Quilted floral treat bags tutorial
Published on 26 April 2021 2 min read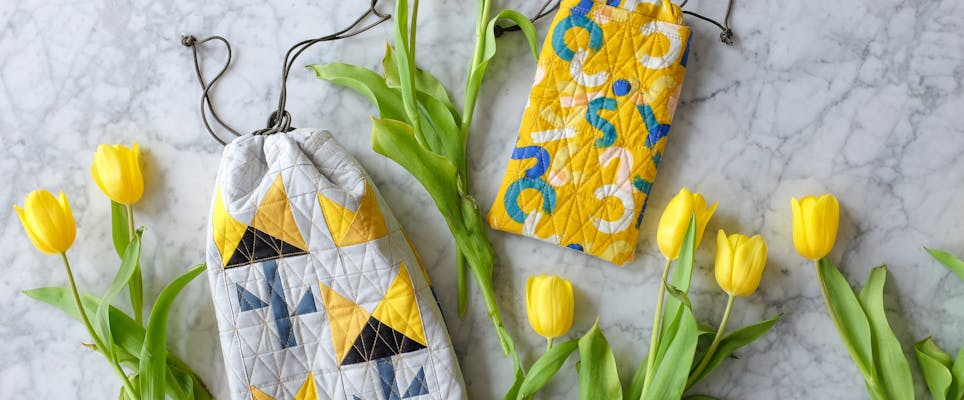
Get that spring feeling all year round with these these beautiful, easy-to-make, quilted floral drawstring goodie bags by Wendy Chow of The Weekend Quilter. Great for both kids and adults, use to store your sunglasses, jewellery, face mask - you name it. They make lovely reusable gift bags too!
The bags come in two sizes – small (5" x 8", 13 cm to 20 cm) and large (8" x 20", 20 cm to 30½ cm).
This project is ideal for confident beginners with a few basic quilting skills under their belt!
Fabric Requirements
Fabric quantities are based on 42" WOF (width of fabric). All solid coloured fabrics in this tutorial are Bella Solids by Moda Fabrics, and the fabric used for the back and lining of the bag is a print from Rashida Coleman Hale’s What Not collection for Ruby Star Society.
You can find the measurements for each block colour of Moda Bella Solids in the PDF pattern download.
Fabrics used in this pattern!
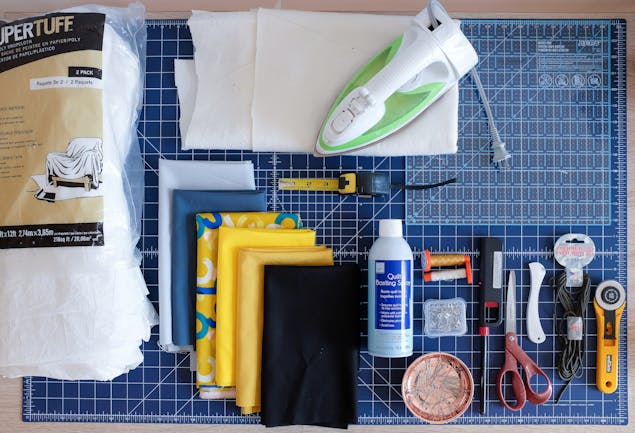
Materials
- Basic sewing machine
- Olfa 45mm Aqua Rotary Cutter
- Olfa 16.5" x 16.5" Non-Slip, Frosted Advantage Acrylic Ruler
- Sew Easy 60 x 45cm Double Sided Cutting Mat
- Hemline Rose Gold 21cm Dressmaking Scissors
- Wadding (also known as batting) – Craft size (36" x 46") or scraps to make two 10" x 13" rectangles small size bag, or two 13" x 17" rectangles for large size bag.
- Sew Easy Pins: Quilters
- Iron
- Aurifil Mako Cotton Thread Solid 50 wt
- Newspaper, tarp or old bedsheets
- Basting spray
- Hera marker or blunt butter knife
- Walking foot or dual feed dog (optional)
- Clover Fabric Marker Pen (Water Soluble) Fine
- Measuring tape (optional)
- Drawstring or cord rope – preferably coordinating fabrics used for the project. For small bag two ½ yard (46 cm) pieces and for large bag ¾ yard (70 cm) pieces.
- Point turner (optional)
- Seam sealant or lighter (optional)
- Prym Safety Pins No. 3 50mm Silver-Coloured
Quilt block assembly
1
The front of the bag is made up of a quilt block. Download The Weekend Quilter’s Springtime Bloom quilt block PDF pattern for FREE to assemble quilt block for the front of the small and large goodie bags.
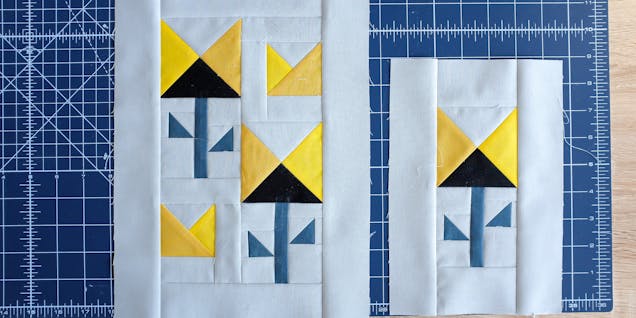
For the remainder of the tutorial, images shown are for the small size quilted goodie bag. Photo examples also applies to large size quilted goodie bag.
Drawstring casing
1
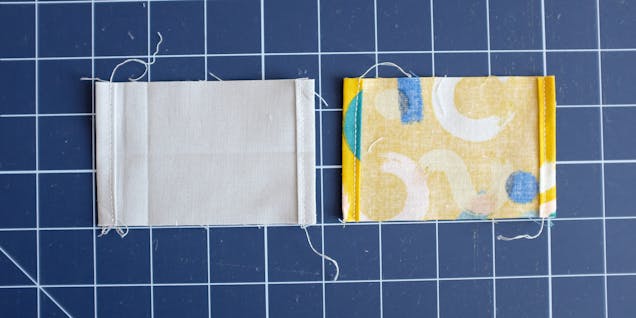
Cut drawstring casing. For small size, cut 1 Fabric A and 1 Fabric F 2½" x 5" rectangles, and for large size, cut 1 Fabric A and 1 Fabric F 2½" x 8" rectangles.
2
Turn each drawstring rectangle wrong side facing up. At the shorter ends of each rectangle, fold raw edges towards the centre of the rectangle twice. Eye ball about ¼" for each fold. Then secure the folds in place by sewing a straight stitch along the edge. In doing this, this will prevent the fabric from fraying when opening and closing the bag.
3
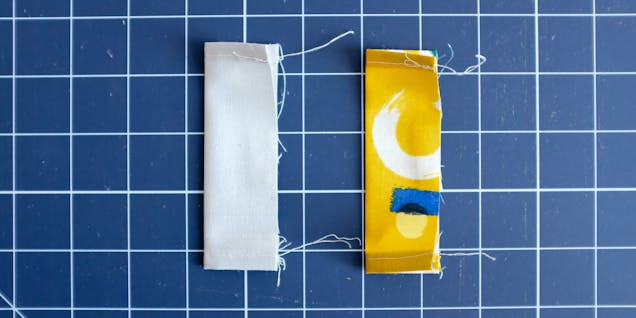
Press each rectangle in half lengthwise to complete the drawstring casings. For each bag, there
should be two drawstring casings. One in each Fabric A and Fabric F. Set casings aside for Bag Assembly section.
Lining
1
For small size bag lining, cut 2 Fabric F 6¼" x 9¼" rectangles, and for big size bag lining, cut 2 Fabric F 9¼" x 13" rectangles.
2
Adjust seam allowance on sewing machine from ¼" to ½". With right sides together, pin two pieces of lining rectangles together.
3
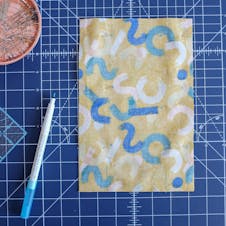
With a fabric pen or pencil, at the bottom edge of the rectangle, mark two 1½" guidelines from
the bottom corners for the small bag, and two 2½" guidelines from the bottom corners for the large bag.
4
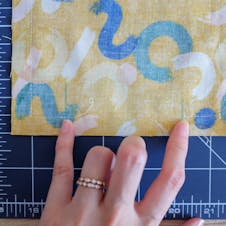
Starting from the top right corner of the bag sew along the long edge, turn and pivot the bag,
and sew along the bottom edge, and stop at the marked guideline from the previous step. Then start at the second guideline, sew along the bottom edge, turn and pivot the bag, and sew along the long edge. Leave the top edge open. And the small opening at the bottom of the bag will be used to turn the bag right side out in the Bag Assembly section later. Also, don’t forget to reverse stitch at the start and end of each seam for additional enforcement.
5
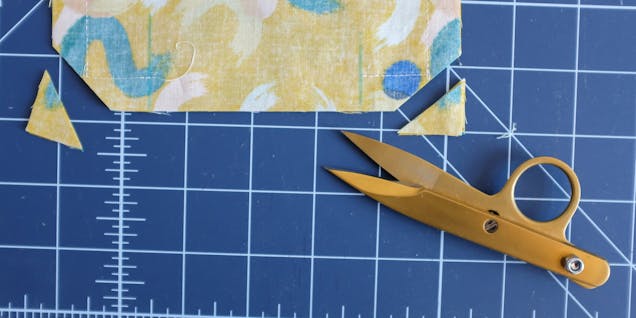
Carefully clip the bottom two corners without cutting into the seam to create a crisp and flat
finish. Set bag lining aside for Bag Assembly section.
Basting
Basting in quilting means to temporarily secure the three layers of the quilt – top, wadding and back – while you incorporate permanent decorative quilting stitches. When these three layers are secured together, they are called a ‘quilt sandwich’.
When basting, do it on a large, hard surface, for example a large desk. Before spraying basting spray, protect your surfaces and workspace from getting sticky (for the most part) by laying newspaper, painter’s tarp or old bed sheets.
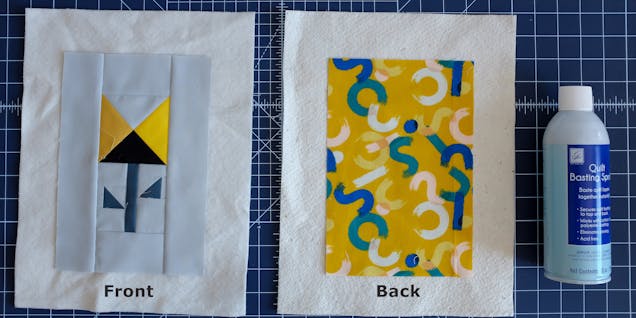
In this instance where we are creating a bag, we will need to create two ‘quilt sandwiches’ – one for the front of the bag, and a second for the back of the bag. Another thing we’re doing a little differently, since the bag has lining, we are basting two layers for the quilt sandwiches instead of three:
1
For small bag, cut 1 Fabric F 6¼" x 9¼" rectangle, and 2 Quilt Wadding 10" x 13" rectangles.
For large bag, cut 1 Fabric F 9¼" x 13" rectangle, and 2 Quilt Wadding 13" x 17" rectangles.
2
Lay wadding on the surface, followed by the front of the bag (quilt block from Quilt Block Assembly section). Spray basing spray between the wadding and the front of the bag. Repeat this step with the second piece of wadding and 1 Fabric F 6¼" x 9¼" rectangle for small bag and 1 Fabric F 9¼" x 13" rectangle for large bag. This will be for the back of the bag.
Pro Tip
After laying and spraying each layer, go over it with a low heat iron to activate the basting spray glue, and push out any stubborn creases and air bubbles.
Quilting
1
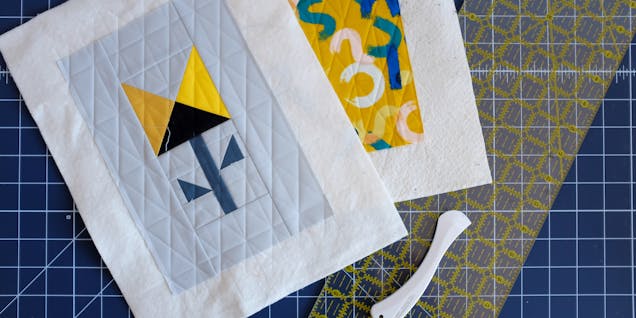
Use hera marker or blunt butter knife and quilt ruler to mark decorative quilting guidelines as desired on each quilt sandwich, and sew on the guidelines. Again, do this on a hard surface so the guidelines come out more distinct and clearer. To avoid prevent the quilt from puckering, adjust the seam width on the sewing machine to 2.8-3.2, and use a walking foot extension or activate dual feed dog function on sewing machine.
2
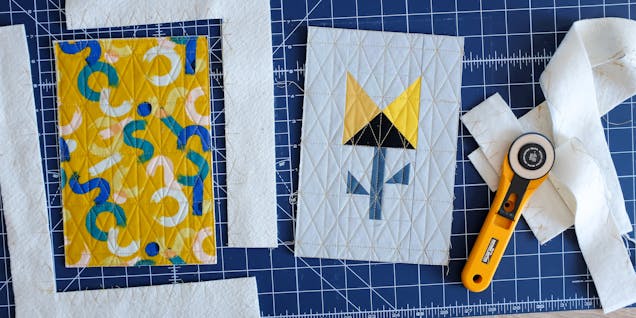
Once all quilting is complete, with a long quilting ruler and rotary cutter, square and trim off excess fabric and wadding. Trimmed quilt sandwiches measures: small bag 6¼" x 9¼", large bag 9¼" x 13".
Bag exterior assembly
1
Similar to the lining, ensure sewing machine seam allowance is set at ½". With right sides together, pin two pieces of quilt sandwiches together. Secure the two pieces together by sewing along the long edges and the bottom shorter edge, creating an opening at the top of the bag.
Pro Tip
When sewing the quilt sandwiches together, make sure the floral design at the front of the bag is positioned correctly in relation to the bag opening. You don’t want the floral design to be upside down when opening and closing the bag.
2
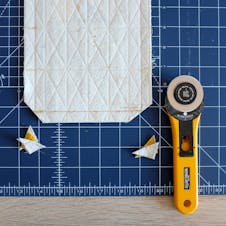
Carefully clip the bottom two corners without cutting into the seam to create a crisp and flat finish. Turn bag inside out, and use a point turner or tip of scissors to poke the corners out to complete bag exterior.
Bag assembly
1
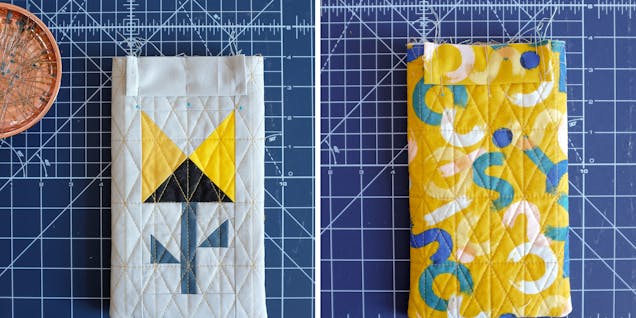
Ensure bag exterior is facing right side out. Line up raw edge of drawstring casing to the raw edge of the bag exterior. Centre the casing, and pin. Ensure drawstring casing Fabric A is pinned to the front of the bag, and drawing string casing Fabric F is pinned to the bag of the back.
Pro Tip
Once you have pinned the first drawstring casing to the bag exterior, you can use the that casing as a guide for where to pin the second casing.
2
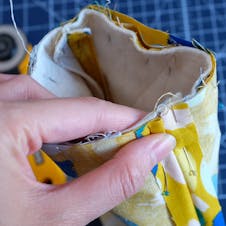
Take bag lining, wrong side facing out. Slide bag exterior inside bag lining. Therefore, right sides of bag exterior and lining are facing each other. Start at one side of the bag. Line up side seams and raw edges. Pin bag exterior and lining together. When pinning, ensure the side seams on the exterior and lining are open to reduce bulk. Repeat with the second side of the bag. Then, put pins in between the sides to hold the bag exterior and lining in place.
Pro Tip
To know that you’ve pinned this correctly, you would see batting when you open the bag.
3
On the sewing machine, adjust seam allowance and sew ¼" seam from the raw edge to secure the bag exterior, lining and drawstring casings.
4
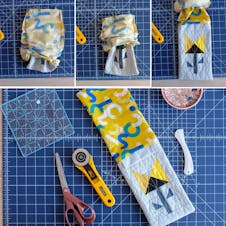
At the bottom of the lining, use the hole to carefully flip the bag right side out.
5
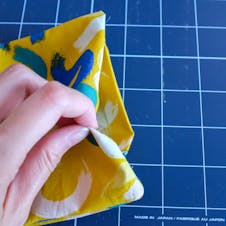
Go back to the sewing machine, edge stitch to close up the hole at the bottom of the lining.
6
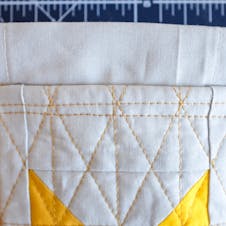
Push the lining inside of the bag. Press the top opening of the bag to ensure bag is flat, and use coordinating thread to sew approx. ½" below the drawstring casing. This seam will provide additional enforcement and prevent the lining from coming out of the bag.
Adding the drawstring
1
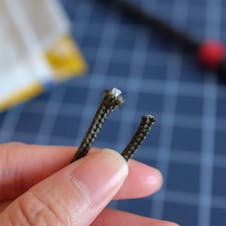
On the end of each drawstring cord, use a seam sealant or wave a lighter under freshly cut ends to stop the cords from fraying. The lighter melts the fibres together and only works on synthetic materials like polyester, and not cotton.
2
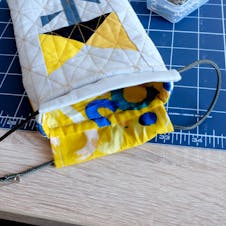
Take one of the drawstring cords, and attach a safety pin on at one end. Starting from the top drawstring casing, thread cord from the left to right. Then thread cord through the bottom drawstring casing from right to left. Remove safety pin and tie ends together.
3
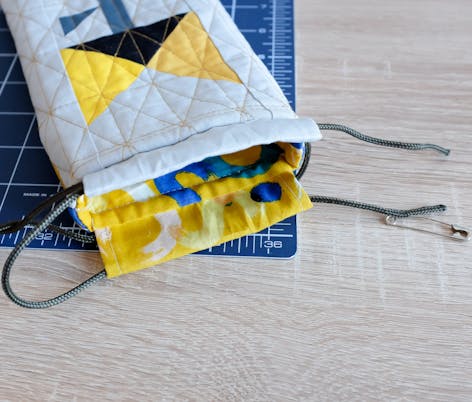
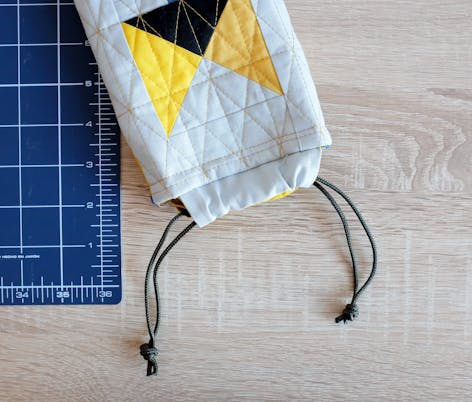
This step is the opposite of the previous step. Take the second drawstring cord, attach the safety pin on at the on end. Starting from the top drawstring casing again, but this time thread the cord from the right to the left. Then thread cord through the bottom drawstring casing from left to right. Remove safety pin and tie ends together.
4
Trim loose threads to complete the project.
And there you have it, beautiful quilted floral goodie bags to brighten up your or that special persons’ day. Share your quilted floral goodie bags by tagging @the.weekendquilter #theweekendquilter and #quiltedgoodiebag on social media.

