How to knit stocking stitch
Published on 6 March 2019 By Yazmin 3 min readStocking stitch, known as stockinette stitch in the USA, is one of the most popular knitting stitches you’re likely to come across in the knit-esphere, popping up in most patterns and appearing in your favourite knitwear from socks, hats, cushion covers and scarves. Once you know how to knit a row and purl stitches, stocking stitch is the perfect next step as you learn how to knit! In patterns you might be more familiar with its abbreviation ‘st st’, short form for (you’ve guessed it) stocking stitch.
Despite being absolutely everywhere, people often neglect to explain what the stocking stitch actually is or mention it by its full name! If you’re a knitting newbie the mere mention of st st might have you scratching your head, so let us give you a quick rundown on what it means to stocking stitch and how to do a stocking stitch step by step.
What is stocking stitch?
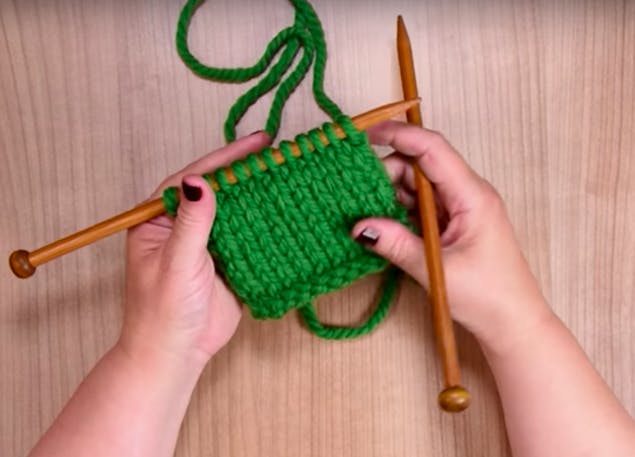
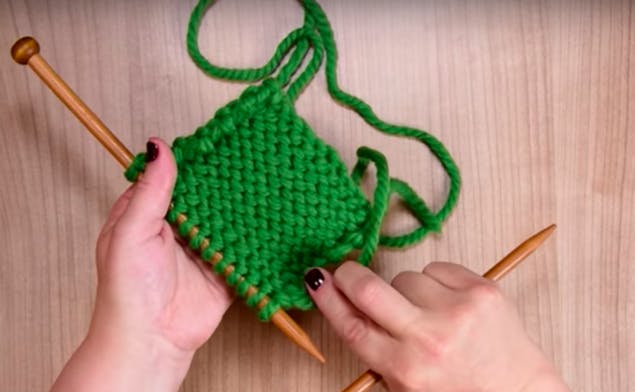
Stocking stitch is where you knit one entire row, and then purl an entire row, and then repeat. The result is a wonderful even flat texture made up of those gorgeous stacked ‘v’ shaped stitches on the ‘right’ (or ‘front’) side of the fabric. The ‘wrong’ or ‘back’ side of the fabric has yarny river like ridges which tend to curl.
Right side (or ‘front’ side)
Wrong side (the 'back' side)
How to stocking stitch step-by-step
1
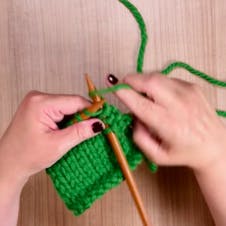
First row. Tie a slip knot and cast on the number of stitches you'd like to knit. Knit one row, by inserting the tip of the right needle into the stitches cast onto the left needle, knitwise.
2
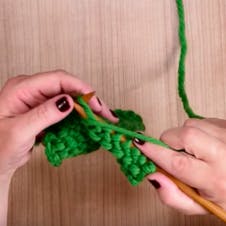
Second row. When you come to the end of your knitted row, swap hands so the needle containing the knitted stitches is in your left hand. Now purl an entire row, by inserting the tip of the right hand needle purlwise into the stitches in your left hand needle.
3
Third row. After you have purled an entire row, it's time to knit again.
Repeat knit and purl alternate rows to build your stocking stitch fabric, and watch your beautiful 'v' rows emerge in all their glory!
Pro Tip
If you’re perfecting your stitches, we’d recommend using a chunky yarn so that you can easily see every stitch and keep track of your progress. It’s easier to spot blips when you’ve got a nice thick yarn!
Why is my knitting curling?
When knitting stocking stitch you might find your fabric beginning to curl around the edges. Don’t worry, this is completely normal! The reason for this is because of the difference in tension between knit and purl stitches. Knit stitches tend to be shorter and tighter compared to purl stitches, so when you have all your knit stitches on one side of your fabric, as you do in stocking stitch, the tighter knit side tends to curl.
How do I stop my fabric curling?
Great question! Sometimes a curled edge can make a beautiful design feature on a cosy cowl or brimmed hat, but if it’s not the effect you’re after there are few great techniques to stop your fabric from curling. From creating a border in an alternative flat stitch (like rib or moss stitch) to changing the elasticity of the fibre for acrylic yarns, we’ll show you lots of great ways to stop your knitting from curling.
What is reverse stocking stitch?
Reverse stocking stitch is the same as stocking stitch, alternating between knit and purl rows, except you start with a purl row, which means your ‘right side’ of fabric is made up of purl stitches instead of knit stitches. Remember purl stitches are characterised by little ‘bumps’ which will appear in the right side of your fabric, if you are knitting the reverse stocking stitch. On the knitted side of the fabric, your knit stitches will take the shape of little ‘V’s.
How to count rows in stocking stitch?
The easiest way to count the number of rows in stocking stitch, is to turn your fabric to the knitted side and count the number of v’s stacked on top of one another.
How to count your row in 2 easy steps
1
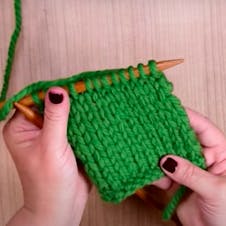
Turn your knitted fabric ‘right side up’ if you are knitting ordinary stocking stitch (‘wrong side up’ if you’re knitting reverse stocking stitch).
2
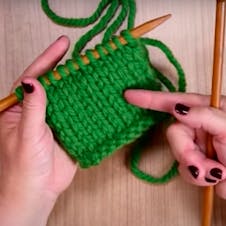
Count the number of ‘v’ shaped stitches stacked on top of each other (vertically), which will tell you how many rows you have.
Where did stocking stitch originate?
Most knitting-muggles will recognise the stocking stitch as a ‘classic’ knitting stitch. For us knitters, stocking stitch gets its name from early knitting artefacts dating back to the thirteenth and fourteenth century, which saw this characteristically stretchy stitch used to create stockings and sock-heels.
Stocking stitch projects for beginners
As a classic stitch, stocking stitch is brilliant for beginner knitting projects, from beautiful beanies and hats to snuggly scarves and baby blankets. This classic flat texture is also the perfect stitch to get creative with colourwork and intarsia. Advanced knitting designs often combine the stocking stitch with more complex stitches, from moss stitch to romantic lace, for playfulness and character.


