Free DIY feminist punch needle wall hanging tutorial!
Published on March 8, 2021 By Zoe Bateman 2 min readInspire and empower yourself year round with a DIY punch needle wall hanging featuring your favourite feminist quote.
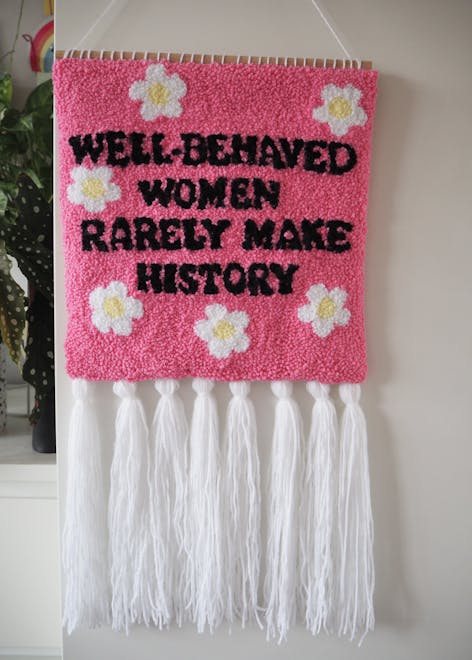
I can’t help but think that Ulrich would approve of her words being immortalised using a traditional rug making technique that has been reclaimed by modern day women as a means of self-expression!
International Women’s Day only comes around once a year, but you can pay homage to your favourite feminist all year long with a punch needle wall hanging of your favourite empowering quote!
In this tutorial I will show you how to turn your punch needle piece into a wall hanging complete with tassels (because everything is better with a tassel, right?!) You’ll end up with a gorgeous piece of home decor that any feminist icon would be proud to hang in their home!
This quote is one of my favourites but it’s often rather misunderstood and incorrectly attributed. Over the years it has been attributed to everyone from Marilyn Monroe to Anne Boleyn, but the original quote was in fact from an academic paper by Laurel Thatcher Ulrich. Published in 1976 the paper was about the little-studied funeral services of Puritans. The original quote is actually "well-behaved women seldom make history" but over the years has been altered slightly to "well-behaved women rarely make history". Most people interpret the quote as meaning women should be less well-behaved in order to achieve recognition and notoriety, but Ulrich actually intended it to mean that well-behaved women should make history. Women shouldn’t have to be outrageous or unconventional to be deserving of being recorded in the history books, but as women throughout history have largely been portrayed solely as mothers and homemakers it is only through ‘misbehaviour’ that their actions were deemed worth of being remembered.
I can’t help but think that Ulrich would approve of her words being immortalised using a traditional rug making technique that has been reclaimed by modern day women as a means of self-expression!
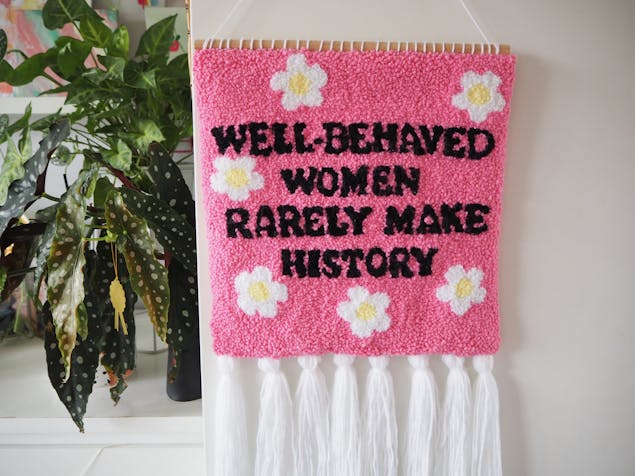
Materials
- Rico Embroidery Frame 30 x 30cm
- Paintbox Yarns Simply DK
- Banana Cream
- Pure Black
- Paper White
- Bubblegum Pink
- Rico Punch Needle Tool
- Small Scissors
- Glue Gun
- Primitive Linen Fabric
- Wooden Dowel (30cm long)
- Water Erasable Fabric Pen
- Tapestry Needle
How to make your DIY punch needle wall hanging
1
Start by stretching your fabric on your frame and securing in place using a staple gun or drawing pins. Ensure it’s stretched nice and tight as this will make the punching much easier and give you a more consistent result.
Print your design and trace on to your fabric making sure it is reversed as we will be using the opposite side as the front of our wall hanging.
2
Now you’re ready to punch your design! If you’re new to punch needle I recommend checking out this beginners guide to help get you started.
3
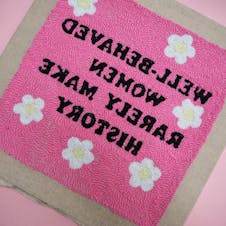
Whenever you start a new punch needle piece you want to do the smaller details first before doing the background.
So on my piece I punched the centres of the daisies in yellow, followed by the petals in white. Then I punched the insides of the letters in pink, followed by the actual letters in black, and finally my background in pink.
4
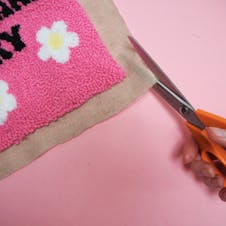
Once you have finished punching your entire piece you are ready to take it off the frame.
Remove your staples or drawing pins and trim down the fabric leaving a border of approximately 4cm all the way around.
Pro Tip
When you first turn over your punch needle piece after you’ve finished punching it might not look quite right but don’t panic, this is normal! As you’re punching some loops may end up in the wrong place - just use the end of your punch needle tool to push the loops back into the right place and neaten up the outline of your shapes.
5
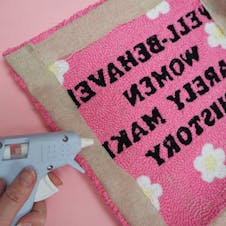
Fold your border of fabric onto the back of your punch needle piece and glue in place with your glue gun. Make sure it’s folded over as close to the yarn loops as possible so you can’t see your foundation fabric from the front.
6
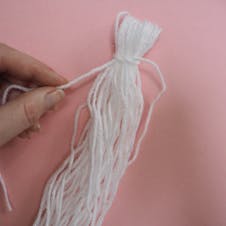
Now we are going to make our tassels. Take your tassel yarn (I used the white yarn for mine) and cut 15 pieces each measuring double the length you want your finished tassel to be. My pieces were 30cm long, and my final tassels are just under 15cm long.
Gather your pieces and fold them in half, then take a short piece of yarn and tie it round your folded yarn, about an inch below the fold. Snip the ends off the yarn you tied with, and you have your first tassel! Repeat this process to make eight tassels in total.
7
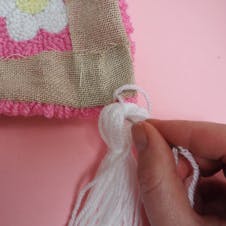
To attach our tassels to our wall hanging we are going to cut a piece of yarn approx 30cm long and thread a large eye tapestry needle with it. Position your tassel along the bottom edge of your wall hanging, and go through the top of your tassel with your needle (through the tunnel created when you folded over your yarn) and then through the fabric of your wall hanging.
Repeat this a few times pulling your yarn tight each time until your tassel feels nice and secure. Tie a knot so it won’t come undone, and repeat with the rest of your tassels.
Pro Tip
To ensure your tassels are evenly spaced you can mark on the back of your wall hanging where they will go before you start attaching them. Use a ruler and your fabric pen to be as accurate as possible.
8
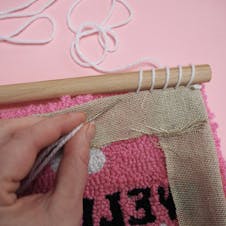
Finally we are going to attach a wooden dowel to hang our punch needle piece from. Thread your tapestry needle with a 50cm piece of your white yarn and tie a knot in the tail end. Starting at one end of the top of your punch needle piece push your needle through from the back to the front, then loop back over to the back so the yarn wraps around the dowel.
Repeat this across your punch needle piece, spacing your stitches about 1cm apart and pulling your yarn tight is the dowel sits flush against the top edge of your work. When you get to the opposite end fasten off with a knot.
9
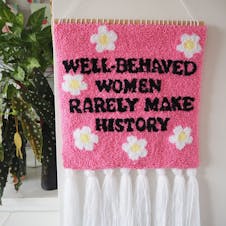
To finish, tie a piece of ribbon or yarn to your dowel to create a hanger and go find somewhere to hang your piece of art!

