6 essential hand sewing techniques to learn
Published on February 17, 2022 By Kate Owen 9 min readKnowing how to sew by hand is a super useful skill to learn! Whether you’re stitching up a small project, hand sewing a quilt or hemming a pair of trousers, these simple hand sewing techniques are sure to come in handy! Kate Owen talks you through all you need to know to get started - from choosing the right needle to how to sew the basic stitches and even how to sew a button!
Choosing your needle and thread
There are many types of sewing needles out there that are designed for different kinds of floss. If you’re using an embroidery thread or wool, you may want a needle with a large eye so that the bulky thread will fit through it.
For detailed hand sewing, you’ll want a small needle so that it’s easier to achieve smaller stitches. The type of thread you’ll most often use is likely a cotton or polyester, like DMC Stranded Floss or Paintbox Crafts 6 Strand Embroidery Floss. As for needles, you can pick up a pack of assorted needles with a variety of lengths and sizes to pick from.
Threading your needle
If you are threading without a needle threader, make sure the end of your thread has been snipped cleanly so that it is easier to get through the eye of the needle. If it still starts to fray, you may want to wet the end of it to make it smoother. Hold the thread very close to the end, then gently wiggle it through the eye of the needle. Once a little has come through, pull it all the way through your needle.
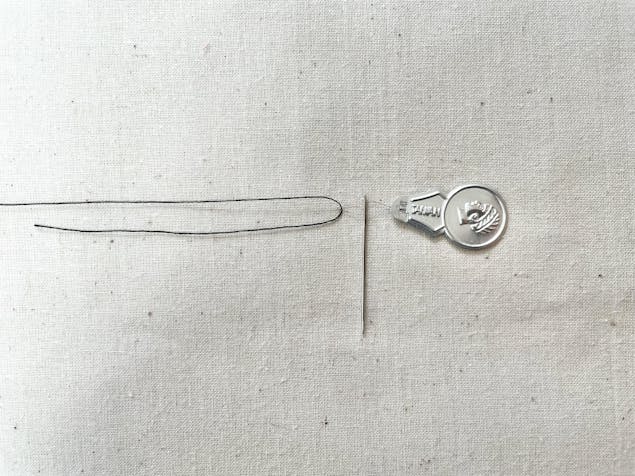
Using a needle threader
A needle threader is really useful and easy to use.
- Put the wire tip of the needle threader through the eye of the needle. The stiffness of the wire makes it much easier to put through than thread.
- Wiggle the wire through the eye of the needle, then put your thread through the loop of wire that has gone through your needle.
- Pull the needle threader back out of the eye, and it will take the thread with it through the eye of the needle.
How to sew running stitch
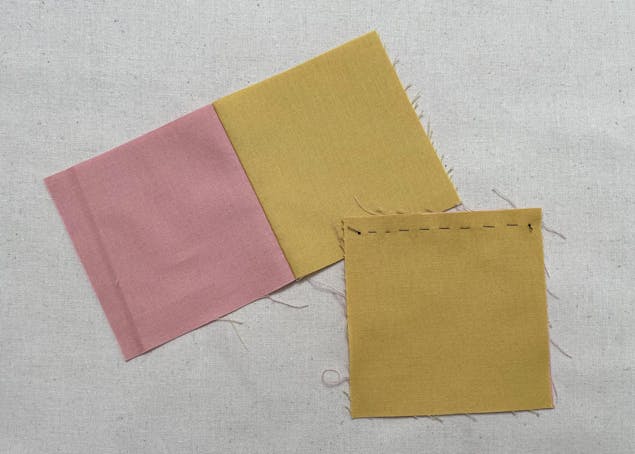
Running stitch is the simplest and most useful stitch to know. It’s perfect for when you want to sew two pieces of fabric together.
- Cut a length of thread longer than what you will be sewing, so that you have some leftover to tie knots once you have finished sewing.
- Thread your needle and tie a knot at the end of your thread. Depending on how thin your thread is you may want to tie a few knots, so that the end is secure.
- Decide how long you want your stitches to be. If you are sewing two fabrics together a stitch length of about 0.5cm is good.
- Bring your needle up through the fabric you are sewing, pulling your thread all the way through and checking that your knot is secure. Now bring the needle back down through your fabric about 0.5cm away from where you came up, again pulling your thread all the way. This is your first stitch!
- Bring your needle back up the same distance away as your first stitch, following a straight line. To sew faster, insert your needle up and down in your fabric the length of your stitches, but don’t pull the thread through until you have done as many stitches as will fit bunched up on your needle.
- Pull your thread all the way through and straighten out your fabric.
- Once you have reached the end of your sewing, use your needle to tie a few knots at the end of your stitching. Hold your thread flat against your fabric with one thumb, then put your needle under the thread and bring it up, creating a loop.
- Keep your thumb gently pressed against the end of your sewing so that the knot doesn't end up pulling your stitches too tight. Do this a few times if needed to make sure your sewing is secure, then trim your thread about 1cm away from the knot.
How to sew back stitch
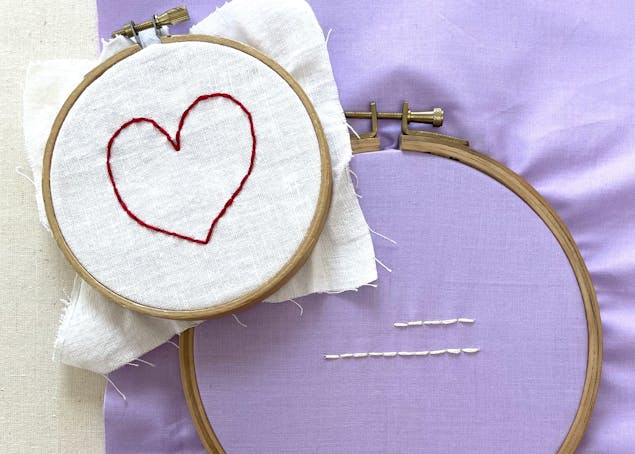
Back stitch is used to create a solid line of stitches and is very similar to the running stitch.
- Start in the same way as the running stitch, but once you have come up to make your second stitch, go back on yourself and bring your needle back down into the same hole you went down to finish your first stitch. Now you will have two stitches in a row without a gap between them.
- Next, come up in the same hole to make your second stitch, and go over and down to make a third stitch.
- Keep doing this, making a backwards stitch every time you have moved forwards, closing the gap between your stitches.
How to sew slip stitch
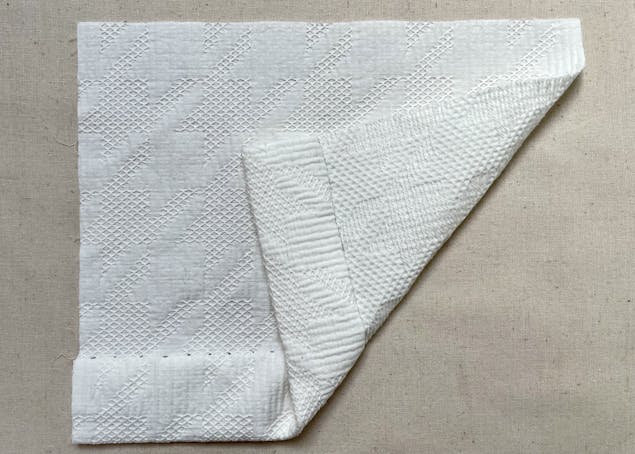
Slip stitch is a very clever stitch that is great for when you need to hem something but you don’t want the stitching to be visible.
- Start by threading a needle and tying a knot (or a few if needed) at the end of your thread. The edge of the fabric that you are hemming should be folded over twice so that the frayed edge is tucked inside.
- Place your needle between the folds of the fabric at one edge, bringing it up through the clean folded edge of your fabric. This will conceal the knot as it will be hidden between the folds.
- Taking your needle up through the folded edge, make a very small stitch down and up through the front of the fabric. As you do this, pick up a tiny bit of fabric so that it is barely visible from the front.
- Bring your needle back down through the clean folded edge and move the tip of your needle over about 1cmand then back up through that clean fold edge. This longer stitch is now hidden in the fold of the fabric.
- As you did before, take a small stitch in the front of your fabric so that the fold is attached to it and then bring the needle back down through the fold and over by about 1cm. If you are sewing a large piece of fabric you can make this hidden stitch in the fold longer, just be sure to keep your stitch lengths even.
Pro Tip
To make the stitching less visible, use a thread the same color as your fabric. In this example, we’ve used black thread and white fabric so that you can see the stitching.
How to sew blanket stitch
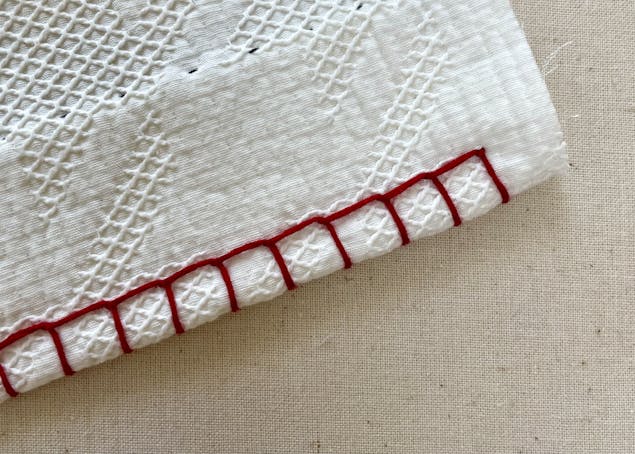
Blanket stitch is a fun stitch that is great to use as an embellishment on the edge of a fabric or garment. Because it doesn’t seal an edge completely, it’s best used on a non-fraying fabric like felt, or on a finished edge.
- Decide how big you want your blanket stitches to be. Here, I’m making them 1cm wide and long.
- Bring your needle up 1cm away from the edge of your fabric, then go back under and bring your needle up again 1cm from the edge and away from where you first came up, causing a loop to go around the edge of your fabric.
- Hook your needle under that loop and pull the thread through so that it is evenly wrapped around your fabric. This is your first blanket stitch!
- Do the same thing again, bringing your needle back under and up through your fabric, looping around the edge of your fabric, then hooking that loop onto your needle to create the next stitch.
- Keep going, and once you want to finish, hook your final loop onto your needle then do a stitch down through your fabric to secure the loop in place and tie a knot at the back.
How to sew chain stitch
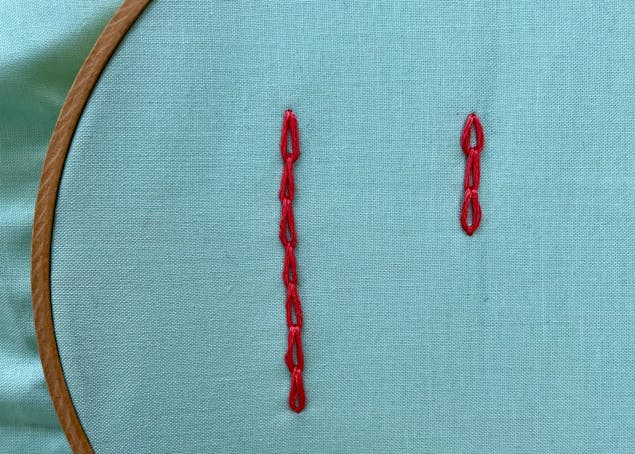
Chain stitch is an embellishment stitch that is made by forming loops and sewing into them so that they link like a chain. You might use the stitch to add some decorative detail to a project – it’s especially good for making flower stems or borders.
- Start by threading your needle and tying a knot at the end of the thread.
- Bring your needle up through your fabric, pulling your thread all the way through. Take the needle and put it right back through that hole you’ve just created, but this time don’t pull your thread through.
- Keep the tip of your needle under your fabric and then bring the tip of it back up the length of the stitch that you want.
- Now loop the tail of your thread under your needle, and pull your needle and thread through, creating the first link of your chain.
- Repeat these steps again, but this time go down through the hole that you’ve just come up through, bringing the tip of your needle down under your fabric and up the length of your stitch. Loop the tail of your thread under the tip of your needle, and pulling your needle and thread through.
- When you are ready to finish and have done the final link of your chain, make a small stitch over your last link securing it down, then tie a knot at the back.
Bonus! How to sew on a button
A skill everyone should learn!
- Choose a cotton or polyester thread the same color as your button, or the same color that has been used on the other buttons on your garment.
- Thread your needle and tie a knot at the end of your thread.
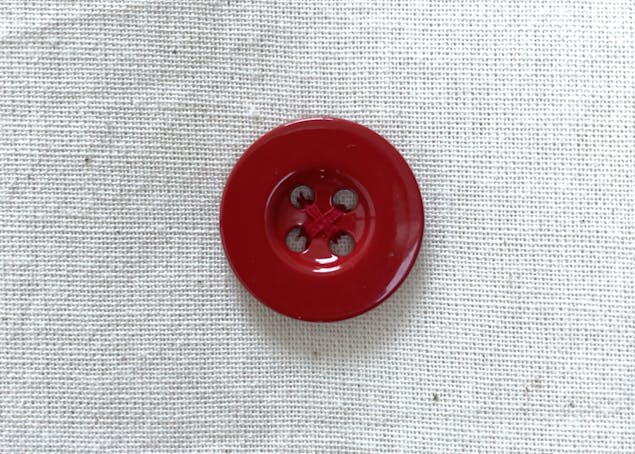
- Hold your button in place then bring your needle up through your fabric and through one of the holes of your button. You may need to poke around a little to find the right place to come up.
- Pull your thread all the way through, checking that your knot is secure, then go back down through an opposite hole in your button.
- If you have a button with four holes you may want to sew an X, going diagonally between two holes at a time. Make several stitches going up and down between the holes, then doing the same diagonally if you have a button with four holes.
- Finish with your thread on the back of your fabric and tie a few knots to secure it.
