Crochet the prettiest puff granny squares with Anna Nikipirowicz
Published on August 11, 2020 By Anna Nikipirowicz 4 min read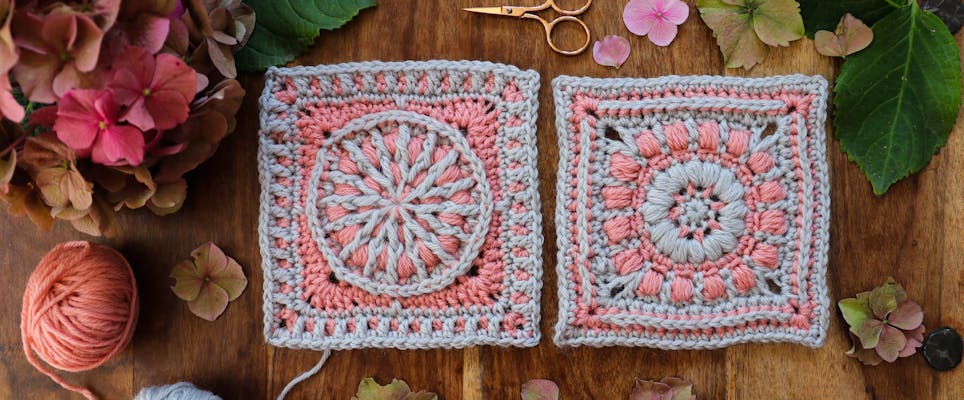
To celebrate Granny Square Day, Anna Nikipirowicz is back with two gorgeous new puff stitch granny squares that we just can't wait to make! Made in the yummiest Paintbox Wool Worsted shades, these two-tone crochet squares are perfect for brightening up every space in your home.
The humble square has been a favourite for many years and it's easy to see why. It's quick, a great way of using oddments and fits perfectly into any project bag so you can crochet one anywhere you go.
I'm delighted to share with you my two designs to celebrate Granny Square Day. I've been obsessed with puff stitches lately and I really wanted to create two designs that use them, but not overpower. The squares will be ideal to use in a blanket or cushion.
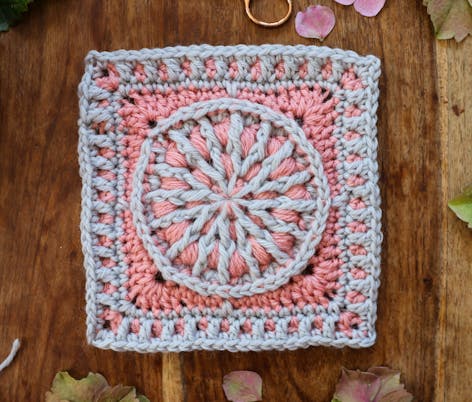
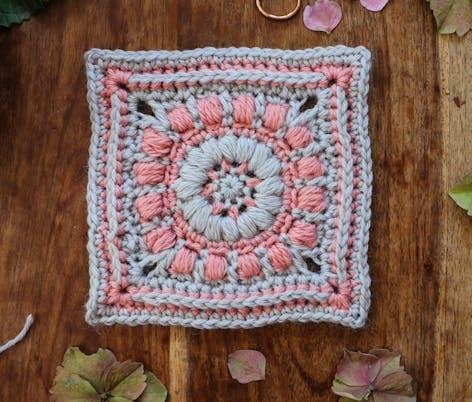
I've chosen to make the squares in Paintbox Wool Worsted as it's a beautiful yarn with an amazing colour range. I decided to make my squares with two of my all-time favourite shades, grey and delicious peach. In my video tutorial I use grey and mint shades.
You can use as many colours as you like for the squares, and make them in any thickness of yarn, just adjust your hook size accordingly. I always go for half a size smaller hook size than the one recommended for the yarn. But if you are tight crocheter go for bigger.
Puff stitch is gorgeous but a really yarn hungry stitch, so do bear that in mind if you are using oddments.
Materials
- Paintbox Yarns 100% Wool Worsted Superwash
- Paintbox Wool Worsted Colour A in Blush Pink 804
- Paintbox Wool Worsted Colour B in Stormy Grey 366
- KnitPro Waves Crochet Hook
- 4.50mm crochet hook
Tension: It's not essential to achieve any particular tension in this project.
Finished size: After blocking my finished squares measure approximately 14.5 x 14.5 cm.
This tutorial uses UK crochet terms, but I've included US term equivalents in the abbreviations.
Abbreviations
Ch – chain
Ch-sp - chain space
Dc (US sc) - double crochet (US single crochet)
Bpdc (US bpsc) – back post double crochet (US back post single crochet)
Bphtr (US bphdc) – back post half treble (US back post half double crochet)
Fptr (US fpdc) - front post treble (US front post double crochet)
Fpdtr (US fptr) – front post double treble (US front post treble)
Htr (US hdc) - half treble (US half double crochet)
Miss (US skip) - omit st(s)
Beg puff – ch 2, yrh, insert hook in st/sp at the base of ch 2, yrh and pull up a loop, [yrh in same place, yrh, pull up a loop] twice, yrh and pull through all 7 loops on hook, ch 1 to lock puff.
Puff – htr4tog (US hdc4tog) in same place – half treble 4 together (US half double crochet 4 together)
Rnd (s) - round (S)
Rep - repeat
RS - right side
Sl st - slip stitch
St(s) - stitch(es)
Sdc (US ssc) – spike double crochet (US spike single crochet)
Yrh - yarn around hook
How to make wagon wheel puff stitch granny square
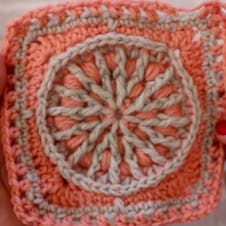
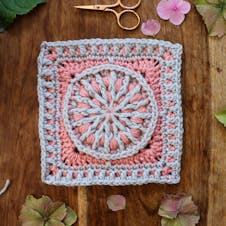
The first puff granny square has a beautiful wagon wheel design and is so easy to make. Crochet along with these steps and video tutorial.
Learn step-by-step
1
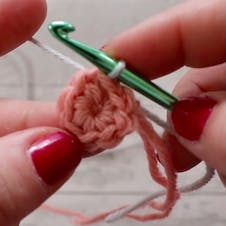
With colour A.
Rnd 1 (RS): Work 8 dc into adjustable ring, enclosing the tail as you work, sl st to first dc and pull tight on the tail to close up opening.
2
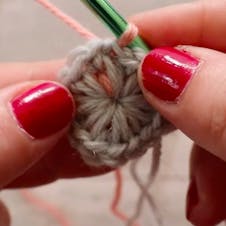
Change to colour B.
Rnd 2: ch 1 (does not count as a st here and throughout), then starting at the same st as ch 1 work, [1 sdc inserting hook into foundation ring, 1 dc in same st] 8 times, into every st, sl st to first dc. (16 sts)
3
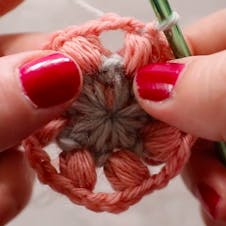
Change to colour A.
Rnd 3: beg puff in first st, ch 2, miss next st, [puff in next st, ch 2, miss next st] 7 times, sl st to top of beg puff. (8 puffs)
4
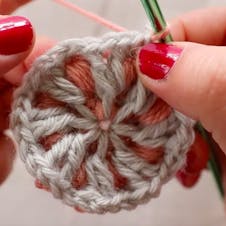
Change to colour B.
Rnd 4: ch 1, 1 dc in top of beg puff, 1 fptr around the post of first sdc from Rnd 2, ch 1, 1 fptr around same sdc as last fptr, 1 dc in top of next puff, [1 fptr around the post of next sdc from Rnd 2, ch 1, 1 fptr around same sdc as last fptr, 1 dc in top of next puff] 7 times, sl st to first dc. (24 sts)
5
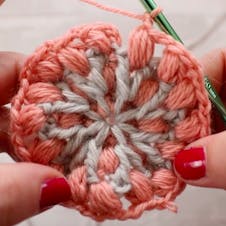
Change to A.
Rnd 5: beg puff in first st, ch 1, miss next st, puff in next ch-1 sp enclosing the ch-2 sp from Rnd 3 as well, ch 1, miss next st, [puff in next st, ch 1, miss next st, puff in next ch-1 sp enclosing the ch-2 sp from Rnd 3 as well, ch 1, miss next st,] 7 times, sl st to top of beg puff. (16 puffs)
6
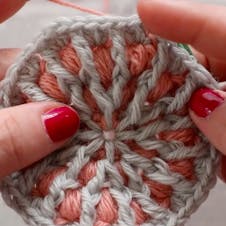
Change to colour B.
Rnd 6: ch 1, 2 htr in top of beg puff, 1 fpdtr around the post of first fptr from Rnd 4, [2 htr in next st, 1 fpdtr around the post of next fptr from Rnd 4] 15 times, sl st to first htr. (48 sts)
7
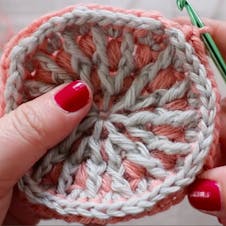
Change to colour A.
Rnd 7: ch 1, [1 bphtr around the post of next 2 sts, 1 bpdc around the post of next 8 sts, 1 bphtr around the post of next 2 sts, ch 2] 4 times, sl st to first bphtr. (48 sts and 4 x ch-2 sp)
8
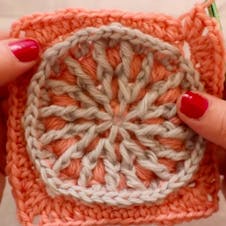
Rnd 8: ch 1, *1 tr in next st, 1 htr in next 2 sts, 1 dc in next 6 sts, 1 htr in next 2 sts, 1 tr in next st, [2 tr, ch 2, 2 tr] all in next ch-2 sp, rep from * 3 more times, sl st to first htr. (64 sts)
9
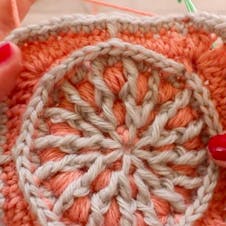
Change to colour B.
Rnd 9: ch 1, 1 dc in next 6 sts, 1 sdc inserting hook into st rnd below, 1 dc in next 8 sts, [1 dc, ch 2, 1 dc] all in next ch-2 sp, * 1 dc in next 8 sts, 1 sdc inserting hook into st rnd below, 1 dc in next 8 sts, [1 dc, ch 2, 1 dc] all in next ch-2 sp, rep from * twice more, 1 dc in next 2 sts, sl st to first dc. (76 sts)
10
Change to colour A.
Rnd 10: ch 3 (counts as 1 htr and ch 1), miss next st, [1 htr in next st, ch 1, miss next st] 7 times, [1 htr, ch 2, 1 htr] all in next ch-2 sp, ch 1, miss next st, * [1 htr in next st, ch 1, miss next st] 9 times, [1 htr, ch 2, 1 htr] all in next ch-2 sp, ch 1, miss next st, rep from * twice more, 1 htr in next st, ch 1, miss next st, sl st to second of beg ch 3. (44 htr, 11 on each side)
11
Change to colour B.
Rnd 11: ch 1, 1 dc in first st, [1 tr in dc from Rnd 9 (the one between two htr), 1 dc in next st] 9 times, *[1 dc, ch 2, 1 dc] all in next ch-2 sp, 1 dc in next st, [1 tr in dc from Rnd 9, 1 dc in next st] 10 times, rep from * twice more, [1 dc, ch 2, 1 dc] all in next ch-2 sp, 1 dc in next st, 1 tr in dc from Rnd 9, 1 dc in next st, 1 tr in dc from Rnd 9, sl st t first dc. (92 sts, 23 sts on each side).
And that's it! You completed your first puff granny square.
How to make your second puff stitch granny square
The second granny square we're going to make has a beautiful complimentary design to the first square.
Learn step-by-step
1
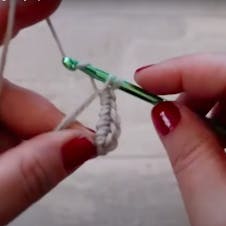
Start with colour B.
Rnd 1 (RS): Work 8 dc into adjustable ring, enclosing the tail as you work, sl st to first dc and pull tight on the tail to close up opening.
2
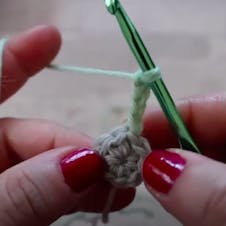
Change to colour A.
Rnd 2: ch 4 (counts as 1 htr and ch 2), [1 htr in next st, ch 2] 7 times, sl st to second of beg ch 4. (8 ch-2 sp)
3
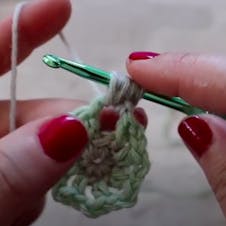
Change to colour B.
Rnd 3: sl st to first ch-2 sp, [beg puff, ch 1, puff, ch 1] all in same sp, miss next st, *[puff, ch 1, puff, ch 1] all in next ch-2 sp, miss next st, rep from *6 times more, sl st to top of beg puff. (16 puffs)
4
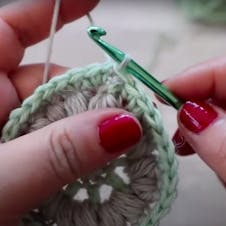
Change to colour A.
Rnd 4: 6: ch 1 (does not count as a st here and throughout), 1 dc in top of beg puff, 1 dc in next ch-1 sp, * 1 dc in top of next puff, 1 dc in next ch-1 sp, rep from * to end, sl st to first dc. (32 dc)
5
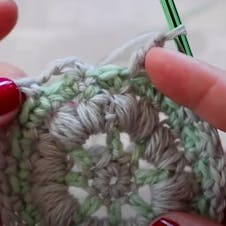
Change to colour B.
Rnd 5: ch 1, 1 dc in first st, ch 2, miss next st, *1 dc in next st, ch 2, miss next st, rep from * to end, sl st to first dc. (16 ch-2 sp)
6
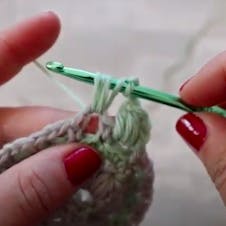
Change to colour A.
Rnd 6: sl st to first ch-2 sp, beg puff in same sp, ch 2, miss next st, * puff in next ch-2 sp, ch 2, miss next st, rep from * to end, sl st to top of beg puff. (16 puffs)
7
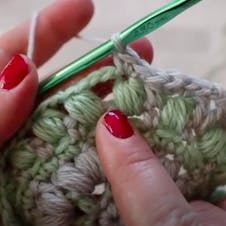
Change to colour B.
Rnd 7: ch 1, 2 dc in top of beg puff,* [1 tr, ch 2, 1 tr] all in dc from Rnd 5 (the one in between puffs), 2 dc in top of next puff, [1 htr in dc from Rnd 5, 2 dc in top of next puff] 3 times, rep from * twice more, [1 tr, ch 2, 1 tr] all in dc from Rnd 5, [2 dc in top of next puff, 1 htr in dc from Rnd 5] 3 times, sl st to first dc. (52 sts, 13 on each side)
8
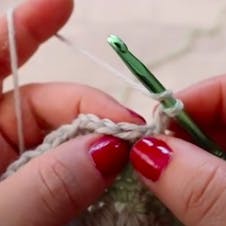
Rnd 8: ch 2 (counts as 1 htr), 1 htr in next 2 sts, [2 htr, ch 2, 2 htr] all in next ch-2 sp, * 1 htr in every st to next ch-2 sp, [2 htr, ch 2, 2 htr] all in next ch-2 sp, rep from * twice more, 1 htr in every st to end, sl st to top of beg ch 2. (68 sts, 17 sts on each side)
9
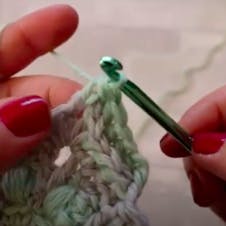
Change to A
Rnd 9: ch 1, 1 bphtr around post of beg ch 2 from Rnd below, *1 bphtr around post of every st to ch-2 sp, [2 htr, ch 2, 2 htr] all in next ch-2 sp, rep from * 3 more times, 1 bptr around post of every st to end, sl st to first bphtr. (84 sts, 21 sts on each side)
10
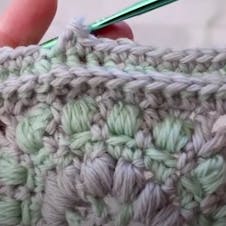
Change to B
Rnd 10: ch 1, 1 dc in first st, * 1 dc in each st to ch-2 sp, [1 dc, ch 2, 1 dc] all in next ch-2 sp, rep from * 3 more times, 1 dc in every st to end, sl st to first dc. (92 sts, 23 sts on each side)
And there you have it! You've completed your second puff granny square.
Making up
Once you've completed all your puff granny squares, block into the shape you'd like by pinning out and gently steaming with an iron, being careful that the iron does not touch the fabric. Alternatively, pin the squares to shape and spray with water, allowing to dry naturally. Perfect for beautiful throws, cushions and blankets!

