Crochet Whimsy and Flit from your fave children's book!
Published on 16 October 2020 1 min readJulianne is a self confessed story stitcher and the author behind delightful children's book Wishweaver from the Tales of Whimsy series. She wanted to combine her love for storytelling with her passion for crochet and has designed patterns for her characters. Bring the story to life and crochet your own characters from the book! In this tutorial Julianne shows you how to make Whimsy and Flit!
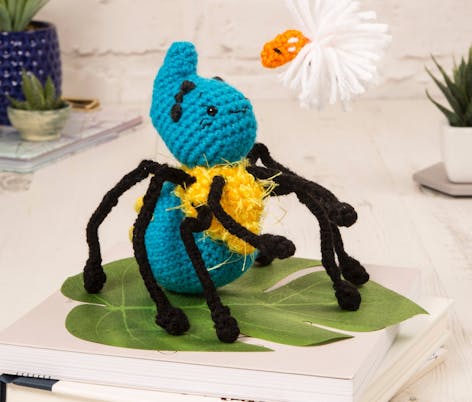
Whimsy and Flit are worked in the amigurumi style, in a spiral without slip stitching or turning chains. Use a st marker or waste yarn to keep track of the first st of each rnd.
Gauge
20 sts x 22 rows = 10cm measured over sc
Abbreviations
mr - magic ring
sc - single crochet
ch - chain
inc - increase
invdec - invisible decrease
st(s) - stitch(es)
FLO - front loops only
FO - fasten off
Materials
- Crochet Hook: Size F (3.75mm)
- 6mm Safety Eyes
- Stitch marker
- Yarn/Tapestry Needle
- Embroidery Needle
- King Cole Giza 4 Ply
- Turquoise 2208 (A)
- Amber 2200 (B)
- Yellow 2206 (D)
- Black 2201 (E)
- Grey 2207(F)
- White 2190 (G)
- King Cole Moments DK
- Amber 3227 (C)
- Red Heart Super Saver Economy Solids
- Pumpkin 0254 (H)
Making Whimsy
1
To make the head:
R1: 5sc in m.r. – 5
R2: inc around – 10
R3: (sc, inc) around – 15
2
R4: (2sc, inc) around – 20
R5: (3sc, inc) around – 25
R6-10: sc around – 25
3
R11: 7sc, (invdec, 2sc) 3 times, 6sc – 22
R12: 7sc, (invdec, sc) 3 times, 6sc – 19
R13: 7sc, (invdec) 3 times, 6sc – 16
4
Attach 6mm eyes between R7-8 of head.
5
R14: 2invdec, 8sc, 2invdec – 12
Begin stuffing.
6
R15: 5sc, 2inc, 5sc – 14
R16: invdec, 4sc, 2inc, 4sc, invdec – 14
R17: 2invdec, 3sc, inc, 2sc, 2invdec – 11
7
R18: invdec, 9sc – 10
Finish stuffing.
R19: 2invdec, 2sc, 2invdec – 6
8
Slst to next, weave long tail through remaining 6 stitches in the FLO to close. Use same tail to take a tuck around R14-15 so that the pointed head curves forward like a crescent moon.
9
Put your yarn needle through to the base of the head where it will connect to the chest and set aside for now.
10
To make the body:
R1: 6sc in m.r. – 6
R2: inc around – 12
R3: (sc, inc) around – 18
11
R4: sc around – 18
R5: (2sc, inc) around – 24
R6: sc around – 24
12
R7: (3sc, inc) around – 30
R8: sc around – 30
R9: (4sc, inc) around – 36
13
R10: sc around – 36
R11: (5sc, inc) around – 42
R12-14: sc around – 42
14
R15: (5sc, invdec) around – 36
R16: sc around – 36
R17: (4sc, invdec) around – 30
15
R18: sc around – 30
R19: (3sc, invdec) around – 24
16
Begin stuffing.
R20: (2sc, invdec) around – 18
R21: (sc, invdec) around – 12
17
Finish stuffing.
R22: invdec around – 6
18
Slst to next, weave tail through remaining 6 stitches in the FLO to close. FO, weave in end.
Pro Tip
To make the chest hold one strand of B & C working stitches together.
19
How to make the chest:
R1: 4sc in m.r. – 4
R2: (sc, inc) around – 6
R3: (2sc, inc) around – 8
20
R4: (sc, inc) around – 12
R5: (sc, inc) around – 18
R6: sc around – 18
21
R7: (8sc, inc) around – 20
R8: sc around – 20
R9: (3sc, invdec) around – 16
22
R10: (2sc, invdec) around – 12
Lightly stuff around middle. Leave top unstuffed for head to be sewn down to later.
R11: (sc, invdec) around – 8
23
Slst to next, weave tail through remaining 6 stitches in the FLO to close. FO, weave in end. You can take a brush or your yarn needle to pull out more of the fun fur that is tucked inside the chest piece if you want the chest furrier. I did not do this on my own. I liked how it looked as is!
24
To make the back spots:
To make the large back spots:
R1: 5sc in m.r. – 5
R2: inc, 2sc, inc, sc – 7
FO, leave tail to stitch to back.
25
To make the medium black spots:
R1: 5sc in m.r. – 5
FO, leave tail to stitch to back.
26
To make the small back spots:
Make French knots with a yarn needle.
27
How to make the hands:
R1: 4sc in m.r. – 4
R2: sc around – 4
FO, leave tail to sew to the end of the leg chains.
Assembling Whimsy
1
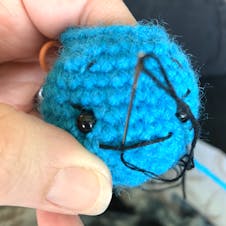
Embroider mouth and eyelashes using the full 6 strands of embroidery thread. Using 2-3 strands of embroidery thread, you will take some shaping stitches to pull the mouth into the shape that you’d like.
2
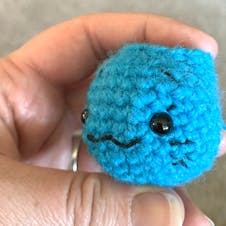
Embroider cheek marks and eyebrows using 3 strands of embroidery thread.
3
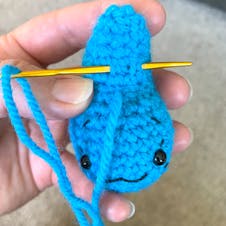
Using the same tail as from closing the top of the head, to take a few tuck stitches around R14-15 so that the pointed head curves forward like a crescent moon. Leave tail.
4
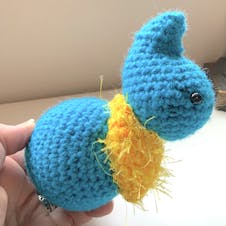
Use the same tail from the head to attach the head to the chest piece, and then the chest piece to the body making sure that the pointed end of the body is toward the end as that is Whimsy’s spinneret. FO, weave in end.
5
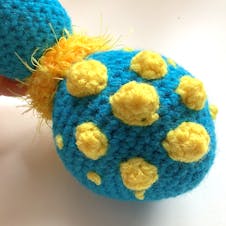
Whipstitch the back spots down in the pattern shown. The 3 large spots down the centre. The 4 medium spots with two on either side. Using a long strand of yellow yarn, make 6 French knots for the smallest yellow circles (3 on either side). FO, weave in end.
Now’s the time to get out your jewelry wire and black yarn.
6
Create internal wiring. I used 4 cut pieces of 12-gauge jewelry wire that were strung through the chest piece to make 8 spider legs. I started off cutting them roughly 16” trimming them down later.
7
Bend three of the four wires up in the back. Leave the frontmost wire forward for her arm-like legs.
8
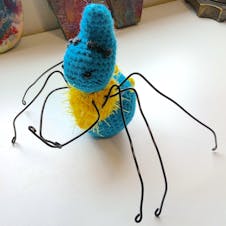
Make sure to loop the bottom of the wire so that the ends aren’t sharp and also so the hands will have a bit more of something to wrap around without the wire poking through the stitches.
9
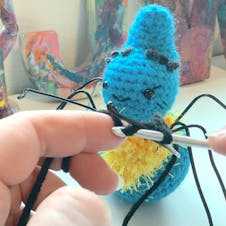
With colour E, make a slipknot on your hook. Chain around wire the length of the leg from chest piece entry all the way to the wrist. FO, leave tail.
With a yarn needle, stitch the top of the chain to the chest around the wire that’s sticking through the chest piece. FO, weave in tail.
10
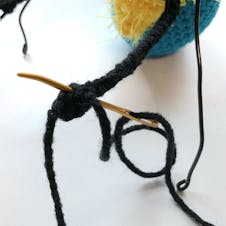
With a yarn needle on the end of the thread left at the opposite side of the chain, go through the hand to bring the hand up and around the end of the leg.
There is no need to fasten, this is just to help you get the hand to the right place around the chained yarn of the leg. Now thread the yarn needle on the hand and whipstitch the hand around the chain making sure none of the wire is showing. Repeat for each of the legs and hands.
11
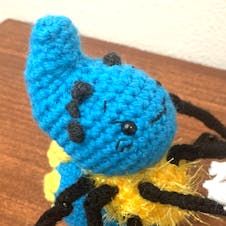
With colour F, you will want to make 6 French knots for Whimsy’s upper eyes. Generally in doing a French knot, you wrap the yarn around your needle only about 2-3 times, however, for the larger knots I would wrap the yarn 4-5 times.
Whimsy is now complete. Time to make her best friend, Flit!
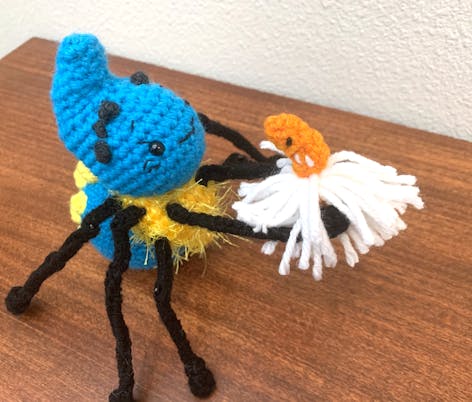
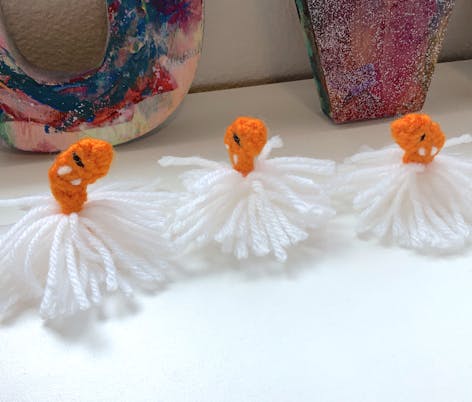
How to make Flit!
1
R1: 4sc in m.r. – 4
R2: (sc, inc) around – 6
R3: sc around – 6
R4-5: invdec, 2inc, invdec – 6
2
Using black yarn embroider the eyes.
3
Do the same for the cheek lines with a strand of white yarn.
4
R6: invdec around – 3
FO, leave tail to sew head to body.
5
Make a small pompom.
Assembling Flit
1
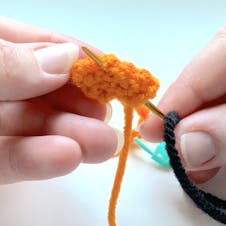
Using E, embroider the face by making a straight stitch per eye. You’ll do this by first tying a knot at the end of a strand of yarn, thread the other end through your yarn needle. Bring the needle up through the threads of a single stitch, trapping the knot inside, where the eye should go.
2
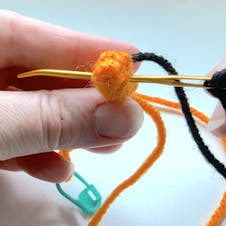
Make vertical lines on either side of the face.
3
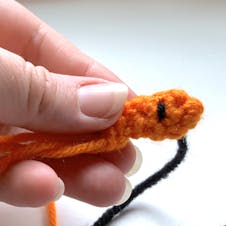
FO, tuck in end.
4
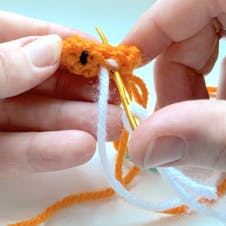
Do the same with a strand of G, making two cheek, horizontal lines on either side of the face. FO, tuck in end.
5
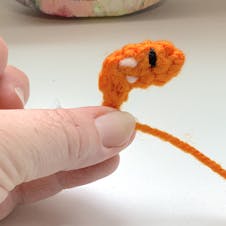
Using the seed head tail, close the hole in the FLO and take a few tucking stitches where the invdec of R4-5 are (just as we did in Whimsy’s upper head area to give her a crescent moon shaped head). Leave tail for sewing seed head to skirt.
6
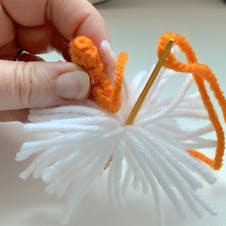
Using the tail from the seed head piece, go in through the centre knot of the body and back up through the bottom of the head, a few times until the head feels secured.
7
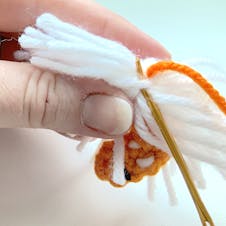
Bring the thread to the underneath side of the body and tie a knot to the white piece of yarn that you used to hold the pompom together.
8
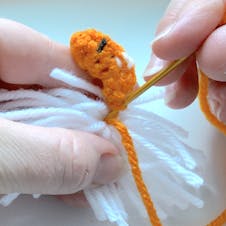
The orange will be hidden inside the wisps body.
FO.
9
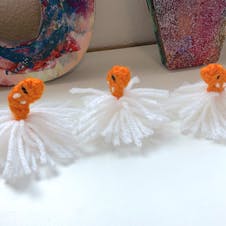
Finally, trim any of the white that you’d like to get the shape you want for the skirt.
Flit is now complete! Time to put him on Whimsy’s shoulder like they do when they go on adventures together.
